Tag Archives: pickled

Pickled Red Onions – Easy!

Mason jar filled with sliced red onions, black peppercorns, and bay leaf in liquid pickling solution
A mason jar filled with homemade pickled red onions.

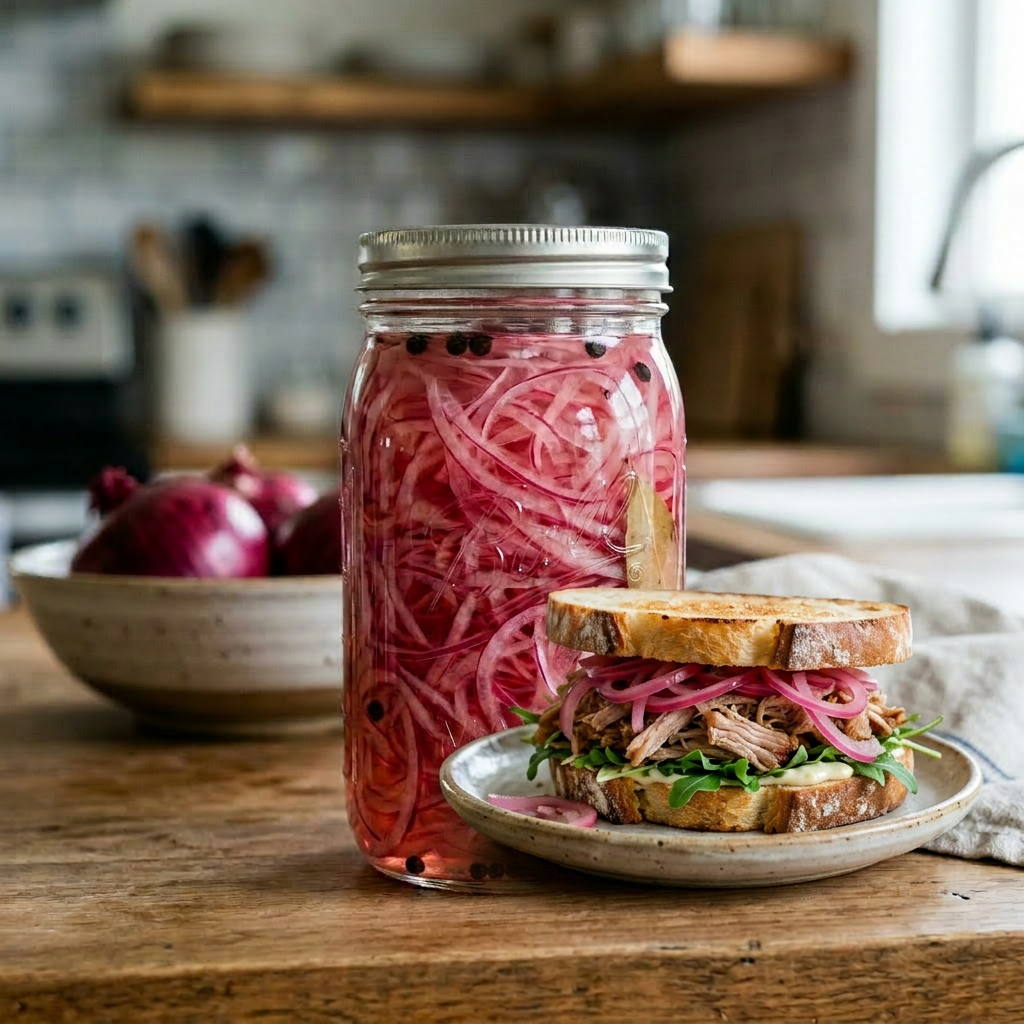
Who loves pickled onions as much as I do? Let me show you how fun and easy it is to make these tasty treats! I use a quick shortcut—no boiling water or par-cooking needed. Just mix vinegar, a splash of water, and a touch of sugar, then stir in thinly sliced onions. I prefer mine paper-thin, so I use a mandolin for perfect slices every time. It’s so simple, and the best part? You get to enjoy crunchy, tangy onions in no time. Give it a try and add a zing to your meals!

Ingredients

My favorite vinegar combo is a mix of red wine vinegar (for flavor and that red color) and seasoned rice vinegar (for sweetness).

  • 1 large red onion or 2 smaller ones
  • 1/2 cup rice vinegar
  • 1/2 cup of red wine vinegar
  • 1 cup of water
  • 1 – 2 tablespoons sugar 
  • ¼ teaspoon salt

Process

  1. Choose a clean glass jar with a tight lid, such as a pickling jar. (Store onions in a glass container because vinegar can react with metal, and plastics may absorb strong flavors, affecting the taste and quality.)
  2. Peel the onion and use a mandolin to slice it into paper-thin slices or half-moons. Set aside.  
  3. Mix vinegar(s), water, and sugar until the sugar dissolves. Add optional ingredients (see below) if desired.
  4. Mix the vinegar with the other ingredients, then pour it over the onions in the jar. Let the onions sit in the marinade for at least 10 minutes before using.
  5. Store in the refrigerator for a couple of weeks.  
  6. Note: This is NOT a pickling recipe; be sure to store in the refrigerator at all times.

Optional Add-ins:

  • Garlic clove sliced in thirds
  • Sprigs of herbs such as dill, marjoram, thyme, and rosemary

These onions are utterly delicious on:

  • Tacos, burritos, and sandwiches
  • Salads and grain bowls
  • Burgers and hot dogs
  • Breakfast dishes like avocado toast or eggs

Bloody Mary Pickled Eggs

Mason jar labeled 'Bloody Mary Pickled Eggs' filled with red eggs, celery, and lemon in brine.

Embark on a flavor adventure with the delightful art of making Bloody Mary Pickled Eggs! This fun culinary project combines the savory richness of traditional pickled eggs with the bold, spicy kick of a classic Bloody Mary cocktail. Perfect for brunch tables, snack platters, or a quirky gift, these eggs are sure to impress and amuse your friends. When ready to serve, enjoy these eggs as a savory snack, garnish for cocktails, or a unique addition to salads. Their striking appearance and complex flavor profile make them a conversation starter and a fun twist on traditional pickled eggs. So, gather your ingredients, embrace the process, and enjoy the deliciously bold results of your Bloody Mary Pickled gs adventure! *Just a reminder all of my recipes can be found at www.kitchenmoxy.com; where they can be searched and printed.

Ingredients

  • 10 eggs
  • 1 medium sweet onion, sliced thin (a mandolin slicer is a perfect tool for this job)
  • 1 cup Bloody Mary Mix
  • 1 cup white distilled vinegar
  • 1 tablespoon Worcestershire Sauce
  • 1 teaspoon minced Garlic
  • 1 tablespoon hot sauce
  • 1 tablespoon celery seed
  • 1 teaspoon red pepper flakes
  • 1 teaspoon kosher salt
  • 2 Bay leaves
  • 1 Jalapeño pepper, sliced
  • 10 drops red food coloring (optional) try ¼ cup beet juice

Process

  1. Place eggs in a large pot of water making sure they are fully submerged. Bring water to a boil, reduce heat and simmer for 11 minutes.
  2. First, drain the hot water and put the eggs in cold water. When they are cool enough to handle, peel off the shells. Do not refrigerate, shells are easier to peel when warm.
  3. Wearing gloves, slice the jalapeño peppers about ¼ inch thick. Leave the seeds if you want more heat.
  4. In a large pot, combine the Bloody Mary Mix, white vinegar, Worcestershire sauce, hot sauce, garlic, celery seed, red pepper flakes, salt, bay leaves and food coloring.  
  5. Bring mixture to a boil, stirring occasionally until the mixture is fully incorporated and salt is dissolved. Reduce heat to low. Simmer for about 5 minutes.
  6. Pour the hot brine over the eggs to fill the jar up to 1/4-inch headspace.
  7. Let sit for 30 minutes before adding the lid.
  8. Secure the lid and place in the refrigerator when eggs cool to room temperature. 

Will last 3 to 4 months in the refrigerator. Let eggs pickle for 7 days to develop flavor.