4–5 fresh jalapeños, seeded and finely diced (leave seeds in 1–2 for extra heat)
2 cloves garlic, minced
1 teaspoon cumin
1 teaspoon smoked paprika
½ teaspoon kosher salt
¼ teaspoon cayenne pepper
For the Crispy Panko Topping:
1 cup panko breadcrumbs
3 tablespoons unsalted butter, melted
¼ cup freshly grated Parmesan
½ teaspoon garlic powder
¼ teaspoon smoked paprika
Pinch of kosher salt
Process
Preheat the oven to 375°F. Lightly grease a 9×13-inch baking dish or a 2-quart casserole dish with cooking spray.
In a large mixing bowl, beat the cream cheese with a hand mixer until smooth. Add the sour cream and mayonnaise and mix until fully combined. Fold in 1½ cups of the cheddar (reserving ½ cup for topping), the Monterey Jack, diced green chiles, fresh jalapeños, garlic, cumin, smoked paprika, salt, and cayenne. Stir until evenly mixed.
Spread the mixture into the prepared baking dish in an even layer. Scatter the reserved ½ cup of cheddar evenly over the top.
In a small bowl, combine the panko, melted butter, Parmesan, garlic powder, smoked paprika, and salt. Toss with a fork until the panko is evenly coated and clumping slightly. Sprinkle the panko mixture evenly over the top of the dip.
Bake for 25–30 minutes, until the dip is hot and bubbling at the edges and the panko topping is deep golden brown and crispy. If the topping browns before the dip is bubbling, tent loosely with foil for the last few minutes.
Remove from the oven and let cool for 5 minutes before serving — it will be extremely hot. Garnish with sliced fresh jalapeño and fresh cilantro or scallions. Set out alongside tortilla chips, crackers, and any other dippers.
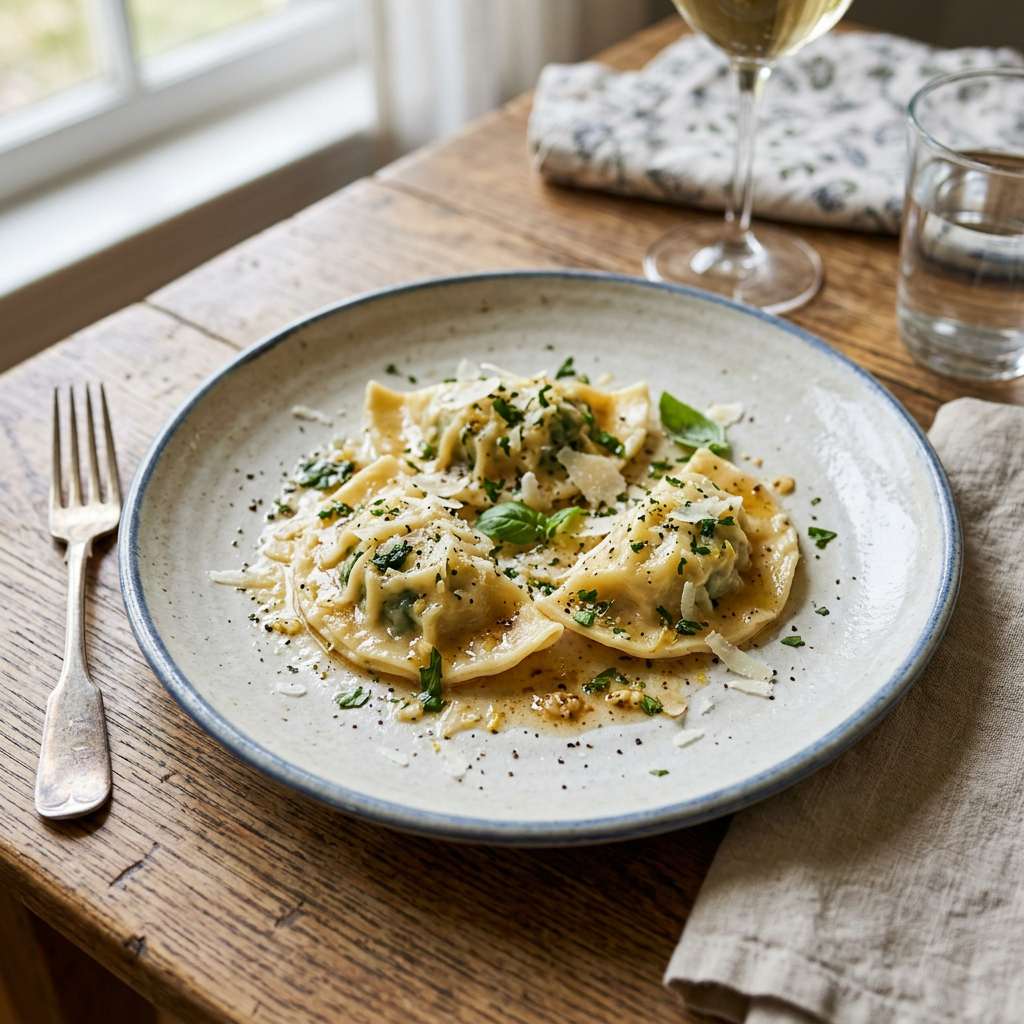
A plate of homemade spinach ravioli garnished with herbs and cheese
Serve these raviolis gently tossed in browned butter with fresh sage for a simple, aromatic finish, or dress them in a light tomato-basil sauce for a brighter, heartier option. They also pair well with a delicate cream sauce infused with white wine and lemon zest for an elegant touch. Finished with a dusting of grated Parmesan and a drizzle of high-quality olive oil, Three Cheese Spinach Wonton Raviolis make an inviting appetizer, a comforting main course, or an impressive dish for entertaining.
Ingredients
½ cup squeezed, chopped, cooked fresh or frozen spinach
½ cup coarsely grated mozzarella
½ cup ricotta (whole milk or low fat)
½ cup freshly grated Parmigiano-Reggiano plus extra for sprinkling
¼ teaspoon freshly grated nutmeg
Kosher salt and freshly ground black pepper to taste
32 square wonton wrappers
Shredded basil for garnish
Browned Butter and Sage Sauce
Directions
In a large bowl, combine the spinach, mozzarella, ricotta, ½ cup Parmesan, nutmeg, and salt and pepper to taste.
Moisten the edges of one wonton at a time with water (or egg wash), keeping the remaining wontons covered.
Put a level teaspoon of the filling in the center of each wrapper, then place another wonton on top.
After folding, use your fingers or a fork to crimp the edges tightly. This not only seals the wonton but also gives it a professional look. See Note below for crimping methods.
As they are filled, transfer the ravioli to a flour-dusted sheet pan. Repeat with the remaining wonton wrappers and filling.
Cook the ravioli in boiling water over medium-low heat for 3–5 minutes, until just tender. While it cooks, warm the sauce. To serve, place ravioli in four shallow bowls, spoon sauce over each portion, and sprinkle with cheese. Top with shredded basil.
BROWNED BUTTER AND FRESH SAGE SAUCE
Ingredients
½ cup of butter
10 to 15 Fresh Sage Leaves, chopped
2 cloves of Garlic, minced
Salt and Pepper to taste
Process
In a medium saucepan, melt the butter over medium-low heat. Stir occasionally to ensure even melting.
Add the minced garlic once the butter is melted. Cook for about 1 minute until fragrant, being careful not to let it burn.
Add the fresh sage leaves to the melted butter. Continue to cook, stirring occasionally, for about 2-4 minutes until the butter turns a light brown color and has a nutty aroma. The sage leaves should become crispy.
Add salt and pepper to taste.
Note: Choose a folding method Triangle-fold: Place filling in the center, fold diagonally to form a triangle, press out air pockets, then bring the two bottom corners together and overlap slightly.
Nurse’s cap fold: Fold in half to form a rectangle, then bring two corners together and overlap them.
Half-gold ingot fold: Fold one corner to the middle, then bring two corners together and overlap.
These folds naturally crimp the edges together with a fork, reducing the chance of leakage.
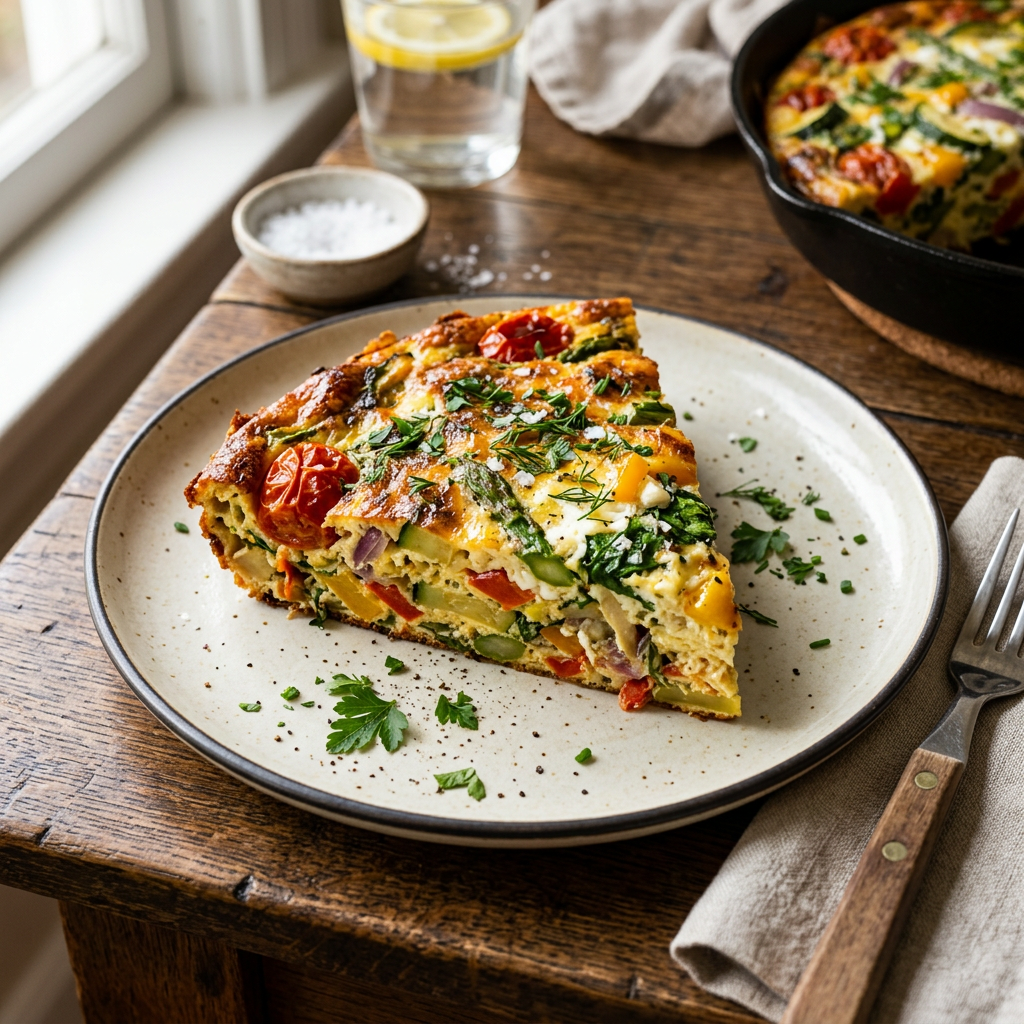
Eggs are a delightful culinary canvas any time of day—breakfast, lunch or dinner—and every part is edible, even the shell when ground for calcium. While shell color doesn’t change flavor, I’m lucky to know farmers whose hens lay blue, green, pink, brown and white eggs—Easter surprises all year. Those backyard eggs are incredibly fresh and, to me, taste like sunshine on a plate. Versatile and nutritious, eggs adapt to countless meals. Try a playful baked frittata: toss in your favorite vegetables, bits of cheese and a pinch of herbs to make a signature version. Serve a colorful tossed salad alongside a warm slice of frittata for a satisfying, balanced dinner.
Ingredients
7 Large Eggs
¼ cup of Whole Milk
1/3 cup of cheese (see NOTE below for choices)
Dash of salt
Dash of pepper
¼ cup of parsley, finely chopped
1 teaspoon of fresh thyme
Up to 1-½ cup of vegetables, (see NOTE below)
Process
Preheat oven to 350F.
Spray a deep pie plate, or a 11”x5” 7” oven proof dish
Beat all ingredients together
Mix egg mixture with your choice of vegetables and cheese
Bake in a preheated oven for 30 minutes or until a knife inserted in the middle comes out clean.
NOTE:Add-in Ingredients in ½ cup increments, up to 1-1/2 cups
Recommended Vegetables for Frittatas
Asparagus: Tender asparagus tips provide delicate, almost sweet notes while the slightly firmer stalks contribute a gentle snap. Roasting or sautéing the asparagus briefly before adding it to the pan concentrates its natural sugars and softens any fibrousness, producing a tender result without losing its color.
Spinach: A classic choice, spinach wilts down significantly and adds a rich green element. It is well paired with various cheeses and herbs.
Mushrooms: They add a savory depth of flavor and a nice texture. Sauté them before adding them to the egg mixture to enhance their taste.
Bell Peppers: Available in various colors, bell peppers add sweetness and crunch. They should be sautéed until tender before mixing with the eggs.
Zucchini: This vegetable adds moisture and a mild flavor. Sauté it to reduce excess water before adding it to the frittata.
Onions: They provide a strong flavor base. Caramelizing onions before adding them can enhance their sweetness and depth.
Broccoli: This hearty vegetable holds its shape well and adds a nice crunch. It should be steamed or sautéed until tender before use.
Tomatoes: Fresh or sun-dried tomatoes can add a burst of flavor. If using fresh tomatoes, pat them dry to avoid excess moisture in the frittata.
Popular Cheese Choices
Cheddar: A good choice is cheddar because it adds creamy, tangy flavor and melts well, making the frittata richer. Choose mild, medium, or sharp to suit your taste. Use block cheese instead of pre-shredded for better melting and texture. Mozzarella: Mozzarella has a mild taste and melts well, giving a creamy, stretchy texture. Fresh mozzarella contains more moisture and makes a frittata softer. Low-moisture mozzarella is drier and gives a firmer result. Feta: This crumbly, tangy cheese adds a Mediterranean flavor. It pairs well with spinach, tomatoes, and olives. Feta does not melt fully but adds a salty, textured contrast. Parmesan: A firm, nutty cheese that adds savory flavor. It does not melt smoothly like soft cheeses, but you can grate it into the eggs or sprinkle it on top for a tasty finish. Gruyère and Pecorino Romano: Gruyère has a mild, nutty, slightly sweet taste and melts smoothly, so it works well in vegetable or meat frittatas. Pecorino Romano is saltier and sharper, so use only a small amount in strong, meat-based frittatas.
Tips for Using Cheese in Frittatas
Grate or crumble your own cheese to ensure smooth melting and avoid additives found in pre-shredded cheese.
Combine cheeses for complex flavors, such as mozzarella with Parmesan or cheddar with Gruyère.
Moderate the amount to prevent a greasy or overly heavy frittata.
Pair with ingredients:
Vegetable frittata: mozzarella, Gruyère, Parmesan, or goat cheese
Meat frittata: cheddar, Pecorino Romano, or Gruyère
Mediterranean frittata: use feta, goat cheese, or mozzarella. Choose cheese based on the flavor and texture you want. Try different combinations to find a balanced taste.
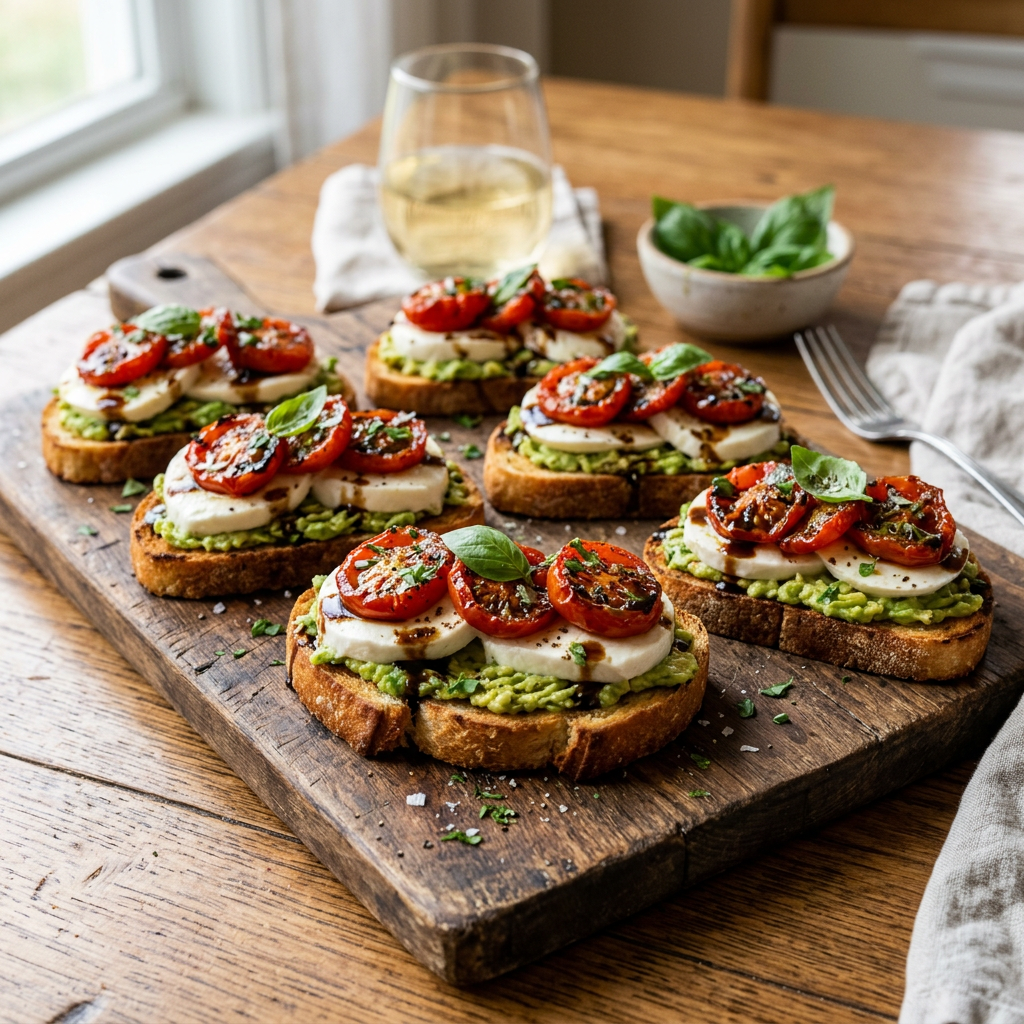
Delicious avocado toast topped with fresh mozzarella, roasted cherry tomatoes, and basil leaves
Imagine tiny flavor explosions on toast: ripe avocado, mashed with a spritz of lemon or lime, a slick of olive oil, and a pinch of salt becomes a silky, zesty base that plays off bright roasted tomatoes. Thin slices of fresh mozzarella tuck in atop the warm crostini, softening and stretching slightly from the toast’s heat to add a gentle milky hug. To assemble, smear the avocado over each piece of toast, plop on a spoonful of juicy roasted tomatoes, and nestle a few mozzarella slices on top. Scatter chopped basil like confetti and finish with a playful drizzle of balsamic reduction or extra-virgin olive oil. The bite delivers delightful contrasts: crackly bread, creamy avocado, tangy-sweet tomato, and pillowy mozzarella. These crostini are perfect for kicking off a relaxed gathering, stealing the show at a dinner party, or bringing cheerful flair to any antipasti spread. All recipes for Kitchen Moxy can be found at www.kitchenmoxy.com
1 clove of garlic, sliced in half; press or grate one half
8 ounces fresh mozzarella cheese, cut into 8 thin slices
1 large avocado, halved, pitted, and mashed
1 teaspoon of fresh lemon juice
1 teaspoon dried oregano
¼ cup roughly chopped fresh basil
1 pinch flaked sea salt
Process
Heat the butter in a large skillet over medium heat. Add bread slices to the skillet, in batches if necessary; cook until crisp and golden in places, 2 to 3 minutes per side.
Transfer crostini to a work surface; rub garlic half on each slice. Sprinkle with a pinch of dried oregano.
Mash avocado with grated garlic, a teaspoon of lemon juice, and 1 tablespoon of olive oil. Spread one scoop on top of each crostini.
Top each crostini with mozzarella, a roasted tomato slice, and a basil leaf. Drizzle with 1 tablespoon olive oil and sprinkle with flaky salt.
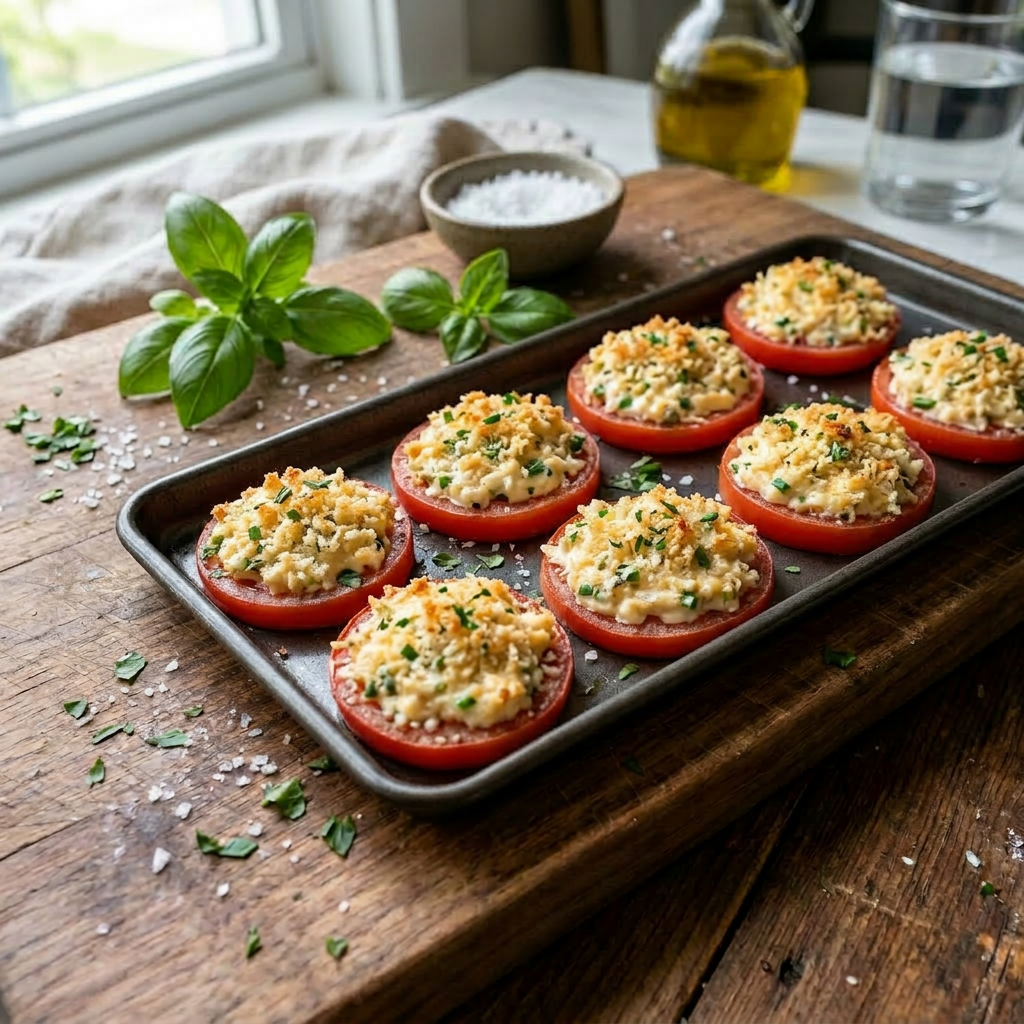
Delicious baked tomatoes topped with a crunchy herb and breadcrumb mixture
Bright, bubbly Parmesan tomatoes turn ordinary tomatoes into a crunchy, cheesy celebration. Thick tomato slices get a shower of grated Parmesan, a sprinkle of herbs, and a breadcrumb blanket, then roast until golden and irresistible. Each bite balances juicy sweetness with a savory, crunchy top that begs for seconds. Serve these playful rounds alongside grilled meats, toss them with pasta, or stack them for a veggie-forward snack. They’re speedy to make—about 10–20 minutes—perfect for a last-minute upgrade that feels special without fuss. All Kitchen Moxy recipes can be found at www.kitchenmoxy.com
Ingredients
4 ripe tomatoes, sliced into 1/2-inch slices
4 tablespoons mayonnaise, or sour cream
½ cup of grated Parmesan cheese
½ cup Panko breadcrumbs
1 tablespoon Dijon mustard
1 teaspoon dried oregano
salt and pepper to taste
1 teaspoon chopped fresh parsley
1 teaspoon chopped fresh basil
½ cup of fresh, shredded mozzarella cheese
Process
Gather all ingredients. Preheat oven to 350°F (175°C).
Arrange tomato slices in a single layer on a baking sheet lined with parchment paper.
In a small bowl, mix mayonnaise, Parmesan, panko breadcrumbs, and Dijon mustard, then add oregano, salt, and pepper to taste.
Layer each tomato slice with a small amount of mayonnaise mixture. Sprinkle with mozzarella and then top with parsley and basil.
Bake in a preheated oven for approximately 15 minutes, or until cheese is golden brown. Serve immediately.
A dish of roasted tomatoes garnished with fresh herbs and olive oil.
Tomato season is here, and the East Coast couldn’t be happier! Try a simple roast: toss halved tomatoes with olive oil, garlic, salt, and pepper, then bake until caramelized. Use these vibrant roasted tomatoes in sauces, soups, gravies, appetizers, or freeze for later. For a burst of flavor, roast cherry tomatoes and pile them on bruschetta. Roasting transforms tomatoes, concentrating their sweetness and giving them a cozy, rustic bite.
Boost this recipe with ease! Choose a roomy baking dish so tomatoes don’t crowd each other and steam; give them space to roast and concentrate their flavor. If you want extra caramelized goodness, drizzle olive oil and sprinkle herbs before baking. Avoid aluminum or reactive metal pans—use stainless steel, enamel, or ceramic to keep the tang intact. Enjoy bright, roasted tomatoes with a punch of flavor and minimal fuss.
Ingredients
2 tablespoons of olive oil
½ tsp of sea salt or kosher salt
¼ tsp of ground pepper
2 cloves garlic, peeled and thinly sliced (throw some unpeeled whole garlic cloves in the pan to roast, you can squeeze the soft garlic out of the clove after roasting and add to your favorite dish)
Fresh herbs: basil, oregano, thyme, rosemary – mix or add your favorite herb
1 pound (450g) tomatoes (8 small or 4 medium-sized)
Process
Preheat the oven to 325ºF
Pour the olive oil into a shallow baking dish or pan and add the herbs and salt and pepper.
Cut the tomatoes in half horizontally, remove the core with a paring knife, then cut into ½-inch thick slices, or leave halved.
Stems will come out easily after roasting.
Toss the tomatoes with the oil and seasonings, lay them cut side down in the dish.
Bake for two hours, or until the tomatoes are completely softened and wilted, and start to wrinkle. Depending on the tomatoes, they may take longer to cook.
Remove from oven and carefully transfer tomatoes to a bowl or plate. Cover with plastic wrap and let cool for about 10 minutes.
Remove plastic wrap and carefully pull off the skin with a pair of tongs, then use as desired.
Storage: Store in a tight-lid mason jar with their juices in the fridge for 3 to 5 days. They can also be frozen for up to six months.
Roasted Tomato, Avocado, and Fresh Mozzarella Crostini
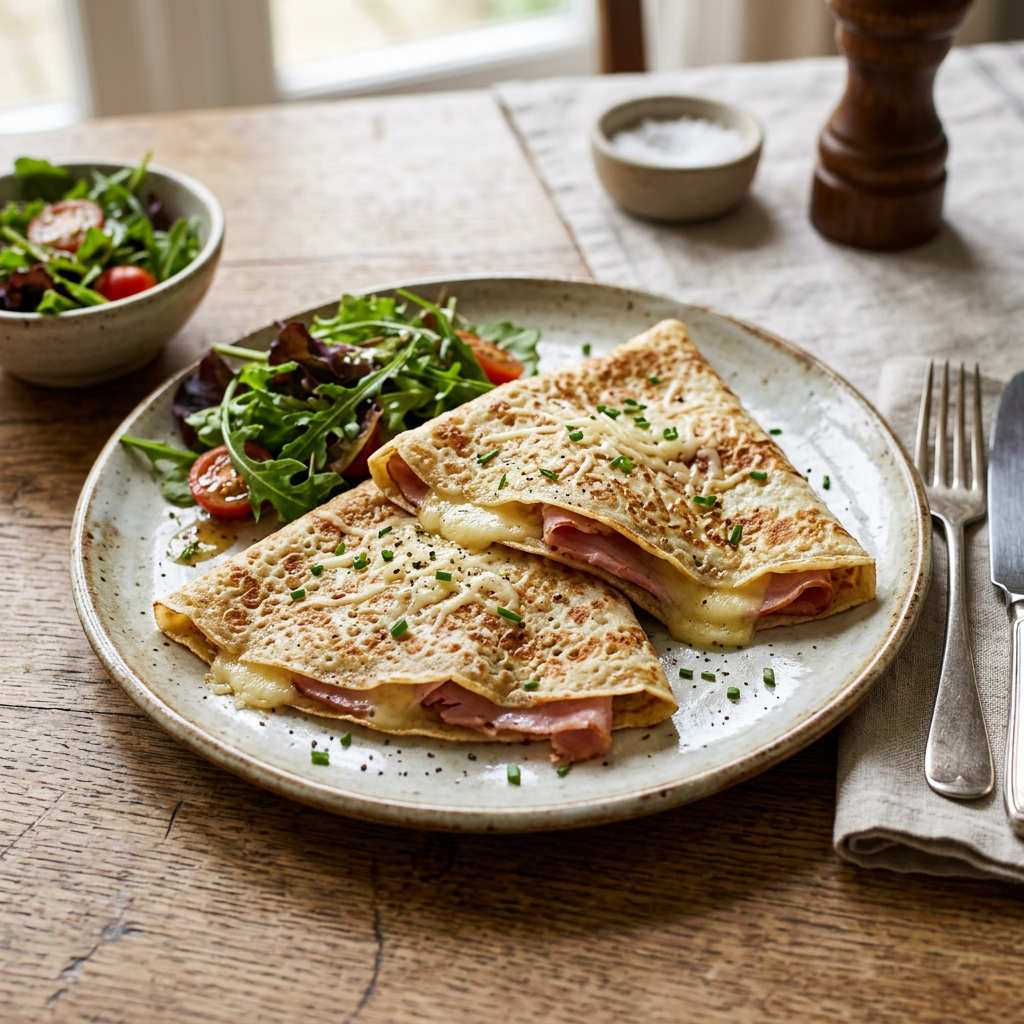
Delicious ham and cheese crepes served with a fresh mixed salad
Ham and Cheese Crêpes deliver a timeless blend of savory comfort and elegant simplicity. Thin, delicate crêpes cradle slices of savory ham and melted cheese, creating a warm, satisfying bite that balances tenderness and a slight crisp at the edges. These crepes are versatile: served for a leisurely brunch with a crisp green salad, paired with Dijon mustard or a drizzle of creamy béchamel for extra richness, or enjoyed as a quick weekday meal with a side of pickles or lightly dressed arugula. Garnish options like chopped chives, a grind of black pepper, or a scattering of fresh herbs bring freshness and visual appeal. For a gourmet touch, use aged Gruyère or Comté for nuttier notes, or choose a mild Swiss or cheddar for a family-friendly version. All recipes from Kitchen Moxy can be found at www.kitchenmoxy.com
Ingredients
1 teaspoon butter
1 medium onion, thinly sliced
2 teaspoons butter, divided, or more as needed
2 tablespoons Dijon mustard
10 slices thinly sliced ham
8 ounces shredded Gruyère cheese
Process
Prepare basic crêpe recipe at least an hour before making crêpes in a non-stick skillet.
Heat 1 teaspoon butter in a skillet over medium heat. Cook onions, stirring occasionally, until they start to turn golden brown, about 5 minutes. Set aside.
Assemble crêpes one at a time, spread mustard over one half, then top with 1 slice of ham, some sautéed onion, and Gruyère cheese.
Fold the crêpe over the filling, press gently, and heat briefly just until the cheese begins to melt. Fold in half again so each finished crêpe is about one-quarter the size of the original.
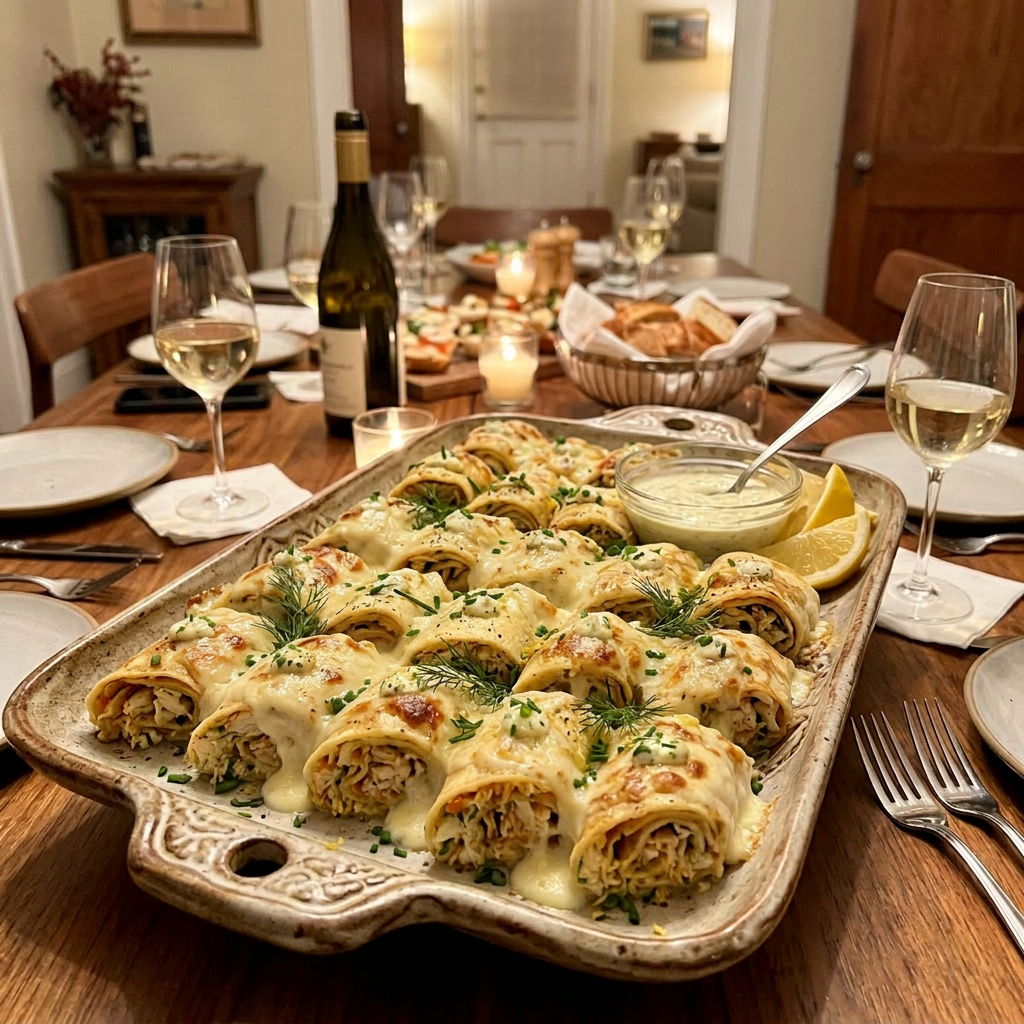
Savory-filled crepes turn any party into a deliciously playful event. Thin, tender crepes become tasty little parcels that hide creamy, flavorful fillings—think bright crab or seasoned chicken—ready to surprise and delight guests. Each bite offers a fun mix of textures: silky seafood or savory poultry, smooth binding sauce, and the gentle chew of the crepe, creating an indulgent yet light mouthful.
These crepes are perfect for entertaining because they’re elegant without being fussy. Arrange them on a platter for guests to graze. Dress them up with zesty citrus drizzles, a dot of crème fraîche, or a glossy beurre Blanc, and top with microgreens for a pop of color and flair. Pair with crisp white wines like Sauvignon Blanc, a delicate Chardonnay, or a lively sparkling wine to brighten the flavors.
Whether you aim for chic sophistication or relaxed charm, savory-filled crepes make a memorable, crowd-pleasing addition to any celebration.
Ingredients
Use 1 pound crab meat (drained) or 2 cooked, shredded chicken breasts.
Prepare basic crêpe recipe at least an hour before making crêpes in a non-stick skillet.
Sauté onions, mushrooms, and bell pepper in 4 tablespoons of butter until soft.
Add the crab, or chicken if using, and stir over low heat. Add the cooking sherry, turn the heat up to medium-high, and bring to a boil.
Boil until the sherry has evaporated, about 2 – 3 minutes. Drain any remaining butter from the pan.
Beat egg yolks in a bowl. Set aside.
In a medium saucepan, melt 4 tablespoons butter. Stir in flour, then add milk all at once over medium heat. Stir constantly until mixture thickens. Season with salt and pepper to taste.
Beat about 1/4 cup of the hot flour mixture into the egg yolks to temper them, then stir the yolk mixture back into the remaining flour mixture. Reduce the heat and cook for one minute, stirring constantly until slightly thickened.
Add ½ cup of Swiss cheese, stirring until melted.
Stir about 2/3 of the sauce into the crab or chicken filling until combined; set the remaining sauce aside.
Place a generous scoop of crab or chicken filling on each crepe, then roll the crepe closed.
Arrange crepes in a baking dish. Pour remaining sauce evenly over them and sprinkle with the remaining cheese before baking.
Bake for 20 minutes until hot.
Variations
Smoked salmon and dill
Sautéed mushrooms and goat cheese
Notes
Crêpes can be prepared ahead for a party. Freeze unbaked crêpes on a tray. When needed, thaw them in the refrigerator and then bake as directed.
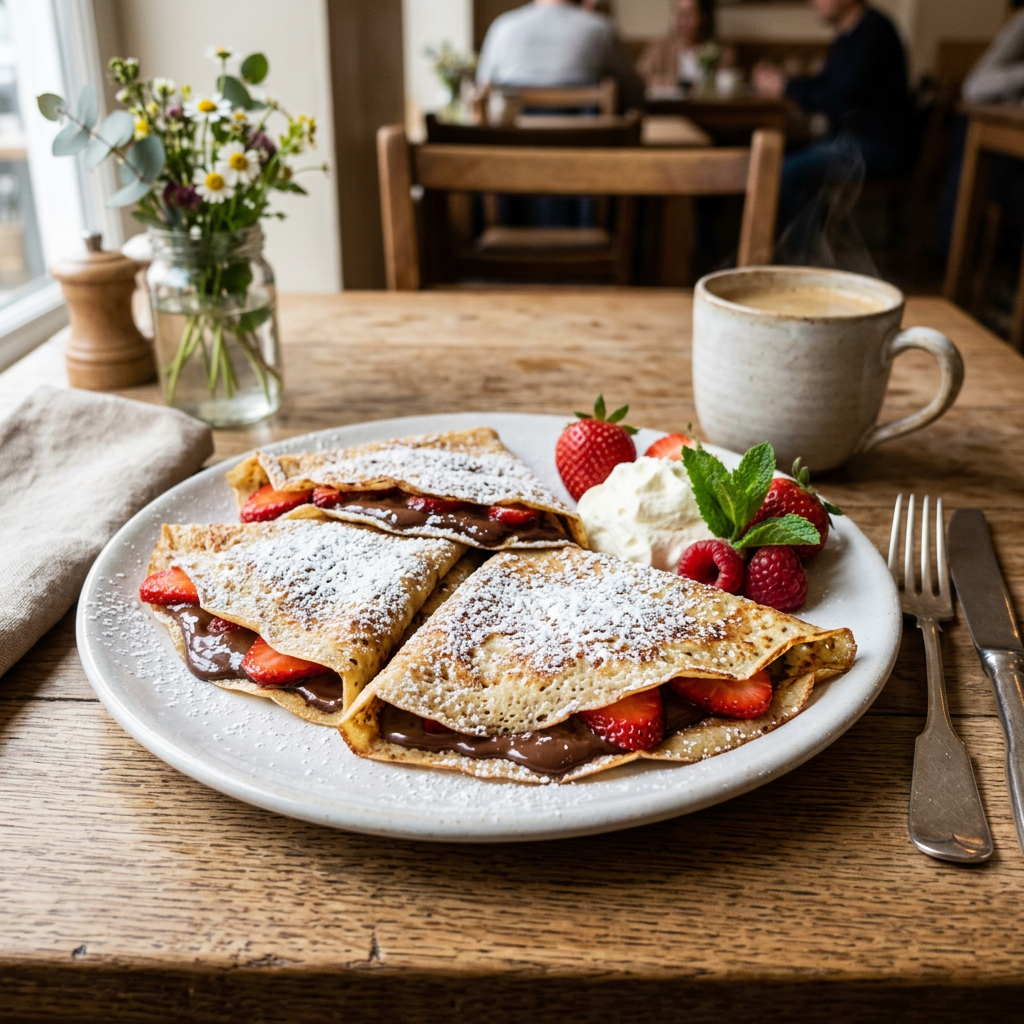
Delicious crepes filled with Nutella and strawberries
Crêpes are delightful, whisper-thin pancakes that invite creativity: sweet, savory, or somewhere deliciously in between. Originating in medieval France, they’ve become a playful breakfast or brunch treat worldwide. Pile fresh berries and billowy whipped cream, spread chocolate-hazelnut for an irresistible gooey bite, or drizzle warm honey for cozy comfort. Prefer savory? Stuff a crêpe with tender chicken, buttery lobster, melty cheese, or sautéed vegetables for a hearty, flavor-packed meal. Crêpes are a blank culinary canvas—mix fillings, fold them fancy, and enjoy a fun, tasty adventure one bite at a time.
Ingredients
2 large eggs
1-1/4 cup of whole milk, room temperature
1 cup all-purpose flour
2 tablespoons of butter, melted (or 1 tablespoon cooking oil)
¼ teaspoon salt
Process
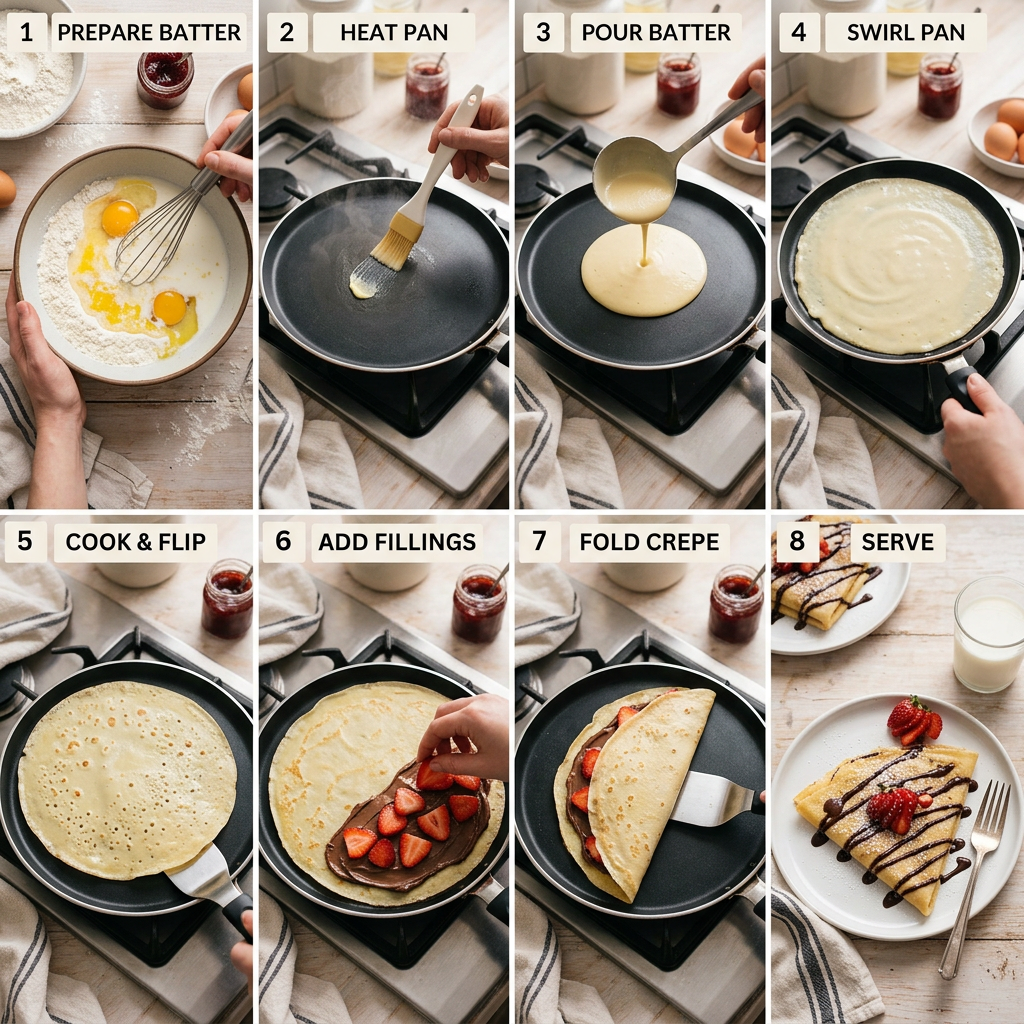
Whisk eggs, milk, and salt together in a large mixing bowl. Add flour and melted butter; whisk vigorously until batter is smooth and pourable. Let batter rest for at least 1 hour – up to 2 days in the refrigerator. (See Notes)
Heat a lightly greased 6-inch non-stick skillet, then remove it from the heat. Spoon in 2 tablespoons of batter and tilt the skillet to spread it into a very thin crêpe.
Cook until lightly browned. If you want, brown just one side or flip to brown the other side.
Invert pan over a paper towel or parchment paper and remove using a spatula. Repeat with the remaining batter, greasing the skillet occasionally.
The picture below shows a crepe being filled in the pan. I prefer to remove the crepe to a plate and fill it there. Crepes can be filled with fruit or savory fillings.
Notes
To make sweet crêpes, whisk 3 tablespoons white sugar and 1 teaspoon vanilla extract into the batter.
For larger crêpes, use a greased 8-inch, non-stick skillet and ¼-cup of batter per crêpe.
The batter needs to rest for at least one hour before cooking. Resting lets the flour absorb the liquid and the gluten relax, so the crêpes stay together and stay tender. Crêpe batter keeps in the refrigerator for up to two days, so you can make it the night before.
Savory Crepes Recipes:
Chicken or Lobster Crepes
A visual guide showing each step to make and serve delicious crepes from batter to plated dessert.
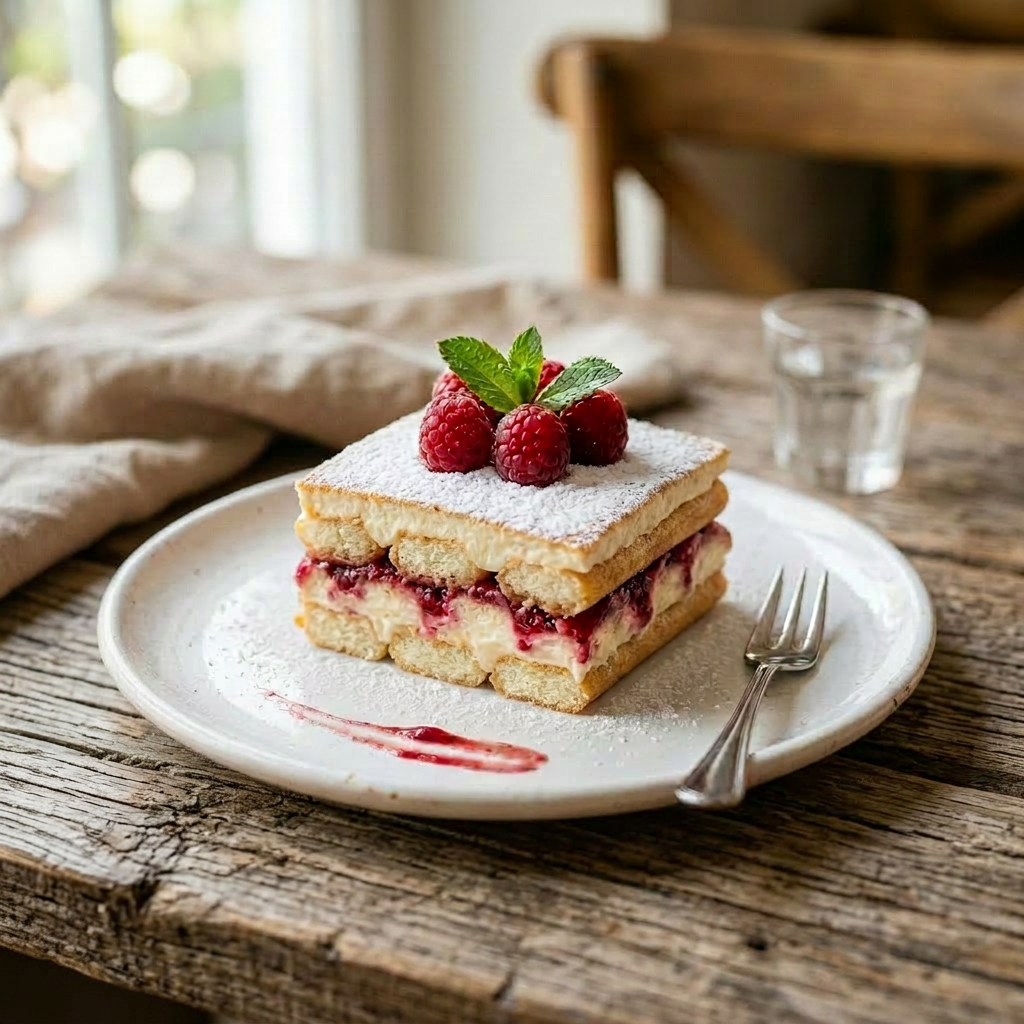
A slice of raspberry tiramisu topped with fresh raspberries and mint leaves.
Raspberry tiramisu offers a bright, fruity twist on the classic Italian dessert. Layers of espresso-soaked ladyfingers are replaced or complemented by raspberry syrup and fresh berries, while mascarpone remains lusciously creamy. The result is light, tangy, and elegantly sweet—a perfect finish to a celebratory meal or a special occasion dessert to share with loved ones.
Ingredients
1 cup of seedless raspberry jam
6 tablespoons orange liqueur (recommended: Grand Marnier)
1 pound mascarpone cheese, at room temperature
1 cup of heavy whipping cream
1/4 cup of sugar
1 teaspoon pure vanilla extract
28 soft ladyfingers or 2 12-ounce pound cakes, cut into 3″ x 1″ x 1″ x 1/2-inch thick pieces
3 pints of fresh raspberries (about 3 3/4 cups total)
Confectioners’ sugar, for serving
Process
Whisk the jam and 4 tablespoons of the orange liqueur in a small bowl to blend.
Combine the mascarpone and remaining 2 tablespoons of orange liqueur in a large bowl to blend.
Beat heavy whipping cream with sugar and vanilla using an electric mixer until soft peaks form. Use a large bowl and stop when peaks hold.
Gently stir 1/4 of the whipped cream into the mascarpone using a large rubber spatula to loosen the mixture. Then fold in the remaining whipped cream until the filling is smooth and even.
Line the bottom of a 13 x 9 x 2-inch glass baking dish or other decorative serving dish with half of the ladyfingers.
Layer the dessert by spreading half the jam over the ladyfingers. Spoon half the mascarpone mixture on top, then add half the raspberries. Repeat the same sequence with the remaining ladyfingers, jam, mascarpone, and raspberries until assembled.
Cover and refrigerate for at least 3 hours or overnight.