Tag Archives: baking

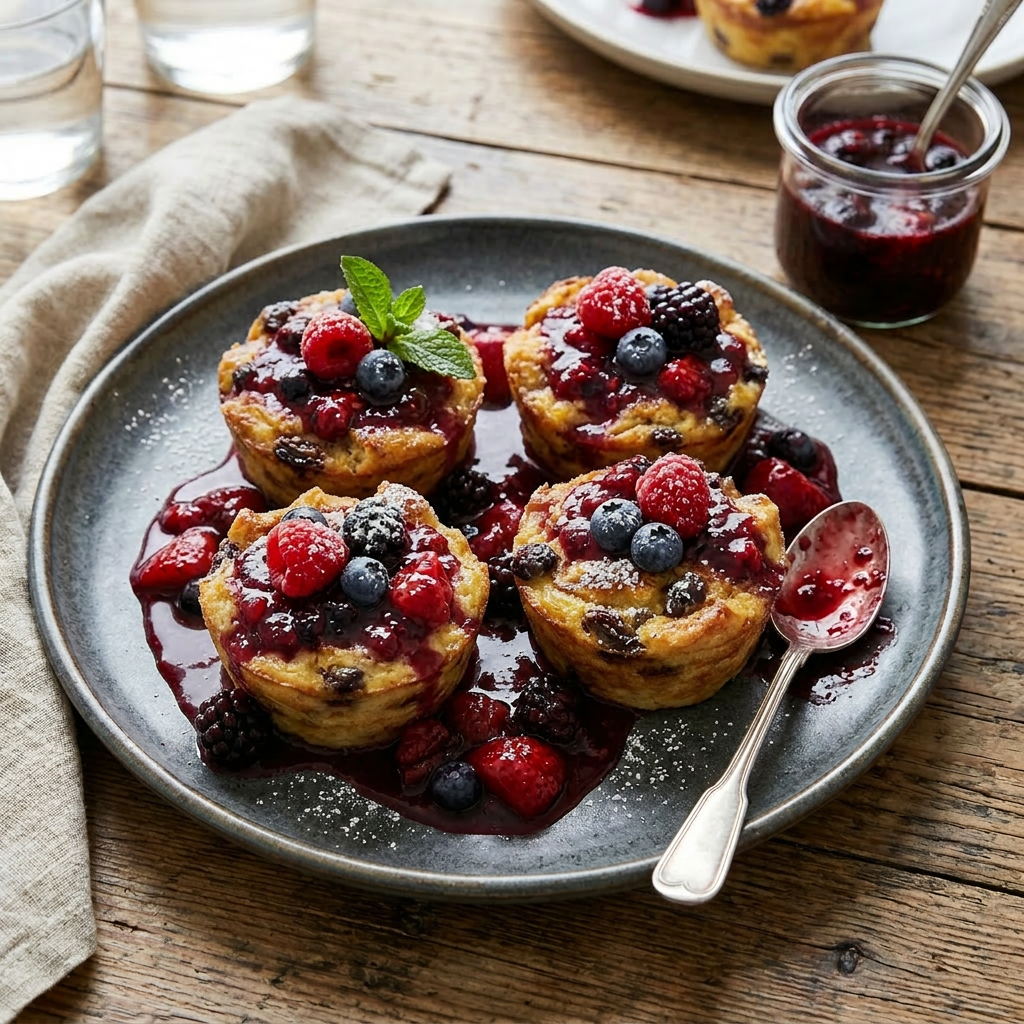
Mini Fresh Berry Bread Puddings

Four square desserts with mixed berries and berry sauce on a round gray plate with a spoon
Fresh Berry Bread Puddings

Imagine a dessert that’s as fun to make as it is delicious to eat—welcome to the world of bread pudding! This treat has a rich history, dating back centuries when clever cooks needed to rescue stale bread from the trash. Instead of wasting it, they turned it into hearty, flavorful dishes, both savory and sweet. Today, bread pudding has evolved into a luxurious delight, often made with fancy breads like brioche and infused with indulgent ingredients such as vanilla beans, bourbon, Gruyère cheese, or crunchy pecans. It’s a versatile dessert that can be dressed up with luscious sauces or fresh fruit, making every bite a delightful experience. Whether you’re reminiscing about childhood or impressing guests with a gourmet twist, bread pudding offers a perfect blend of history, comfort, and elegance. So, gather your ingredients and get ready to create a fun, flavorful masterpiece that celebrates both tradition and decadence.

Makes 6

Ingredients

  • 5 cups of mixed fresh berries, such as blackberries, blueberries, and raspberries (about 3 pints)
  • 2 tablespoons fresh lemon juice
  • 2 tablespoons of water
  • 1 vanilla bean split lengthwise
  • 1/2 cup of sugar
  • Pinch of salt
  • 18 thin slices of white sandwich bread (Challah bread can be used; roll out a slice to make thin)

Directions

  1. In a saucepan, cook berries, water, and lemon juice over medium heat until berries release their juices but still hold their shape, about 2 minutes. Slice a vanilla pod down the center and scrape the beans; add the beans to the berry mixture. Stir in sugar and salt; cook until the sugar is dissolved, 3 to 5 minutes. Strain the sauce into a bowl through a sieve or colander; do not discard the berries. Set both aside to cool.
  2. Take a piece of plastic wrap that is 6 inches longer than the cupcake tin. Press it into the cups of the tin. Alternatively, place another muffin tin on top of the plastic wrap to help press it into the cups.
  3. Using a 2-3/4-inch cookie cutter, cut six rounds from the bread slices and set one round in the bottom of each muffing tin.
  4. Using a smaller 2-1/4-inch cookie cutter, cut twelve rounds from the bread and set aside.
  5. Pour 1 tablespoon of sauce into each cup; add 1 tablespoon of reserved cooked berries. Top with smaller bread rounds; add another tablespoon each of sauce and berries. Make another layer of bread, sauce, and berries; top with remaining bread rounds. Press down firmly with the bottom of a glass.
  1. Cover the puddings with plastic wrap. Place a baking sheet on top and add a heavy skillet to weigh it down. Keep it in the refrigerator for at least 4 hours.
  2. To serve, pull up the plastic wrap, and gently unmold each pudding onto plates; drizzle with leftover sauce.

Cook’s Note

Using a cupcake tin lined with plastic wrap makes it easy to form, transport, and unmold the chilled puddings. Spray the tins with cooking spray to help the plastic wrap stay in place.

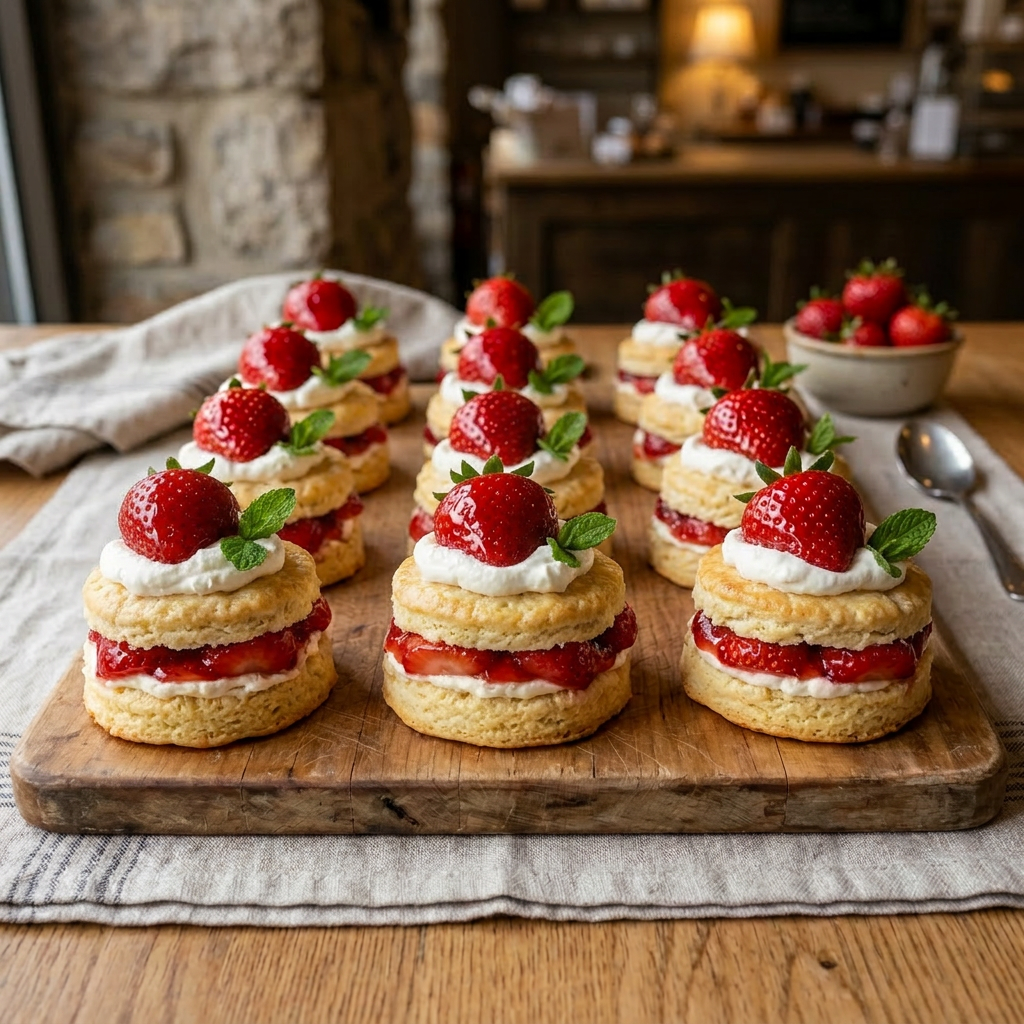
Classic Strawberry Shortcake

Fresh strawberry shortcakes topped with whipped cream and mint leaves on a wooden board
Delicious fresh strawberry shortcakes topped with whipped cream and mint leaves.

This refreshing old-fashioned recipe for Strawberry Shortcakes is a delightful dessert that combines the sweetness of ripe strawberries with the light, fluffy texture of freshly baked shortcakes. This classic treat is perfect for summer gatherings, picnics, or any occasion where a cool, fruity dessert is desired. The key to a perfect strawberry shortcake lies in selecting fresh, juicy strawberries, which are sliced and often lightly sweetened to enhance their natural flavor. The shortcakes themselves are made from tender biscuit-like dough, baked until golden, then split open to hold the luscious strawberries and whipped cream. For an added touch of freshness, some recipes incorporate a hint of lemon zest or a splash of vanilla into the shortcake batter. This dessert is not only visually appealing with its vibrant red strawberries and fluffy layers but also offers a harmonious balance of sweetness and acidity.

Ingredients

Filling

  • 6 cups of fresh strawberries, sliced
  • ½ cup sugar
  • 1 teaspoon vanilla extract

Whipped Cream

  • 1 cup heavy whipping cream
  • ¼  cup of powdered sugar
  • 1 teaspoon of vanilla extract

Biscuits

  • 2-3/4 cups of all-purpose flour
  • ¼ cup sugar
  • 4 teaspoons baking powder
  • 3/4 cup of cold butter, cut up
  • 2 large eggs, lightly beaten
  • 1 (8-oz.) container of sour cream
  • 1 teaspoon vanilla extract

Preparation

  1.  Combine strawberries, 1/2 cup sugar, and vanilla extract. Cover and chill in the refrigerator for about 2 hours.
  2.  Beat whipped cream at medium-high speed with an electric mixer until foamy.
  3. Gradually add powdered sugar and vanilla, beating until stiff peaks form. Note: do not overbeat or the whipped cream will become butter! Cover and chill in the refrigerator until ready to use.

Biscuits

  1. Preheat oven to 450°F.
  2. Line a baking sheet with raised edges with parchment paper.
  3. Combine flour, sugar, and baking powder in a large bowl;
  4. Cut butter into the flour mixture with a pastry blender or two forks until crumbly.
  5. In a separate bowl, whisk together eggs, sour cream, and vanilla until blended
  6. Add to flour mixture, stirring just until dry ingredients are moistened.
  7. Drop dough into 10 mounds on an ungreased baking sheet; flatten each mound with the back of a spoon until about ¾ inch thick.
  8. Bake for 10 – 12 minutes until golden.

Presentation

  1. Cool on a wire rack for about 10 minutes. Cut shortcakes in half horizontally. Spoon half of the berries and whipped cream over the bottom layers.
  2. Replace the top layers and cover with the remaining strawberries and whipped cream.

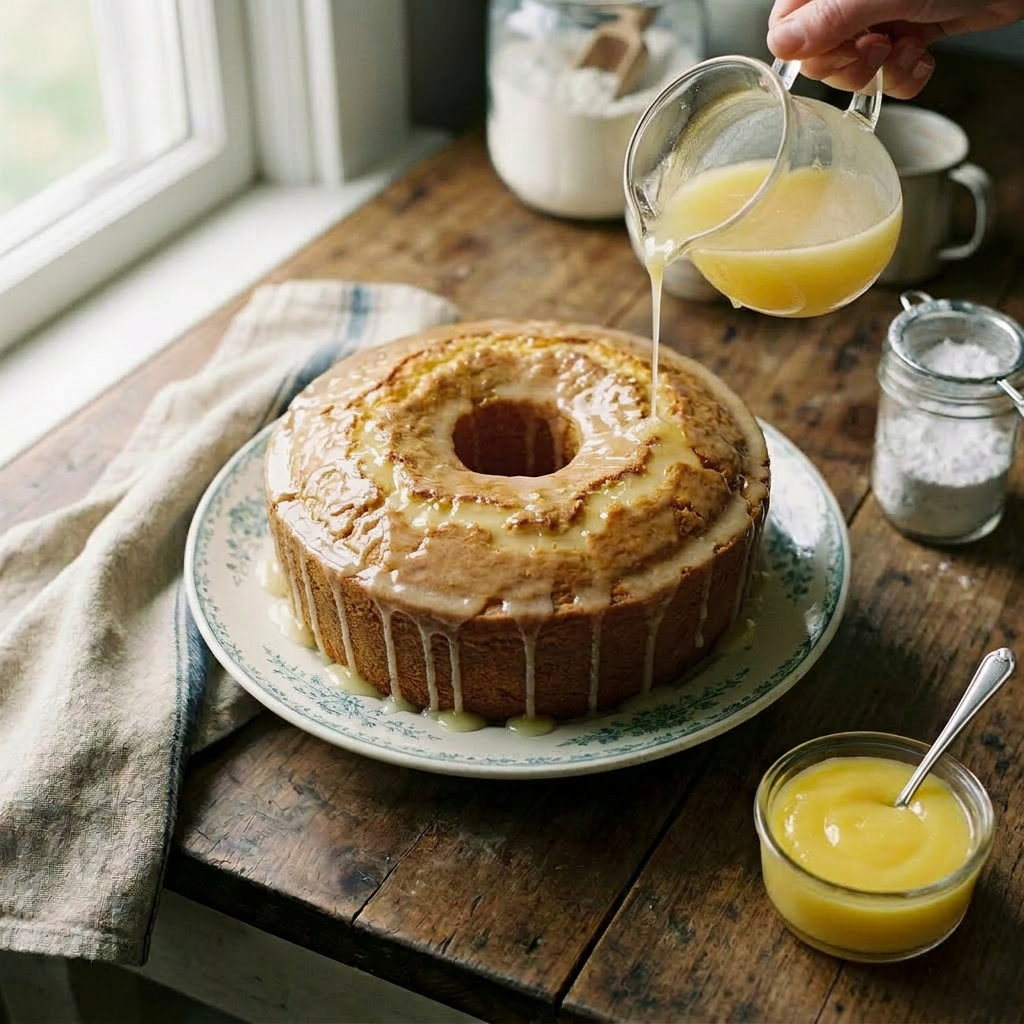
Sour Cream Pound Cake

Freshly baked bundt cake in a metal pan with a slice on a plate nearby
Glazed Sour Cream Pound Cake served with lemon curd

This is a dense pound cake crafted with a rich blend of ingredients. This variation incorporates sour cream and beaten egg whites, which contribute to its moistness and subtle tanginess, enhancing the overall taste experience. The use of sour cream not only adds a creamy richness but also helps in tenderizing the crumb, resulting in a dense yet soft texture that melts in the mouth. Beaten egg whites, on the other hand, introduce air into the batter, providing structure and stability without compromising the cake’s substantial density. This combination ensures the cake remains moist and flavorful, with a fine crumb that is ideal for pairing with fresh fruits, whipped cream, or a dusting of powdered sugar.

Ingredients

  • ½ pound of butter (2 sticks)
  • 3 cups granulated sugar
  • 1 cup sour cream
  • 6 large eggs – separated
  • 3 cups of all-purpose flour
  • ¼ teaspoon baking soda
  • ¼ teaspoon salt
  • 1 teaspoon vanilla extract
  • 1/2 teaspoon lemon extract
  • ½ teaspoon almond or coconut extract

Process

  1. Preheat oven to 300°F.
  2. Grease and flour a 9- or 10-inch tube pan.
  3. Separate the egg yolks from the whites and put the whites aside.
  4. In a mixer bowl, cream the sugar and butter until fluffy and white.
  5. Add egg yolks, one at a time, beating well after each addition.
  6. Add sour cream, mix thoroughly.
  7. Add flavorings.
  8. The flour is added in two parts: add the first cup to this sour cream mixture.  (The remaining amount with the baking soda and salt is added later).
  9. In a clean bowl, beat egg whites until stiff peaks form (do not over-beat).
  10. Fold egg whites into the sour cream mixture.
  11. Lastly, stir in remaining dry ingredients (flour, baking soda, salt).
  12. Turn into a greased tube pan.
  13. Bake 1 to 1-1/2 hours (or more) until a pick inserted comes out clean.

Cream Puffs with Mascarpone Whipped Cream Filling

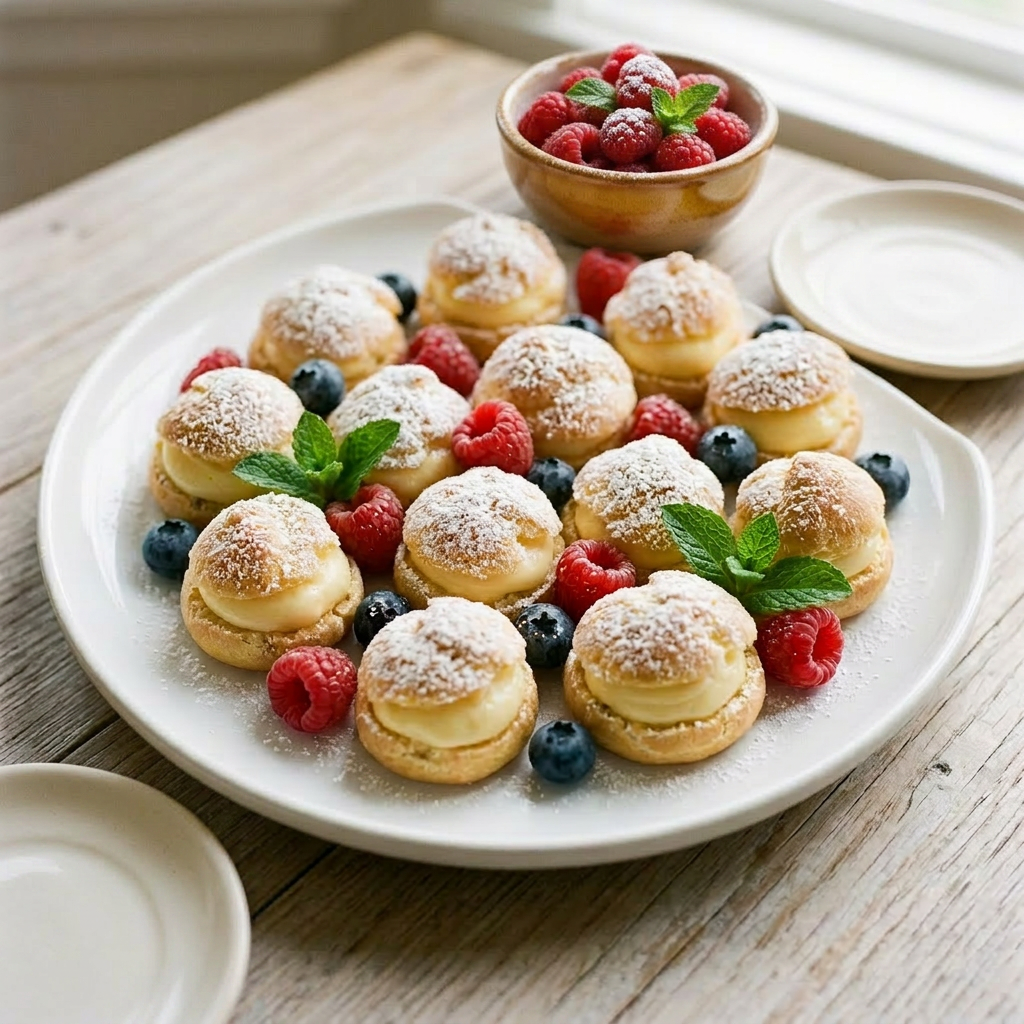
Tray of small cream puffs filled with cream, topped with powdered sugar, raspberries, blueberries, and mint leaves
A tray of cream puffs dusted with powdered sugar, fresh raspberries, blueberries, and mint leaves

Old-fashioned cream puffs are a timeless dessert that evokes a sense of nostalgia and elegance. These delicate pastries are made from choux pastry, which is baked to achieve a light, airy, and crisp exterior. For Mother’s Day, cream puffs are an ideal choice for a light and airy dessert that can be both elegant and satisfying. Their fluffy interior and this creamy Mascarpone cheese whipped cream filling make them a perfect treat to celebrate the special occasion without feeling overly heavy. Additionally, cream puffs can be customized with various fillings and toppings, such as chocolate glaze, powdered sugar, or fresh berries.

Ingredients

Pastry

  • 1 cup of water
  • 1/2 cup of butter (4 ounces)
  •  1 cup of all-purpose flour
  •  1/4 teaspoon salt
  •  4 large eggs

Process

  1. Preheat the oven to 400°F.
  2. In a small bowl, whisk together the flour and salt; set aside.
  3. In a medium-sized saucepan, bring 1 cup of water to a boil.
  4. Add the butter. 
  5. When the butter has melted, add the flour mixture all at once and stir vigorously. 
  6. Continue stirring until the mixture forms a ball that doesn’t separate.
  7. Remove from the heat and cool slightly (about 1 minute).  Add the eggs, one at a time, beating after each one until the dough is smooth.
  8. Place spoonfuls of dough, about 2 inches apart, onto a baking sheet lined with parchment paper. Alternatively, put the batter into a pastry bag fitted with a round tip and pipe circles approximately 2 inches wide and 1 inch apart onto the baking sheet.
  9. Bake the puffs for about until they are golden brown and puffy, about 25 to 30 minutes.
  10. If the puffs are mini-sized, bake for about 17 to 20 minutes. 
  11. Remove the cream puffs from the oven and cool on a cooling rack.

Mascarpone Cheese Filling

  • 2/3 cup mascarpone cheese
  • 2/3 cup heavy whipping cream
  • 5 tablespoons powdered sugar
  • 2 teaspoons pure vanilla

Process

  1. In a chilled bowl, beat the Mascarpone cheese and vanilla until creamy.
  2. Add the heavy whipping cream, and beat until thick.
  3. Gradually add the powdered sugar, mix until fully incorporated.
  4. Beat mixture on high speed until thick and fluffy.
  5. Cut cooled puffs in half, and set the top half of the puff aside.
  6. Fill the bottom halves of the puffs with the cream mixture, then replace the tops.
  7. Drizzle with melted bittersweet chocolate or dust with powdered sugar.
  8. Store in the refrigerator until ready to serve.

Angel Food Summer Fruit Cake

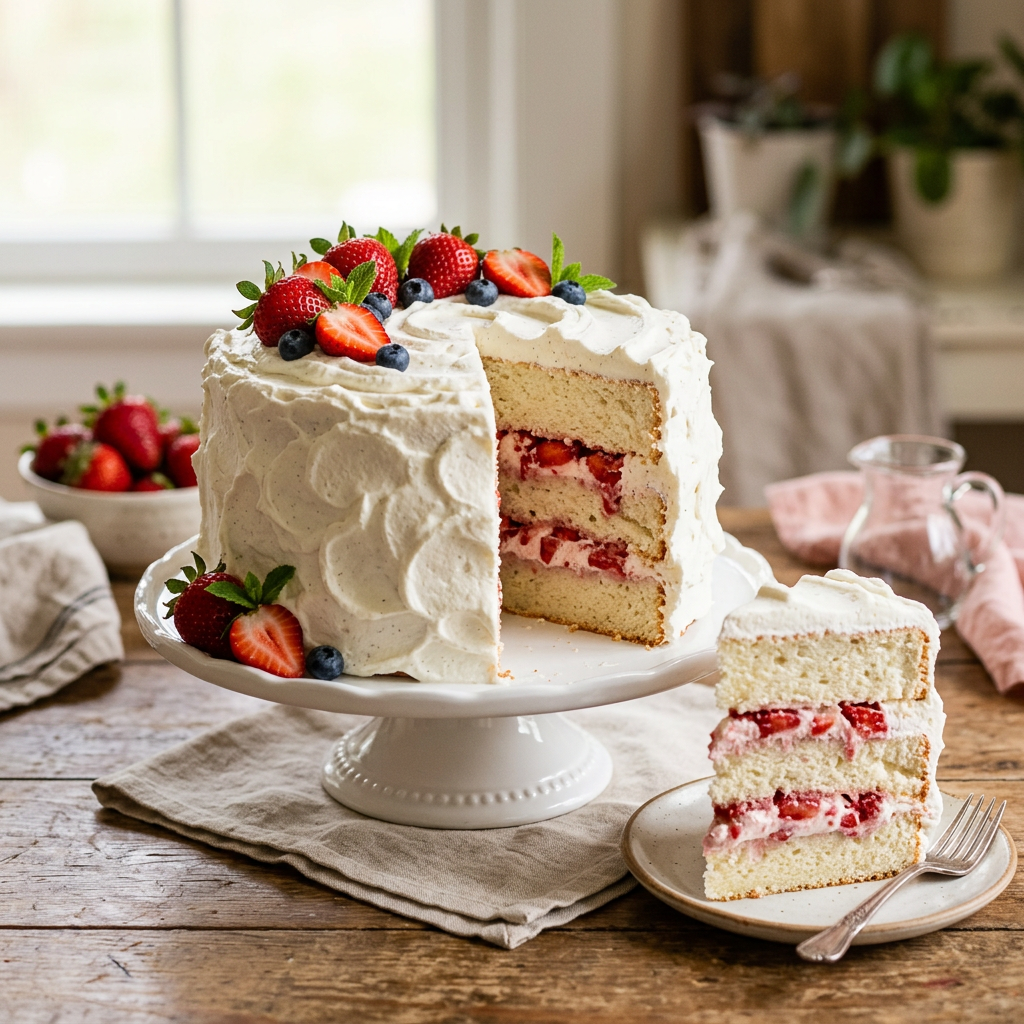
Layered vanilla cake with white frosting, strawberries, and blueberries on top
A beautifully decorated layered cake filled with strawberries and cream.

Experience the light and airy delight of our Angel Food Summer Fruit Cake, expertly layered with fresh seasonal fruit and luscious filling. This elegant dessert combines the fluffy texture of angel food cake with vibrant fruit toppings and a smooth filling, making it a perfect centerpiece for summer gatherings or a special treat. Its delicate sweetness and refreshing flavors are sure to please every palate.

Ingredients

  • 1 Angel Food Cake
  • 2 pints of fresh strawberries (see note below)
  • 1 Large container of Cool Whip
  • 1 regular-size box of instant vanilla pudding
  • 1 stick of butter (soft)
  • 2 cups of powdered sugar

Cake Filling

  1. In a mixer bowl, add 1 cup of milk to 1 regular-size box of instant vanilla pudding – beat for 2 minutes.
  2. Add half of the container of Cool Whip, blend the pudding mix and Cool Whip with a spoon, and refrigerate until ready to assemble the cake.
  3. Refrigerate the remaining Cool Whip to use for frosting.

Process

  1. Prepare cake according to box directions, cool completely.
  2. Slice the cooled cake into 2 layers.
  3. Slice strawberries into thin pieces.
  4. Spread half of the pudding filling onto the bottom layer.
  5. Spread sliced strawberries on top of the filling.
  6. Cover with the first layer of cake.
  7. Repeat the filling and strawberry layers, then place the top cake layer on and press gently to set.

Frosting

  1. Beat the butter until it becomes smooth and creamy.
  2. Add powdered sugar and mix until combined.
  3. Fold in the remaining half of the container of Cool Whip.
  4. Frost the sides of the cake and then the top. Decorate with sliced fruit.
  5. Keep cake refrigerated until ready to serve.

Note

You can use any fruit for this cake. The original recipe used canned mandarin oranges, sliced lengthwise.

  • Mandarin oranges (canned), sliced lengthwise
  • Strawberries
  • Blueberries
  • Blackberries
  • Any mix of the above

Coconut Cream Vanilla Bean Whipped Cream

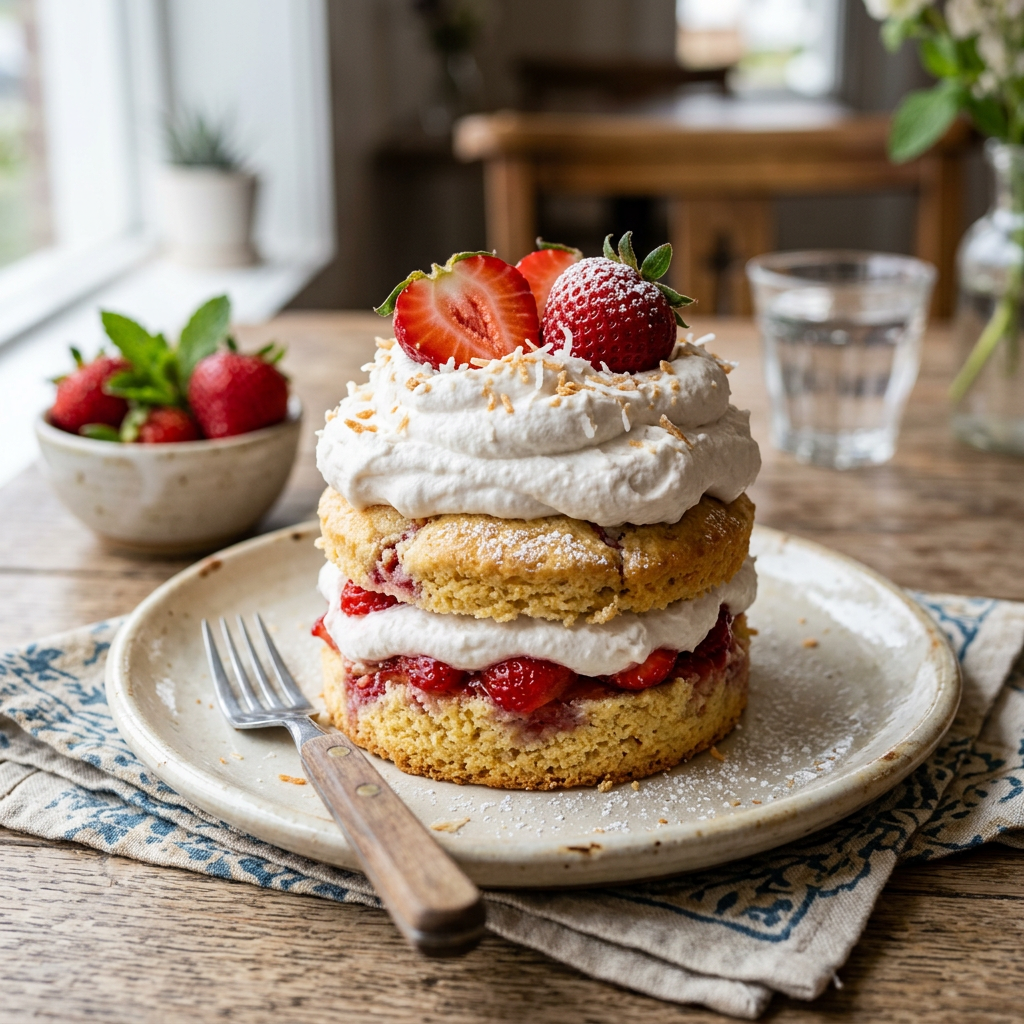
Two-layer strawberry shortcake with whipped cream and fresh strawberries on a plate

Creating vegan-friendly vanilla bean coconut cream whipped cream is a delightful process that combines plant-based ingredients to produce a rich, creamy topping suitable for a variety of desserts. This alternative to traditional whipped cream is not only dairy-free but also offers a unique flavor profile enhanced by the natural sweetness of coconut and the aromatic essence of vanilla beans.

Ingredients

  • 1 14oz can of full-fat coconut milk
  • 2 tablespoons powdered sugar
  • 1 vanilla bean pod

Process

  1. Refrigerate the unopened can of coconut milk in the refrigerator for 24 – 48 hours. This separates the cream from the liquid.
  2. Chill your mixing bowl and beater in the refrigerator or freezer for 10 – 15 minutes.
  3. Slice the vanilla bean lengthwise and scrape the seeds out of the pod and set aside.
  4. Open the can and carefully scoop out the thickened cream into the chilled bowl, leaving the liquid in the can (can be used for other food purposes)
  5. Using a mixer, beat the coconut cream on medium-high speed for 2 – 3 minutes until it becomes fluffy. 
  6. Add the scraped vanilla beans and powdered sugar into the cream and mix until incorporated for another 1 – 2 minutes. Stop once soft peaks form. Use a tablespoon of liquid from can to lighten the whipped cream if it is too thick.

Tips for Success

  • Use Full-Fat Coconut Cream milk. Light or low-fat coconut milk will not whip properly due to insufficient fat content.
  • Avoid liquid sweeteners, stick to powdered sugar to prevent the cream from becoming runny.
  • Be sure your tools are cold. Chilled cream, bowl and beaters help achieve the best volume and texture.
  • Store in an airtight glass container in the refrigerator for up to 5 days. Re-whip if it separates or hardens.
  • Coconut Milk recommendations include Savoy Coconut Cream, Aroy-D Coconut Milk, and Nature’s Charm Coco Whipping Cream. These are suggested for the best results.

Vanilla Extract – Homemade

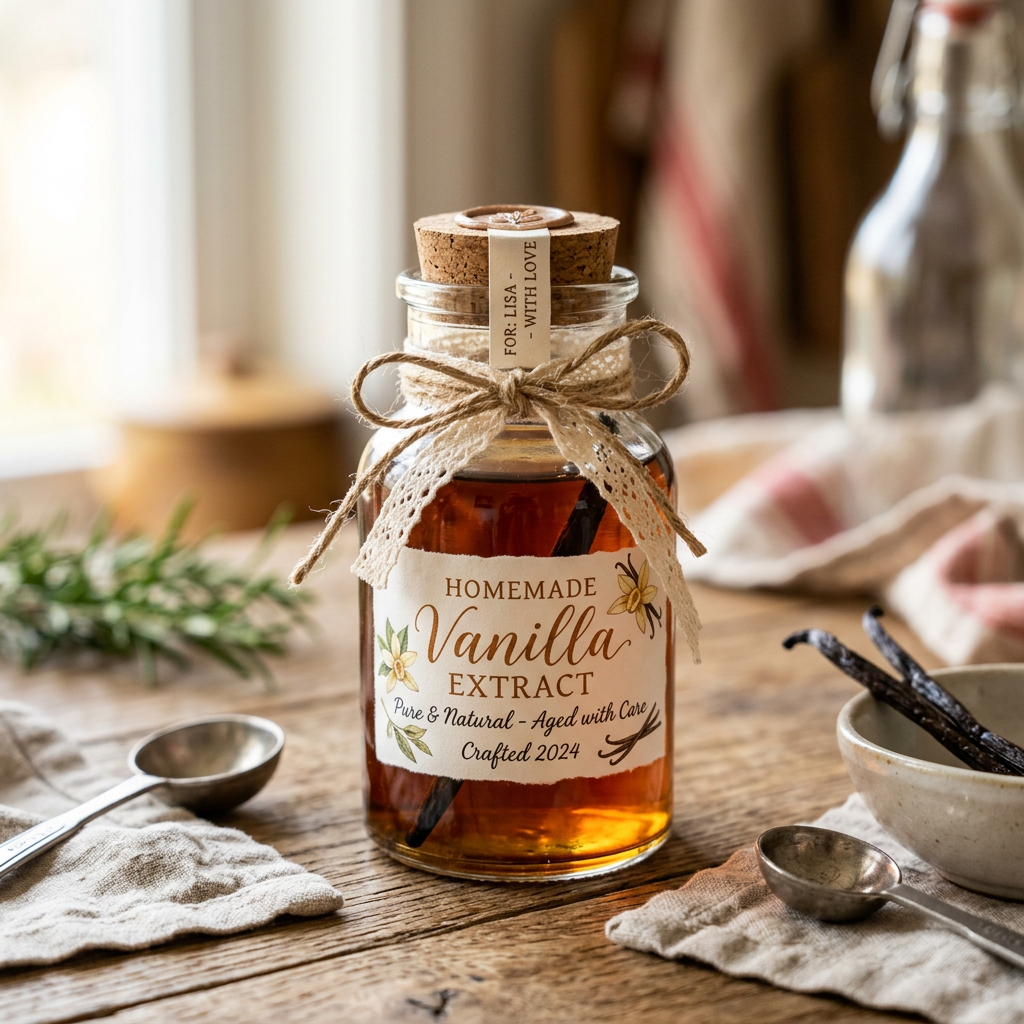
Glass jar of homemade vanilla extract with cork stopper and decorative label
A charming homemade vanilla extract jar tied with a rustic bow, perfect for gifting.

Ever wondered why bother making your own vanilla extract when store-bought options are so easy? Well, here’s the scoop: store prices for vanilla are all over the place, making homemade a smart, budget-friendly choice. Plus, you get to tweak the flavor strength to your liking—no more settling for weak, artificial vanilla. Many commercial brands skimp on real vanilla, opting for imitation or synthetic ingredients, or they just add less vanilla to save costs. When you craft your own, you’re paying for rich, authentic flavor, not just convenience. Homemade vanilla is a game-changer for bakers craving depth and quality in every drop!

Ingredients

  • 8 grade A vanilla beans (see note below for types of vanilla beans)
  • 8 ounces of vodka (or other liquor – see note below)

Process

  1. Begin by slicing the vanilla bean down the center to release the seeds.
  2. The rule of thumb is one vanilla bean to one ounce of liquor. I prefer unflavored vodka because it provides a clean, neutral base that lets the true flavor of the vanilla beans shine.
  3. In an 8-ounce glass jar with a tight-fitting lid, combine 8 sliced vanilla beans with the liquor of your choice.
  4. Store the infused vanilla out of direct sunlight and give it a shake once per week.
  5. Vanilla will be ready to use in 2 months.
  6. Vanilla sediment is normal, edible, and adds another depth of flavor. The sediment consists of tiny vanilla seeds and bean particles released during extraction. Filtering the sediment is optional. Some people prefer to leave the specks because they indicate real vanilla. If you want a clearer appearance for gifts, you can pour the vanilla through a coffee filter. After filtering, you can put the beans back into the vanilla, so they continue to release flavor when given as a gift.
  7. Long Shelf Life: The high alcohol content in unflavored vodka acts as a preservative, allowing the vanilla extract to last for years when stored properly in a cool, dark place. This longevity makes it a practical choice for making large batches of vanilla extract at home.

Note: Use 80-proof alcohol, such as vodka, bourbon, brandy, or rum. You don’t need expensive alcohol; cheaper options are fine. The vanilla flavor comes from vanilla beans, so buy good-quality beans. Avoid flavored vodka because it often contains artificial flavors that are not suitable for making pure vanilla extract.

Types of grade A vanilla beans:

  • Madagascar Vanilla – very common and has a creamy and rich flavor
  • Mexican Vanilla – has a darker, almost smoky flavor
  • Tahitian Vanilla – also very common and has a rich floral flavor

Vanilla Bean Syrup

Vanilla Bean Sugar

Vanilla Bean Sugar Cubes

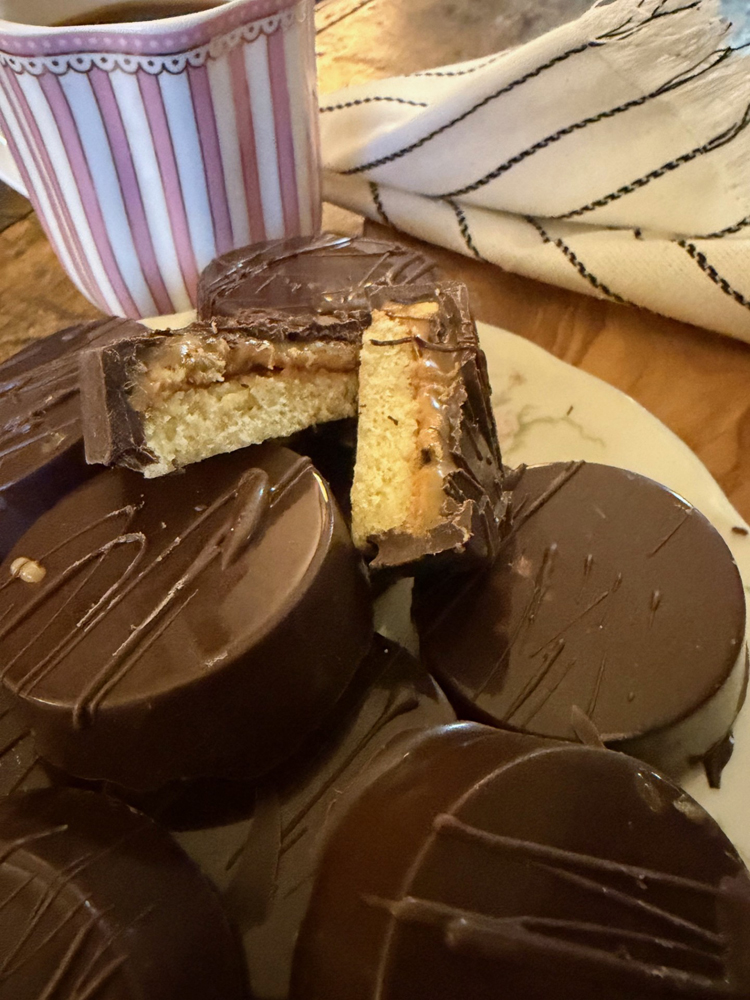
PB Carmel Cloud Cookie

“Meet the PB Caramel Cloud — a dreamy cookie with a soft sponge cake base, creamy peanut butter, gooey caramel, and a silky chocolate top. This original recipe is melt‑in‑your‑mouth perfection and guaranteed to become your new signature dessert.”

Ingredients

  • 1 Cups of flour
  • 1/2 teaspoon of baking powder
  • 1 Cups of sugar
  • 1/2 Cup of milk
  • 1 tablespoon of soft butter
  • 2 eggs
  • 1 jar of peanut butter, creamy or chunky
  • 1 11 oz bag of Kraft Caramels
  • 1/3 cup of heavy cream
  • 1 bag of chocolate candy wafers

Process

Sponge cake

  1. Spray a 9″ x 13″ raised edge baking sheet with cooking spray, line it with parchment paper, then spray the paper. This prevents sticking and makes cleanup easier.
  2. Heat oven to 350°F.
  3. Combine flour, sugar, baking powder, milk, butter, and eggs in a bowl. Mix at a medium speed for 2 minutes until smooth.
  4. Pour the sponge mix into the baking sheet and bake for 20 minutes until done.
  5. Take cake out of the oven and spread the creamy peanut butter (or chunky) on top of the hot cake and spread evenly with an offset spatula.
  6. Refrigerate for an hour.
  7. Unwrap the caramels and melt them with the heavy cream in a microwave-safe bowl, keep stirring every 30 seconds until the caramels and cream are melted together creating a smooth and luscious spread. About 2 minutes.
  8. Remove the cake from the refrigerator and spread the caramel sauce on top of the peanut butter. Return to the refrigerator until the caramel sauce is set.

Note: At this point you can melt the chocolate according to the package instructions and spread on top of the caramel sauce. Cut the cookie into squares while the chocolate is still warm. Place the pan in the refrigerator until the chocolate hardens and then remove cookies to a storage container.

Or

  1. Do not pour chocolate over the set caramel.
  2. Using silicon or poly plastic cookie molds, cut the cookies to fit into the molds using a 2” cookie cutter, set aside.
  3.  Melt the chocolate according to package instructions and pour a tablespoon into the bottom of each mold. Place cookie cutouts in the molds, then refrigerate until the chocolate hardens. Once set, remove from the molds and enjoy your treat.

Blueberry Corn Muffins with Vanilla Butter

Enhancing this rustic treat is a spread of vanilla butter, which adds a layer of creamy richness and aromatic sweetness. The vanilla butter melts gently over the warm muffins, infusing each bite with a fragrant vanilla essence that elevates the overall flavor experience. This combination of textures and flavors makes blueberry cornbread muffins with vanilla butter an ideal choice for breakfast, brunch, dinner side dish, or a cozy snack.

Ingredients

  • 1 cup of yellow cornmeal
  • 1 cup all-purpose flour
  • 2 teaspoons of baking powder
  • 1⁄2 teaspoon baking soda
  • 1⁄2 teaspoon salt
  • 1⁄2 cup unsalted butter, melted and cooled
  • 2 tablespoons vegetable oil
  • 1⁄2 cup granulated sugar
  • 2 large eggs
  • 1 cup of buttermilk
  • 1 teaspoon vanilla extract
  • 1 cup fresh blueberries or frozen (not thawed)

Instructions

  1. Preheat the oven to 400°F. Line a 12-cup muffin pan with paper liners or grease the cups with cooking spray.
  2. In a large bowl, mix the dry ingredients together until well combined. Set aside.
  3. In a separate mixing bowl, beat the melted butter, oil, and sugar until smooth and thick. Add the eggs one at a time and mix until combined.
  4. To add the dry ingredients to the buttermilk mixture, start and end with the flour. Mix gently by hand until about halfway combined. Add the blueberries and stir just until no streaks of flour are visible.
  5. Divide the batter evenly between the muffin cups, filling each all the way to the top.
  6. Bake for 15-18 minutes or until a toothpick inserted into the center comes out with just a few moist crumbs.
  7. Let the muffins cool in the pan for 5 minutes before removing them to a cooling rack.

Vanilla Butter

Ingredients

  • 1 cup of good unsalted butter
  • 2 vanilla pods
  • 3 tablespoons powdered sugar
  • ½ teaspoon flakey sea salt (Maldon)
  •  

Process

  1. Let the butter come to room temperature.
  2. Using a very sharp knife, cut the vanilla pods in half lengthwise, exposing the seeds. Using the knife, scrape out the seeds and add to the butter.
  3. Combine the butter, vanilla seeds, sugar and salt to a mixing bowl and whip until light and fluffy.

Cinnamon Bread Pudding with Vanilla Bourbon Sauce

Discover the ultimate bread pudding recipe that fills your home with irresistible aromas of brown sugar, cinnamon, and vanilla. Perfect for holiday brunches or cozy weekends, this rich, comforting treat is totally addictive. Feel free to get creative with your bread—stale French bread, day-old glazed doughnuts, cinnamon rolls—anything goes! Bake, enjoy, and watch everyone rave about this delightful, fun dessert that warms both your heart and your home.

Ingredients

Pudding

  • 1 cup firmly packed brown sugar
  • ½ cup granulated sugar
  • 1 loaf or 10 cups of cubed brioche or other stale bread *see note below
  • 1-1/2 cups of Half and Half
  • 1/2 cup of heavy whipping cream
  • 4 eggs
  • 2 teaspoons cinnamon
  • ¼ teaspoon nutmeg
  • 1 teaspoon vanilla extract
  • ½ cup melted butter

Vanilla Bourbon Sauce

  • 1 cup heavy cream
  • ½ cup granulated sugar
  • ½ cup bourbon
  • 1-1/2 teaspoons pure vanilla extract
  • 2 tablespoons of butter
  • 1 tablespoon cornstarch (optional)

Process

  1. Preheat oven to 350°F.
  2. Spray a 9 x 13-inch baking dish with cooking spray. Spray a piece of aluminum foil with cooking spray to cover the bread pudding while it is baking.
  3. In a large mixing bowl, beat together the eggs, sugars, cinnamon, nutmeg, vanilla, and melted butter until smooth.
  4. Stir in the Half and Half, and whip cream and mix well. Add the cubed bread and let the mixture sit for 2 hours, stirring occasionally to ensure the bread absorbs the custard mixture.
  5. Pour bread pudding batter into pan. Cover with foil and bake for 50 minutes to 1 hour or until center of pudding is firm.

NOTE: This can be made about 1 or 2 days in advance, reheating it at 250°F. for 30 minutes before serving.

Vanilla Bourbon Sauce

  1. In a saucepan over medium heat, combine the cream, sugar, and vanilla.
  2. Heat until the mixture is warm but not boiling.
  3. In a separate bowl, mix the bourbon with a bit of the cornstarch to thicken the sauce.
  4. Whisk in the bourbon mixture and continue to cook for another minute until slightly thickened.
  5. Remove from the heat and stir in the butter until melted.

Cut pudding into squares and serve with a generous serving of bourbon sauce and a dollop of whipped cream or ice cream.

NOTE: If your bread is not stale, start by cutting a fresh loaf into small 1” pieces. Place the pieces on a baking sheet lined with parchment paper. Dry the bread in a 350°F oven, stirring once. Remove when the bread is slightly dry.