Category Archives: Dessert

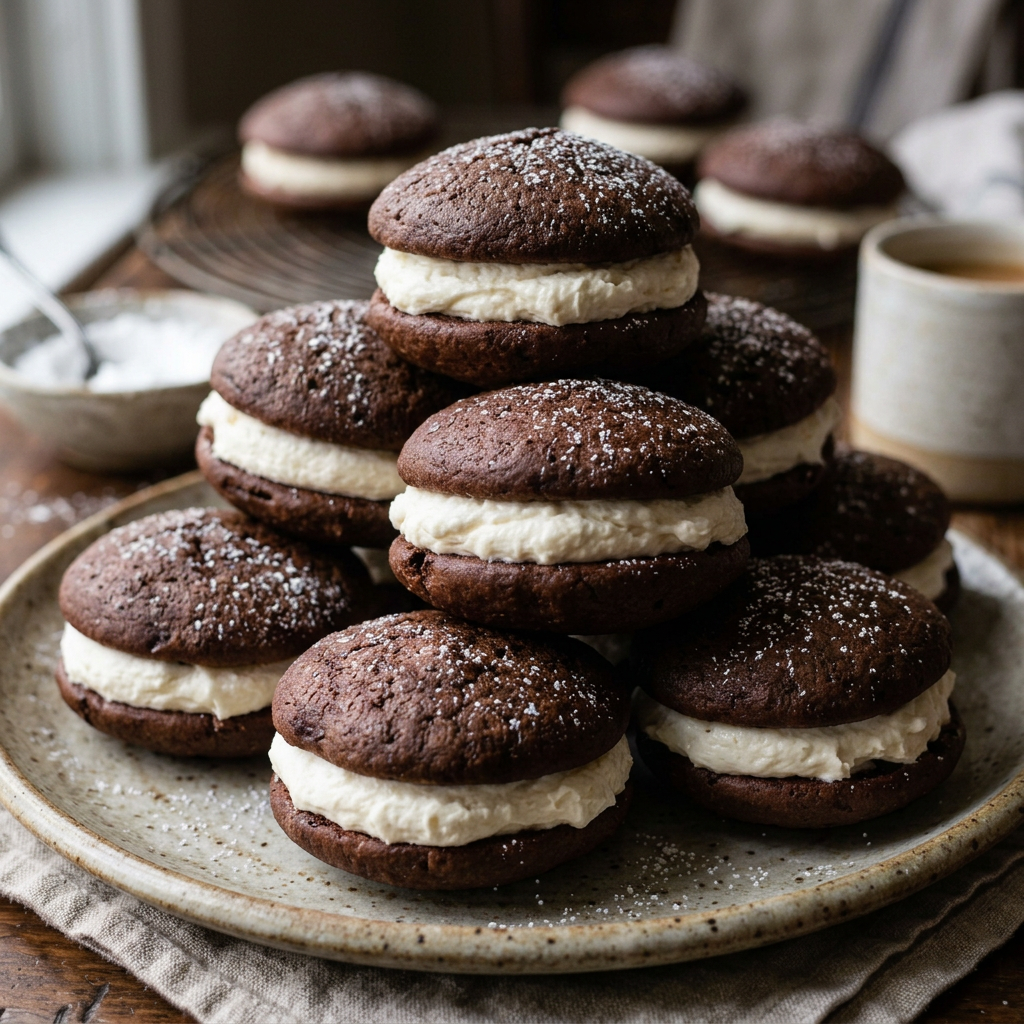
Whoopie for Dutch Country Chocolate Cream Pies

Stack of chocolate whoopie pies with cream filling beside coffee
Old Fashioned chocolate whoopie pies

A soft cocoa sandwich cookie with sweet farmhouse charm and a cloud of creamy filling. Meet the Pennsylvania Dutch Whoopie Pie: part cookie, part cake, and an all-out happy little sandwich of chocolatey goodness. Born from the practical magic of Amish and Pennsylvania German kitchens, these soft cocoa rounds hug a cloud of sweet, creamy filling that feels like a farmhouse celebration in every bite. Tuck one into a lunch pail, pass a plate at the picnic table, or enjoy it with a cold glass of milk—and don’t be surprised if the first taste makes you want to shout, “Whoopie!”

Ingredients

  • 1 cup sugar
  • ½ cup shortening
  • 1 egg
  • 1 egg yolk
  • 2 cups all-purpose flour
  • 2/3 cup unsweetened cocoa powder
  • ¼ teaspoon salt
  • 1 teaspoon baking soda
  • ½ cup hot water
  • 2/3 cup buttermilk

Process

  1. Preheat oven to 350°F. Line 2 cookie sheets with parchment paper.
  2. Beat together sugar and ½ cup shortening at high speed with a stand mixer until fluffy.
  3. Add the egg and egg yolk and beat until incorporated.
  4. In a separate bowl, stir together the flour, cocoa powder, and salt; set aside.
  5. Dissolve baking soda in the ½ cup of hot water; cool slightly.
  6. Add the flour mixture, baking soda mixture, and 2/3 cup buttermilk alternately to the sugar-shortening mixture.
  7. Beat at a medium speed until well mixed.
  8. Drop batter by rounded tablespoonfuls 2 inches apart onto a parchment paper-lined cookie sheet. Bake for 8 – 10 minutes.
  9. Cool cookies on a cookie rack. Yields 48 cookies.

Filling Ingredients

  • 2 cups sifted powdered sugar
  • ½ teaspoon of meringue powder
  • 1 teaspoon vanilla
  • ½ cup shortening (such as white Crisco)
  • ¼ cup butter

Process

  1. In a stand mixer, combine the shortening, butter, vanilla, and 1 teaspoon water; beat on high speed until light and fluffy.
  2. Turn mixer to low and gradually add powdered sugar and meringue powder.
  3. Beat on high until mixture is light and fluffy. If the mixture is too thick to spread, add 1 teaspoon of water at a time until it is spreading consistency.
  4. Spread some filling on the flat side of half the cookies; top with the remaining cookies, flat side down.
  5. Store in the refrigerator.

09/04/2026
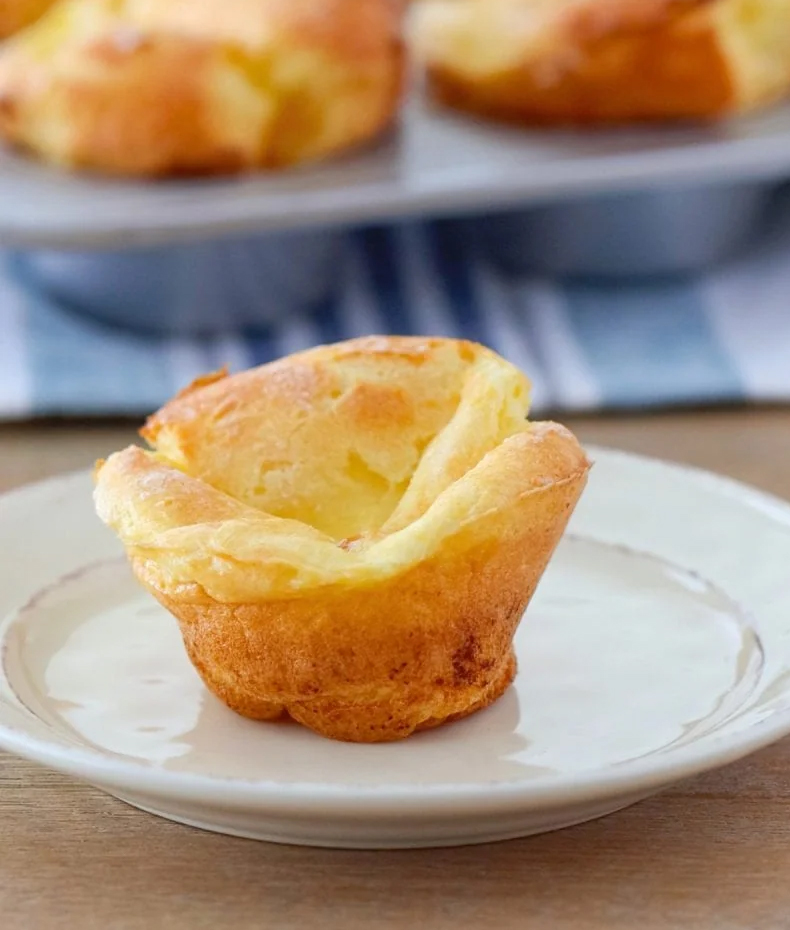
Nuns Puffs

Nun’s Puffs are delicate pastries with a light, airy texture and a gently crisp exterior. Made from a simple choux-style dough, these golden treats rise beautifully in the oven, creating a tender center that is both soft and satisfying. Their subtle sweetness makes them versatile enough for breakfast, afternoon tea, or a refined dessert. Often finished with a dusting of powdered sugar, Nun’s Puffs have an understated elegance that suits any occasion. Enjoy them warm and freshly baked, or pair them with fruit, whipped cream, honey, or a drizzle of chocolate for an extra touch of indulgence. Light, graceful, and wonderfully comforting, Nun’s Puffs offer a delightful balance of simplicity and sophistication.

Ingredients

  • ½ cup butter
  • ¾ cup flour
  • 1 cup of milk
  • 4 eggs, room temperature

Process

  1. Preheat oven to 375°F.
  2. Grease 12 muffin cups well, including the top of the muffin tin.
  3. Melt the butter in a medium saucepan.
  4. Melt the butter. Add the milk and bring it to a boil.
  5. Add all the flour at once. Stir until the mixture forms a firm ball.
  6. Remove from the heat and let it cool for 5 minutes. Add the eggs one at a time, beating with a wooden spoon for 1 minute after each egg.
  7. Divide the batter between each muffin cup.
  8. Sprinkle the top with granulated sugar.
  9. Bake for 30 minutes.
  10. Remove from oven and remove buns from muffin tin.
  11. Drizzle with honey or your choice of topping and enjoy while warm.

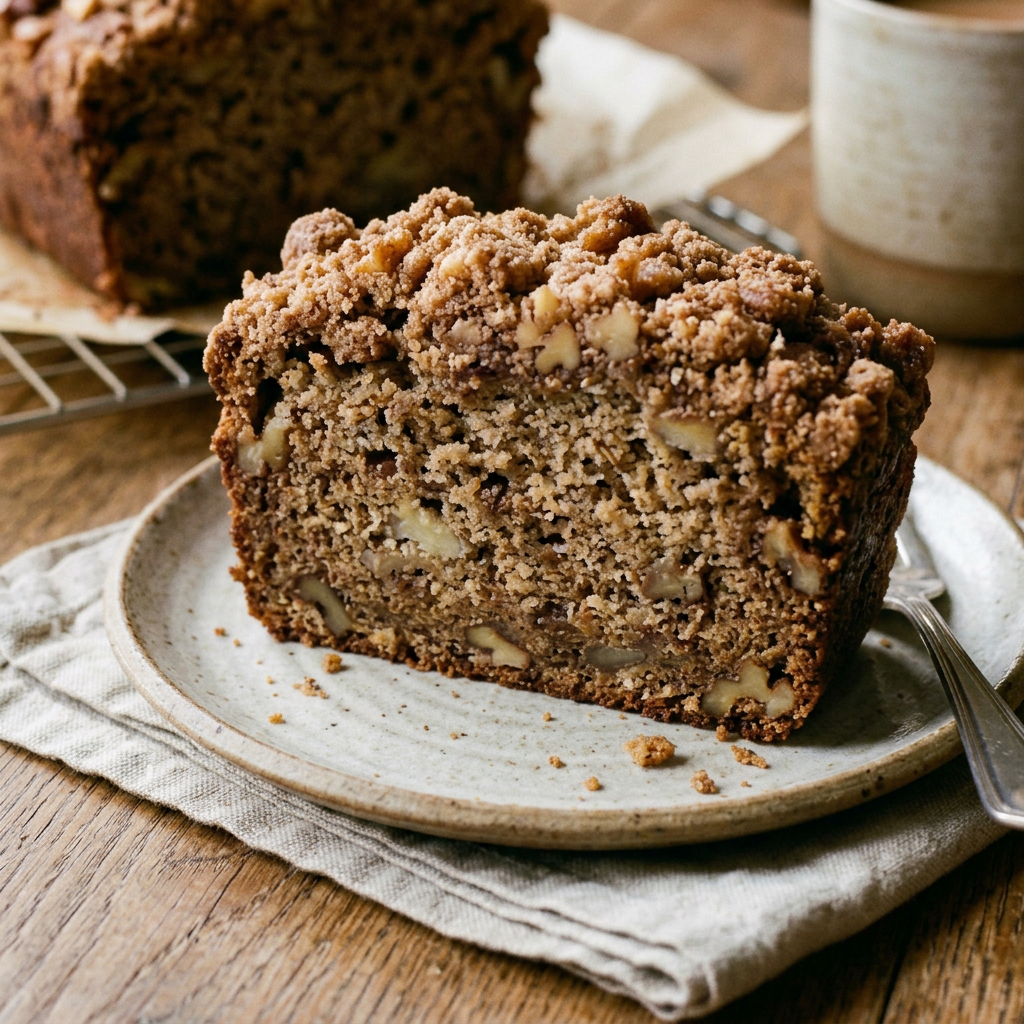
Banana Nut Bread

Slice of walnut banana bread with crumb topping beside a cup of coffee
A crumb-topped slice of walnut banana bread is served alongside coffee in a cozy kitchen setting.

Banana Nut Bread recipes are everywhere, and most are delicious. But this one is truly a standout! I discovered it about 10 years ago, and it has been my favorite ever since. Each slice is moist, wonderfully dense, and bursting with intense banana flavor. Toasted walnuts or pecans add a satisfying crunch, while the cinnamon streusel topping delivers the perfect sweet, buttery finish.

Ingredients:

  • ¾ cup butter, softened
  • 1 8oz package of cream cheese, softened
  • 2 cups of sugar
  • 2 large eggs
  • 3 cups of all-purpose flour
  • ½ teaspoon baking powder
  • ½ teaspoon baking soda
  • ½ teaspoon salt
  • 1-1/2 cups mashed ripe bananas (about 4 with dark spots)
  • 1 cup chopped toasted walnuts or pecans
  • ½ teaspoon vanilla extract

Process:

  1. Beat butter and cream cheese with an electric mixer until fluffy
  2. Gradually add sugar, beating until light and fluffy
  3. Add eggs one at a time, beating until just blended after each addition
  4. COMBINE flour and next three ingredients
  5. Gradually add butter mixture at low speed until blended
  6. Add bananas, vanilla, and nuts
  7. Spoon batter into two greased and floured 8 x 4-inch bread pans
  8. Top with streusel topping
  9. Bake at 350°F for 1 hour, or until a toothpick inserted in the center comes out clean and the sides pull away from the pan.
  10. Cool pans on a wire rack for 10 minutes and remove from pan
  11. Cool completely before slicing

STREUSEL TOPPING

Mix ½ cup firmly packed brown sugar, ½ cup chopped toasted nuts, 1 tablespoon melted butter, 1 tablespoon flour, and 1/8 teaspoon ground cinnamon. Sprinkle the mixture over the batter before baking. If the top browns too quickly, cover it with foil for the last 15 minutes.

Fruit Tart

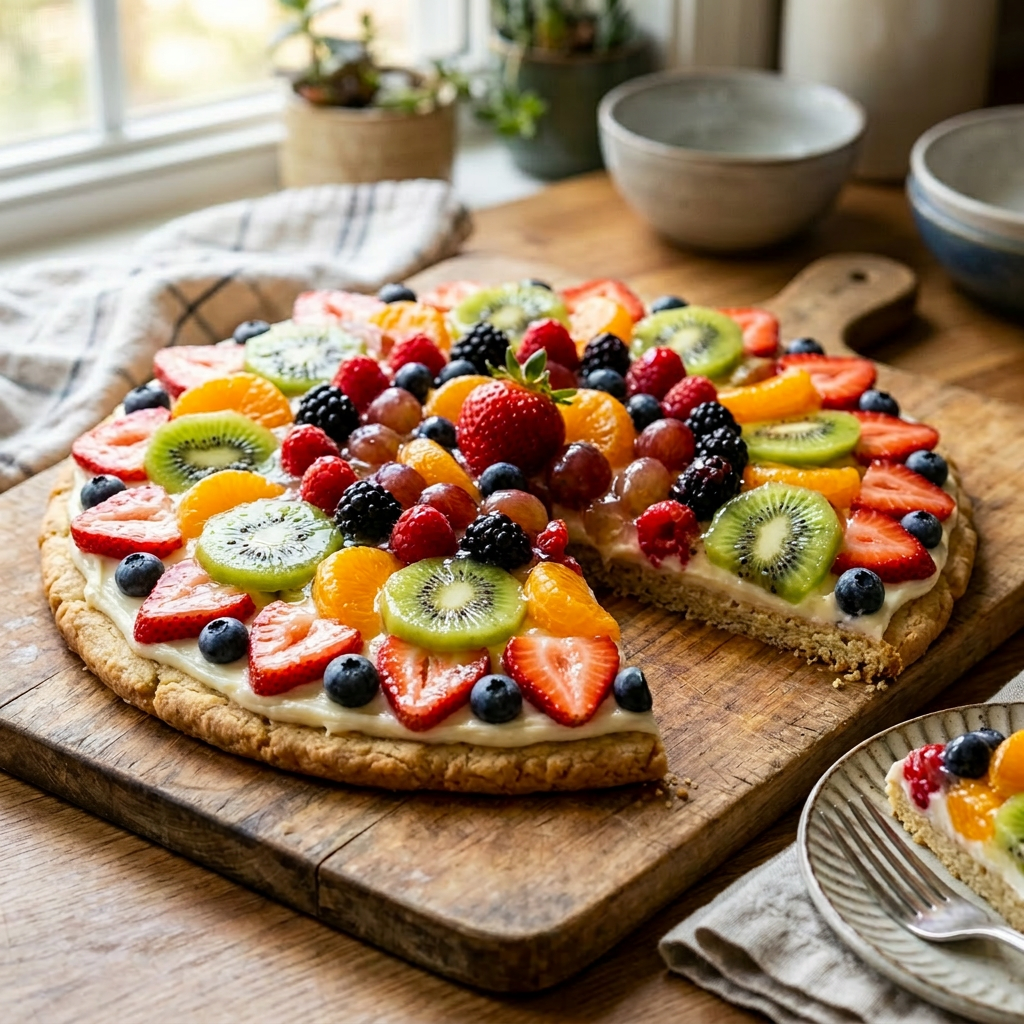
fruit pizza with strawberries, kiwi slices, blueberries, blackberries, raspberries, grapes, and mandarin orange segments on creamy base
A vibrant fruit pizza topped with assorted fresh berries and kiwi on a wooden board

Perfect for summer get-togethers, this dazzling fruit pizza steals the show and won’t stress you out in the kitchen. Pick fruits that slice and bite easily—think juicy but not soggy—and choose varieties that stay bright instead of browning. Mix colors and shapes for a playful, eye-catching layout: berries, sliced peaches, kiwi, strawberries, bananas, mandarin segments and a dollop of passion fruit all work wonders. Gently press each piece into the cream cheese layer so it stays put while you admire your masterpiece. The mix of textures and flavors keeps every bite exciting, from the creamy base to the burst of fresh fruit. For the best crunch and visual pop, assemble the fruit pizza the same day you serve it. Invite friends, let everyone grab a slice, and watch the compliments roll in—this is one dessert that looks as fun as it tastes!

Ingredients

  • 1 package (18oz) refrigerated sugar cookie dough
  • ½ cup granulated sugar
  • 1 egg
  • 1 8-oz package of cream cheese
  • ¼ cup of sour cream
  • 1-1/2 teaspoons of pure vanilla extract

For Glaze

  • 1 cup of clear fruit juice such as apple or white grape juice
  • ¾ cup granulated sugar
  • 2 ½ teaspoons cornstarch
  • 1 teaspoon lemon juice

Process

  1. Preheat oven to 350°F
  2. Unroll the refrigerated sugar cookie dough.
  3. Begin flattening out the dough onto a 12” pizza pan, or 9″ x 13″ baking pan with raised edges.
  4. Work the dough until it is spread out to the outer edges of the pan.
  5. Bake until lightly brown, about 12 – 15 minutes.
  6. Remove from oven, allow it to cool completely

Filling

  1. With an electric mixer, in a medium bowl combine sugar and egg, beat until sugar is dissolved.
  2. Add cream cheese, sour cream and vanilla, beat until creamy. Add more sour cream if filling is too stiff to spread.
  3. Spread filling on cookie crust.
  4. Start in the center of the pizza and arrange the fruit outward in a circle or create any pattern you like.

Glaze

  1. In a small saucepan over medium heat, add fruit juice, sugar, cornstarch, and lemon juice. Bring to a boil, then cook, stirring constantly, until glaze is thick (should stick to back of a spoon), about 5 to 7 minutes.
  2. Remove saucepan from heat and allow glaze to cool while assembling fruit pizza.
  3. Pour fruit juice glaze on top of fruit pizza, making sure to cover all of fruit
  4. Refrigerate glazed fruit pizza for at least 1 hour before slicing.

Raspberry Tiramisu

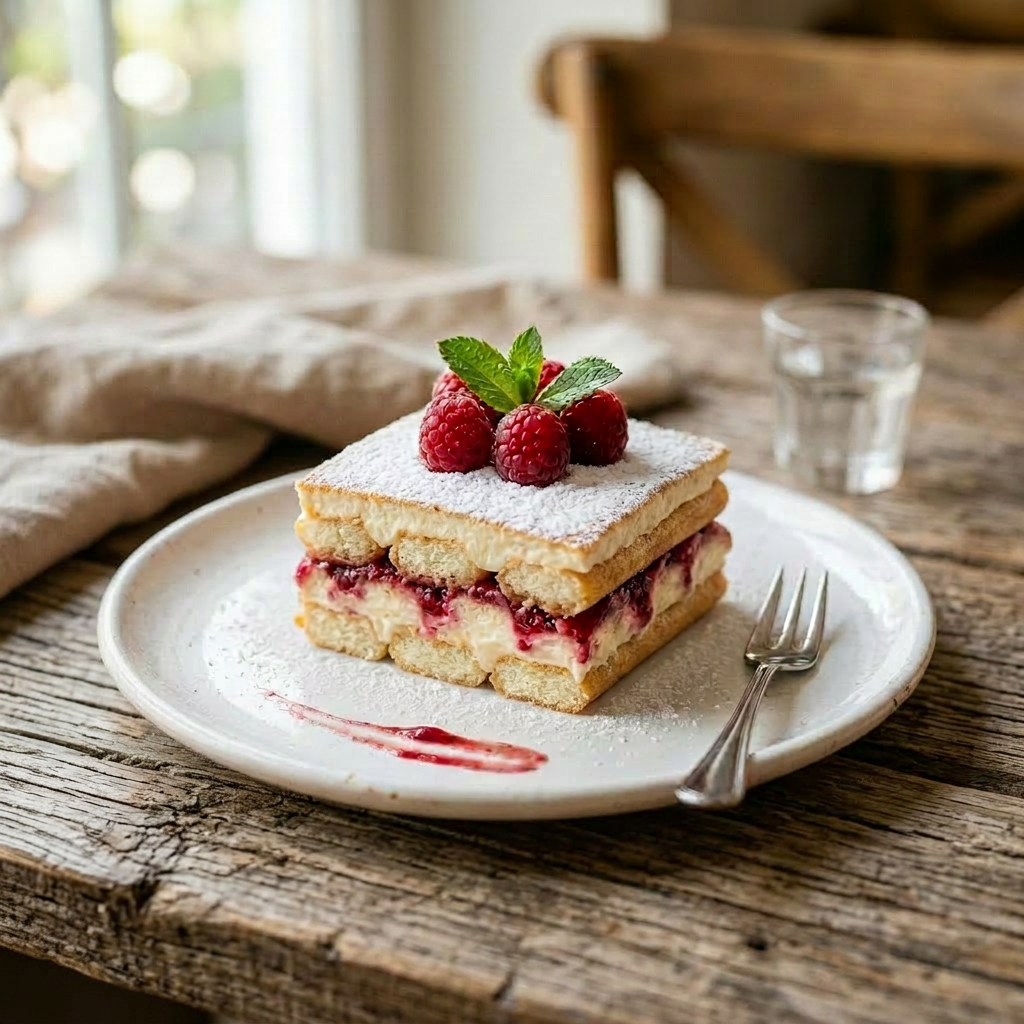
Slice of tiramisu with raspberries and mint on plate with fork
A slice of raspberry tiramisu topped with fresh raspberries and mint leaves.

Raspberry tiramisu offers a bright, fruity twist on the classic Italian dessert. Layers of espresso-soaked ladyfingers are replaced or complemented by raspberry syrup and fresh berries, while mascarpone remains lusciously creamy. The result is light, tangy, and elegantly sweet—a perfect finish to a celebratory meal or a special occasion dessert to share with loved ones.

Ingredients

  • 1 cup of seedless raspberry jam
  • 6 tablespoons orange liqueur (recommended: Grand Marnier)
  • 1 pound mascarpone cheese, at room temperature
  • 1 cup of heavy whipping cream
  • 1/4 cup of sugar
  • 1 teaspoon pure vanilla extract
  • 28 soft ladyfingers or 2 12-ounce pound cakes, cut into 3″ x 1″ x 1″ x 1/2-inch thick pieces
  • 3 pints of fresh raspberries (about 3 3/4 cups total)
  • Confectioners’ sugar, for serving

Process

  1. Whisk the jam and 4 tablespoons of the orange liqueur in a small bowl to blend.
  2. Combine the mascarpone and remaining 2 tablespoons of orange liqueur in a large bowl to blend.
  3. Beat heavy whipping cream with sugar and vanilla using an electric mixer until soft peaks form. Use a large bowl and stop when peaks hold.
  4. Gently stir 1/4 of the whipped cream into the mascarpone using a large rubber spatula to loosen the mixture. Then fold in the remaining whipped cream until the filling is smooth and even.
  5. Line the bottom of a 13 x 9 x 2-inch glass baking dish or other decorative serving dish with half of the ladyfingers.
  6. Layer the dessert by spreading half the jam over the ladyfingers. Spoon half the mascarpone mixture on top, then add half the raspberries. Repeat the same sequence with the remaining ladyfingers, jam, mascarpone, and raspberries until assembled.
  7. Cover and refrigerate for at least 3 hours or overnight.
  8. Dust with the confectioners’ sugar and serve.

Ambrosia Fruit Salad

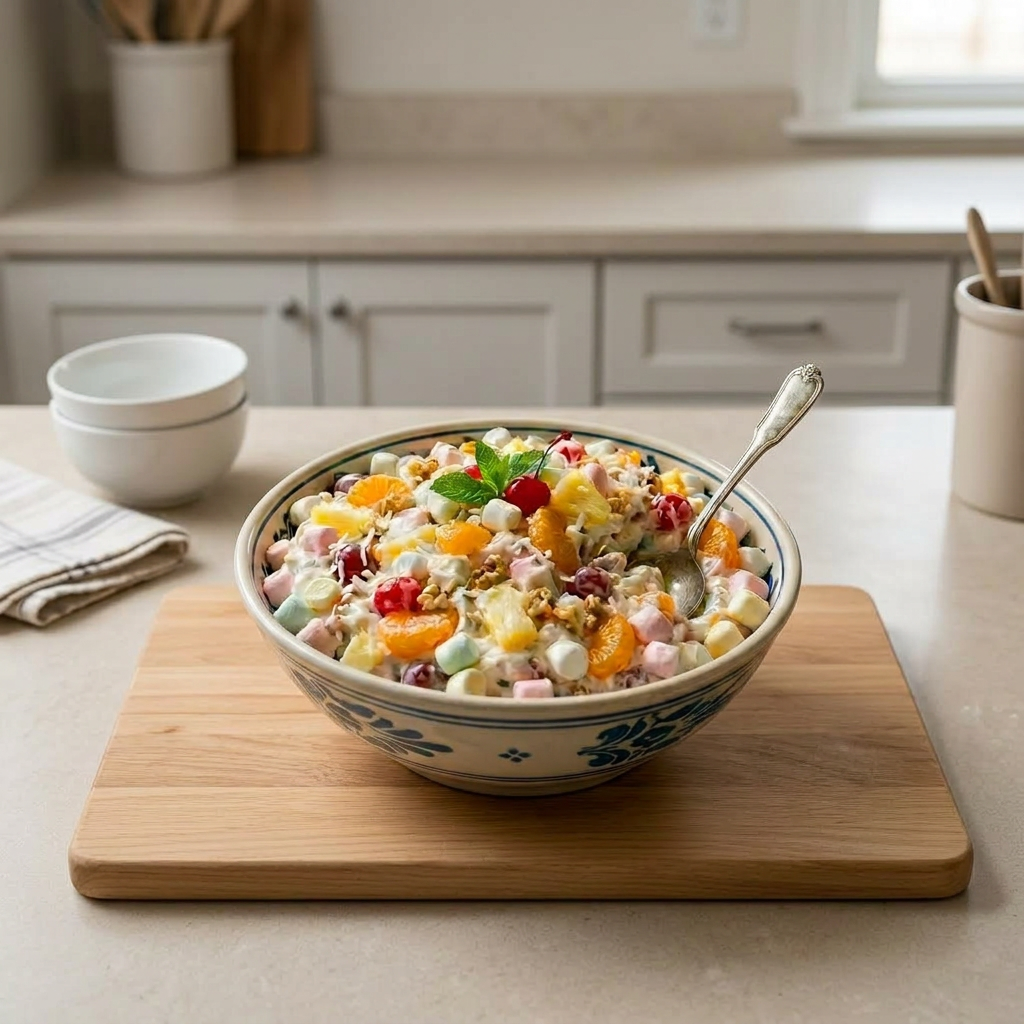
Place ambrosia in simple neutral kitchen setting

Dive into a playful summer salad pitch! This Ambrosia remix swaps sour cream for tangy Greek yogurt, then tosses in strawberries and blueberries for bright color and punchy texture. Try colored mini-marshmallows or toasted coconut for whimsy, or a splash of citrus to brighten flavors—happy experimenting!

Ingredients

  • 2 cans of pineapple tidbits
  • 2 cans of mandarin oranges
  • 1/2 cup of blueberries
  • 1 cup of sliced strawberries
  • 1 12-ounce container of Cool Whip (or fresh vanilla bean whipped cream)
  • 1 8-ounce container plain or vanilla Greek yogurt
  • 1 bag of mini marshmallows, either plain or colored
  • ½ bag of coconut

Process

  1. Mix all ingredients together and refrigerate for at least 2 hours to let the flavors blend.

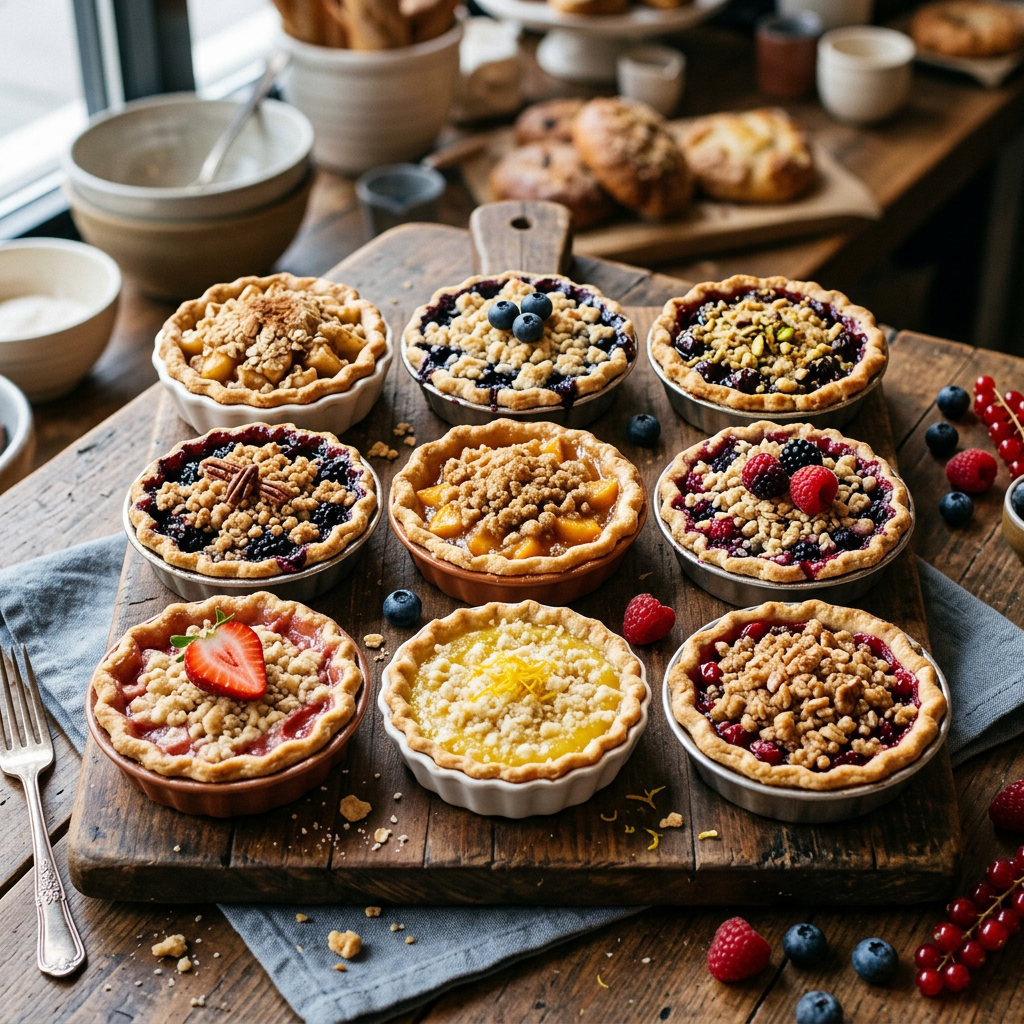
Crumb Toppings for your Baked Goods

Nine different homemade mini fruit pies with various toppings on a wooden board
a variety of crumb toppings for desserts

Imagine a tasty treat called a crumble, also known as a brown betty. It comes from Britain and is now enjoyed worldwide. This dish can be sweet or savory, but the sweet version is most popular. Its history dates back to American cuisine during European colonization. The magic happens when it’s baked until the topping becomes crispy. It is often served warm with cooked fruit, custard, cream, or ice cream, making it a perfect cozy dessert. I enjoy trying different toppings, like toasted coconut, chocolate chips, or raw coconut, to add extra flavor. Whether you want a comforting dessert or a savory snack, crumble toppings are a fun way to improve your recipes. I’ve collected creative topping ideas to inspire your cooking. Get ready to enjoy a crispy, delicious treat that is both nostalgic and exciting—happy baking!

#1 BASIC CRUMB TOPPING

Ingredients

  • 1 1/2 cups of all-purpose flour
  • 3/4 cup light-brown sugar
  • 1/3 cup granulated sugar
  • 1/4 teaspoon salt
  • 1/4 teaspoon cinnamon
  • 1 1/2 sticks chilled butter, cut into pieces

Directions

  1. In a bowl, mix flour, light-brown sugar, granulated sugar, salt, and cinnamon.
  2. Cut chilled butter into pieces.
  3. Use a pastry cutter or fork to mix the butter into the sugar until it forms large crumbs.
  4. Refrigerate until ready to use.

#2 FRENCH CRUMB TOPPING:

Ingredients

  • 1/3 cups of chilled butter
  • 1/3 cups of brown sugar
  • 3/4 cups of all-purpose flour
  • 1/2 cup of chopped nuts

Directions

  1. Mix sugar, flour, and nuts together.
  2. Cut in butter with a fork or pastry cutter until blended.
  3. Refrigerate until ready to use.


#3 WALNUT CRUMB TOPPING:

Ingredients

  • 1/2 cup all-purpose flour
  • 3/4 cup walnuts, chopped
  • 1/4 cup packed dark brown sugar
  • 1/4 teaspoon sea salt  
  • 4 tablespoons unsalted butter, at room temperature

Directions

  1. In a medium bowl, stir together flour, walnuts, brown sugar, and salt.
  2. Cut in butter with a fork or pastry cutter until blended.
  3. Refrigerate until ready to use.

#4 OAT CRUMBLE

Ingredients

  • 1 1/2 cups old-fashioned rolled oats
  • 3/4 cup pecans or almonds, chopped
  • 1/2 cup brown sugar
  • 1/3 cup whole-wheat flour or all-purpose flour
  • 3/4 teaspoon ground cinnamon
  • 5 tablespoons canola oil

Directions

  1. Mix dry ingredients together, then stir in canola oil.
  2. Mix with a spoon until the mixture resembles coarse crumbs.
  3. Refrigerate until ready to use.

#5 BAKED CRUMB TOPPING

Ingredients

  • ½ cup Brown sugar
  • ½ cup flour
  • ¼ cup chilled butter
  • ¼ cup of nuts, coconut, flaxseed, or sunflower seeds (all optional but make great texture)

Directions

  1. Preheat oven to 350°F. degrees
  2. Mix ingredients together; it should stick together and form crumbs.
  3. Spread the mixture onto a baking sheet lined with parchment paper.
  4. Bake for 20 minutes.
  5. Crumble any pieces that are clumped together and put the crumbs on everything in sight!

Cook’s Notes:

Add any of the following ingredients to your crumb toppings for extra flavor or texture.

  • Nuts
  • Coconut
  • Flax seed
  • Sunflower seeds
  • Cinnamon
  • Cardamom
  • Toffee
  • Chocolate chips
  • Peanut butter chips
  • Cream cheese chunks
  • Shredded cheddar cheese (great on apple anything)
  • M & M’s
  • Drizzle your crumb topping with caramel sauce, and sprinkle lightly with sea salt.

The sky is the limit where your dessert is concerned.

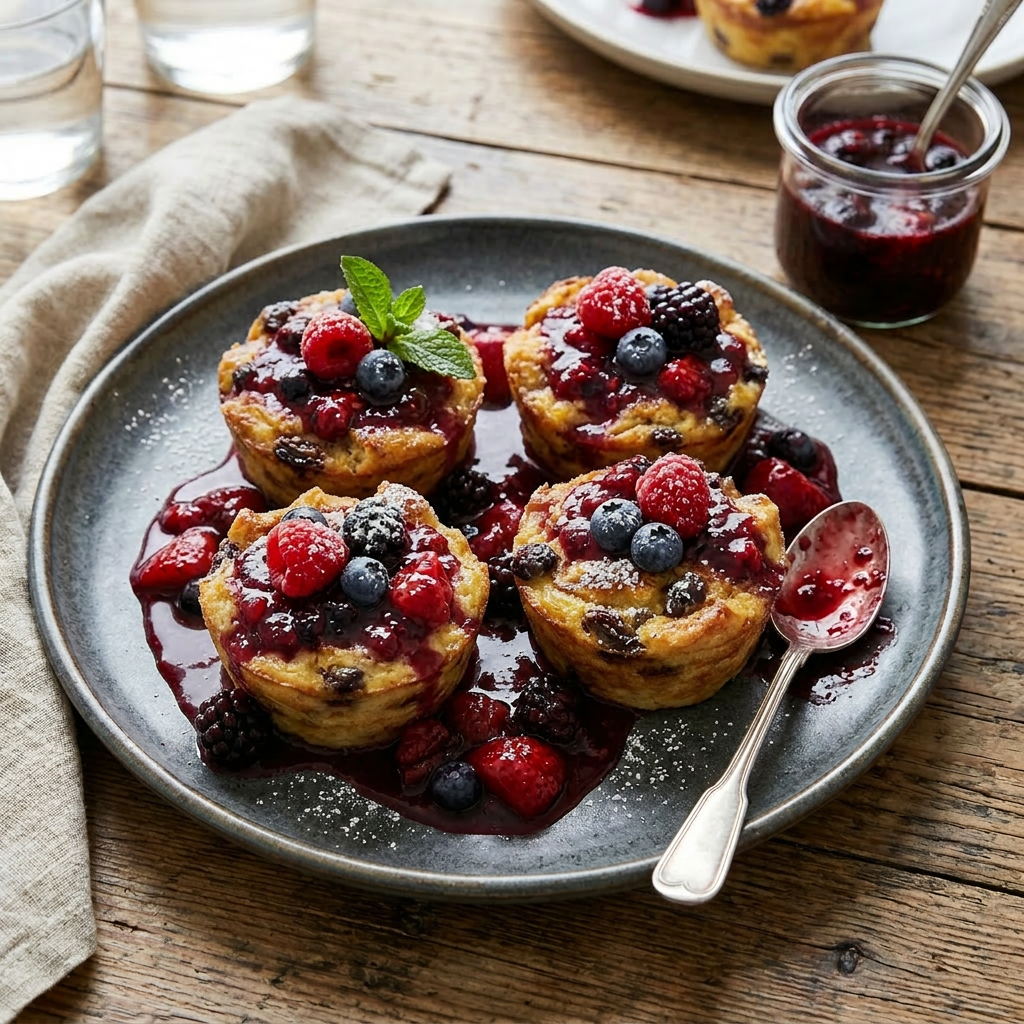
Mini Fresh Berry Bread Puddings

Four square desserts with mixed berries and berry sauce on a round gray plate with a spoon
Fresh Berry Bread Puddings

Imagine a dessert that’s as fun to make as it is delicious to eat—welcome to the world of bread pudding! This treat has a rich history, dating back centuries when clever cooks needed to rescue stale bread from the trash. Instead of wasting it, they turned it into hearty, flavorful dishes, both savory and sweet. Today, bread pudding has evolved into a luxurious delight, often made with fancy breads like brioche and infused with indulgent ingredients such as vanilla beans, bourbon, Gruyère cheese, or crunchy pecans. It’s a versatile dessert that can be dressed up with luscious sauces or fresh fruit, making every bite a delightful experience. Whether you’re reminiscing about childhood or impressing guests with a gourmet twist, bread pudding offers a perfect blend of history, comfort, and elegance. So, gather your ingredients and get ready to create a fun, flavorful masterpiece that celebrates both tradition and decadence.

Makes 6

Ingredients

  • 5 cups of mixed fresh berries, such as blackberries, blueberries, and raspberries (about 3 pints)
  • 2 tablespoons fresh lemon juice
  • 2 tablespoons of water
  • 1 vanilla bean split lengthwise
  • 1/2 cup of sugar
  • Pinch of salt
  • 18 thin slices of white sandwich bread (Challah bread can be used; roll out a slice to make thin)

Directions

  1. In a saucepan, cook berries, water, and lemon juice over medium heat until berries release their juices but still hold their shape, about 2 minutes. Slice a vanilla pod down the center and scrape the beans; add the beans to the berry mixture. Stir in sugar and salt; cook until the sugar is dissolved, 3 to 5 minutes. Strain the sauce into a bowl through a sieve or colander; do not discard the berries. Set both aside to cool.
  2. Take a piece of plastic wrap that is 6 inches longer than the cupcake tin. Press it into the cups of the tin. Alternatively, place another muffin tin on top of the plastic wrap to help press it into the cups.
  3. Using a 2-3/4-inch cookie cutter, cut six rounds from the bread slices and set one round in the bottom of each muffing tin.
  4. Using a smaller 2-1/4-inch cookie cutter, cut twelve rounds from the bread and set aside.
  5. Pour 1 tablespoon of sauce into each cup; add 1 tablespoon of reserved cooked berries. Top with smaller bread rounds; add another tablespoon each of sauce and berries. Make another layer of bread, sauce, and berries; top with remaining bread rounds. Press down firmly with the bottom of a glass.
  1. Cover the puddings with plastic wrap. Place a baking sheet on top and add a heavy skillet to weigh it down. Keep it in the refrigerator for at least 4 hours.
  2. To serve, pull up the plastic wrap, and gently unmold each pudding onto plates; drizzle with leftover sauce.

Cook’s Note

Using a cupcake tin lined with plastic wrap makes it easy to form, transport, and unmold the chilled puddings. Spray the tins with cooking spray to help the plastic wrap stay in place.

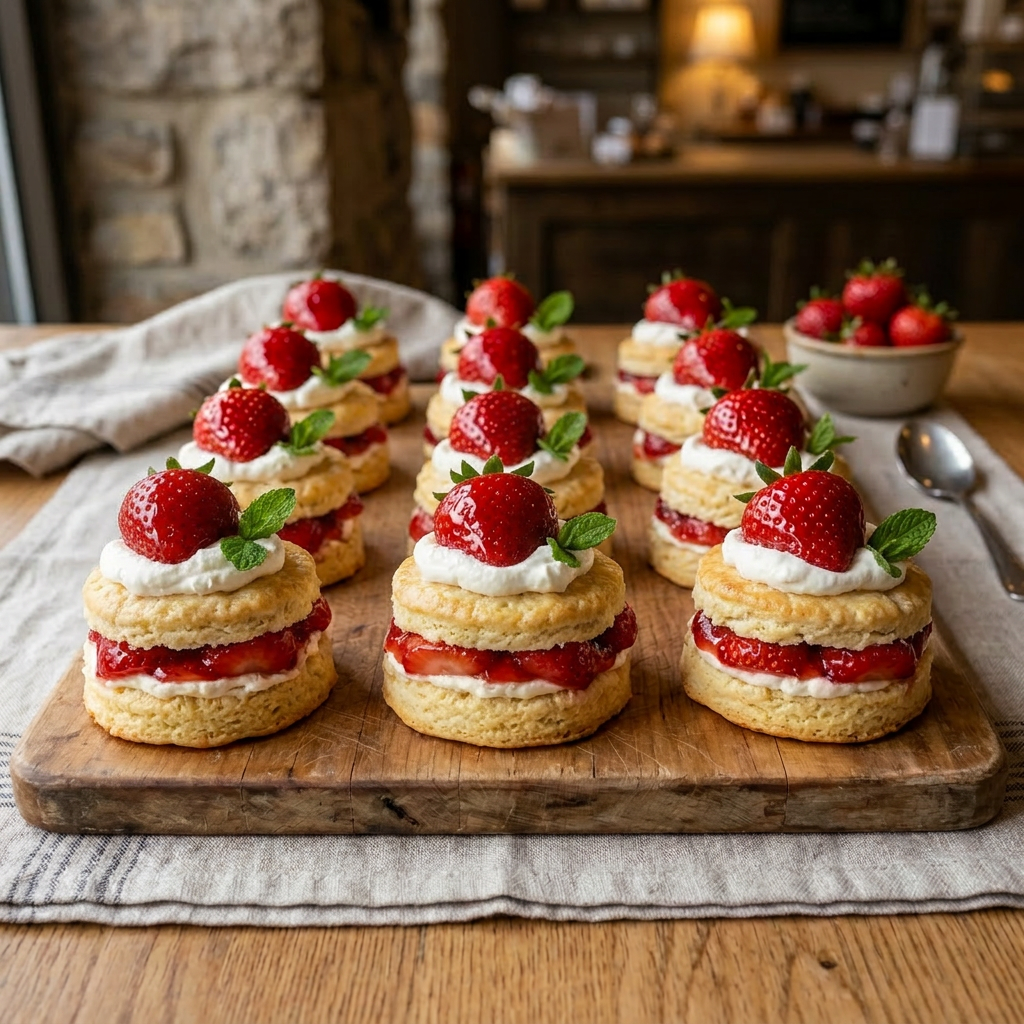
Classic Strawberry Shortcake

Fresh strawberry shortcakes topped with whipped cream and mint leaves on a wooden board
Delicious fresh strawberry shortcakes topped with whipped cream and mint leaves.

This refreshing old-fashioned recipe for Strawberry Shortcakes is a delightful dessert that combines the sweetness of ripe strawberries with the light, fluffy texture of freshly baked shortcakes. This classic treat is perfect for summer gatherings, picnics, or any occasion where a cool, fruity dessert is desired. The key to a perfect strawberry shortcake lies in selecting fresh, juicy strawberries, which are sliced and often lightly sweetened to enhance their natural flavor. The shortcakes themselves are made from tender biscuit-like dough, baked until golden, then split open to hold the luscious strawberries and whipped cream. For an added touch of freshness, some recipes incorporate a hint of lemon zest or a splash of vanilla into the shortcake batter. This dessert is not only visually appealing with its vibrant red strawberries and fluffy layers but also offers a harmonious balance of sweetness and acidity.

Ingredients

Filling

  • 6 cups of fresh strawberries, sliced
  • ½ cup sugar
  • 1 teaspoon vanilla extract

Whipped Cream

  • 1 cup heavy whipping cream
  • ¼  cup of powdered sugar
  • 1 teaspoon of vanilla extract

Biscuits

  • 2-3/4 cups of all-purpose flour
  • ¼ cup sugar
  • 4 teaspoons baking powder
  • 3/4 cup of cold butter, cut up
  • 2 large eggs, lightly beaten
  • 1 (8-oz.) container of sour cream
  • 1 teaspoon vanilla extract

Preparation

  1.  Combine strawberries, 1/2 cup sugar, and vanilla extract. Cover and chill in the refrigerator for about 2 hours.
  2.  Beat whipped cream at medium-high speed with an electric mixer until foamy.
  3. Gradually add powdered sugar and vanilla, beating until stiff peaks form. Note: do not overbeat or the whipped cream will become butter! Cover and chill in the refrigerator until ready to use.

Biscuits

  1. Preheat oven to 450°F.
  2. Line a baking sheet with raised edges with parchment paper.
  3. Combine flour, sugar, and baking powder in a large bowl;
  4. Cut butter into the flour mixture with a pastry blender or two forks until crumbly.
  5. In a separate bowl, whisk together eggs, sour cream, and vanilla until blended
  6. Add to flour mixture, stirring just until dry ingredients are moistened.
  7. Drop dough into 10 mounds on an ungreased baking sheet; flatten each mound with the back of a spoon until about ¾ inch thick.
  8. Bake for 10 – 12 minutes until golden.

Presentation

  1. Cool on a wire rack for about 10 minutes. Cut shortcakes in half horizontally. Spoon half of the berries and whipped cream over the bottom layers.
  2. Replace the top layers and cover with the remaining strawberries and whipped cream.

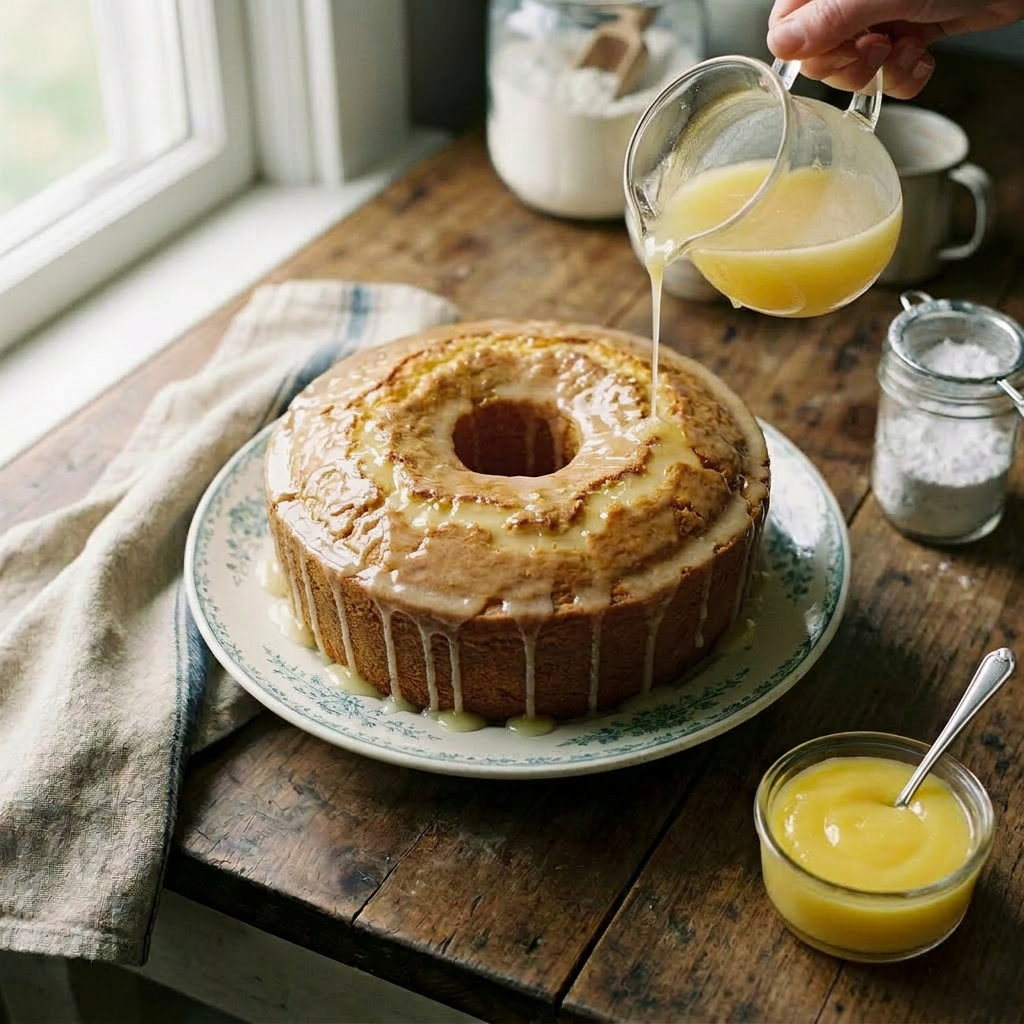
Sour Cream Pound Cake

Freshly baked bundt cake in a metal pan with a slice on a plate nearby
Glazed Sour Cream Pound Cake served with lemon curd

This is a dense pound cake crafted with a rich blend of ingredients. This variation incorporates sour cream and beaten egg whites, which contribute to its moistness and subtle tanginess, enhancing the overall taste experience. The use of sour cream not only adds a creamy richness but also helps in tenderizing the crumb, resulting in a dense yet soft texture that melts in the mouth. Beaten egg whites, on the other hand, introduce air into the batter, providing structure and stability without compromising the cake’s substantial density. This combination ensures the cake remains moist and flavorful, with a fine crumb that is ideal for pairing with fresh fruits, whipped cream, or a dusting of powdered sugar.

Ingredients

  • ½ pound of butter (2 sticks)
  • 3 cups granulated sugar
  • 1 cup sour cream
  • 6 large eggs – separated
  • 3 cups of all-purpose flour
  • ¼ teaspoon baking soda
  • ¼ teaspoon salt
  • 1 teaspoon vanilla extract
  • 1/2 teaspoon lemon extract
  • ½ teaspoon almond or coconut extract

Process

  1. Preheat oven to 300°F.
  2. Grease and flour a 9- or 10-inch tube pan.
  3. Separate the egg yolks from the whites and put the whites aside.
  4. In a mixer bowl, cream the sugar and butter until fluffy and white.
  5. Add egg yolks, one at a time, beating well after each addition.
  6. Add sour cream, mix thoroughly.
  7. Add flavorings.
  8. The flour is added in two parts: add the first cup to this sour cream mixture.  (The remaining amount with the baking soda and salt is added later).
  9. In a clean bowl, beat egg whites until stiff peaks form (do not over-beat).
  10. Fold egg whites into the sour cream mixture.
  11. Lastly, stir in remaining dry ingredients (flour, baking soda, salt).
  12. Turn into a greased tube pan.
  13. Bake 1 to 1-1/2 hours (or more) until a pick inserted comes out clean.