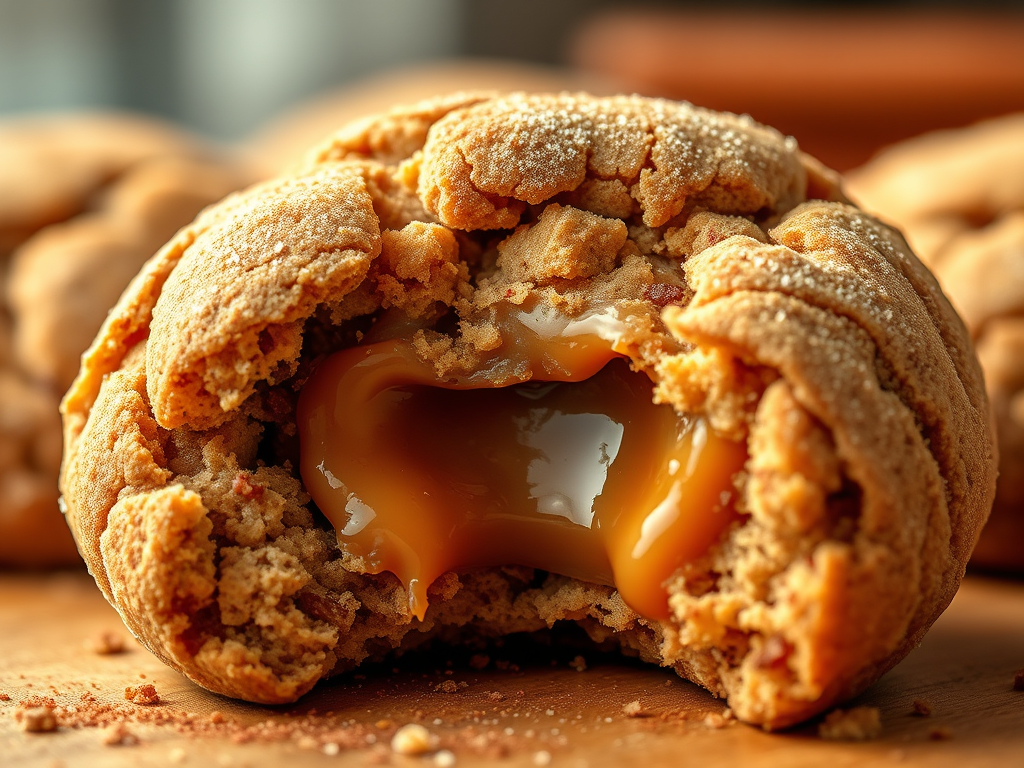
Tag Archives: cookies

Whoopie Pies

The history of Whoopie Pies is an interesting part of American food culture, mainly in the Northeastern U.S. They likely started in the early 1900s, possibly in Pennsylvania or Maine. The name “Whoopie” may come from children’s exclamations of joy or surprise when discovering the sweet filling inside. These treats have become a beloved regional specialty, reflecting local culinary traditions and history.

Cookie Ingredients

  • 1 cup sugar
  • ½ cup shortening
  • 1 egg
  • 1 egg yolk
  • 2 cups of all-purpose flour
  • 2/3 cup unsweetened cocoa powder
  • ¼ teaspoon salt
  • 1 teaspoon of baking soda
  • ½ cup hot water
  • 2/3 cup buttermilk

Cookie Process

  1. Preheat oven to 350°F. Line 2 cookie sheets with parchment paper.
  2. Beat together sugar and ½ cup shortening at high speed with a stand mixer until fluffy.
  3. Add the egg and egg yolk and beat until incorporated.
  4. In a separate bowl, stir together the flour, cocoa powder, and salt; set aside.
  5. Dissolve baking soda in the ½ cup of hot water; cool slightly.
  6. Add the flour mixture, the soda mixture, and 2/3 cups of buttermilk alternately to the sugar, shortening mixture.
  7. Beat at a medium speed until well mixed.
  8. Drop batter by rounded tablespoonfuls 2 inches apart onto a parchment paper lined cookie sheet. Bake for 8 – 10 minutes.
  9. Cool cookies on a cookie rack. Yields 48 cookies.

Filling Ingredients

  • 2 cups sifted powdered sugar
  • ½ teaspoon of meringue powder
  • 1 teaspoon vanilla
  • ½ cup shortening (such as white Crisco)
  • ¼ cup butter

Filling Process

  1. In a stand mixer, add shortening and butter, vanilla, 1 teaspoon of water and beat at high speed until light and fluffy.
  2. Turn mixer to low and gradually add powdered sugar and meringue powder.
  3. Beat on high until mixture is light and fluffy. If mixture is too thick to spread, add 1 teaspoon of water at a time, until it is spreading consistency.
  4. Spread some filling on the flat side of half the cookies, top with the remaining cookies, flat side down.
  5. Store in the refrigerator.

Fruit Pizza Dessert

Perfect for any summer gathering, this impressive dessert is sure to wow your guests. This dazzling fruit pizza is a summer showstopper—and surprisingly easy to make!

Choosing the right fruit for a fruit pizza is important for both appearance and taste. The fruit should be soft enough to cut and bite easily, but not too watery. It should also resist browning to keep the pizza looking fresh. To make the presentation attractive, select fruits that vary in color and shape. When placing the fruit on the cream cheese layer, press gently to help it stick. Popular options include different berries, sliced peaches, bananas, canned mandarin oranges, strawberries, kiwi, and passion fruit. These fruits not only look appealing but also add a variety of flavors, making fruit pizza more delicious and visually attractive.

For the best texture and presentation, fruit pizza is best made the same day it’s served.

Crust
1 package (18oz) refrigerated sugar cookie dough

Preheat oven to 350°F.

  1. Unroll the refrigerated sugar cookie dough.
  2. Crumble dough into a 12” pizza pan, or 9″ x 13″ baking pan with raised edges.
  3. Work the dough until it is spread out to the outer edges of the pan.
  4. Bake until lightly brown, about 10 – 12 minutes. Remove from oven, cool completely.

Filling

  • 1/3 cup granulated sugar
  • 1 egg
  • 1 8oz cream cheese, room temperature
  • 1/4 cup of sour cream
  • 1 teaspoon vanilla

Glaze

Jelly: is used as a glaze for the fruit, it protects it from drying out or turning brown as well as giving it a healthy shine.

  • ½ cup of apple jelly, apricot jelly, orange marmalade or peach jelly make great options for glazing the fruit. Apple jelly is clear, allowing the fruit to stand out. Orange marmalade compliments the flavors of the fruit beneath.

Process

  1. With an electric mixer, in a medium bowl combine sugar and egg, beat until sugar is dissolved.
  2. Add cream cheese, sour cream and vanilla, beat until creamy. Add more sour cream if filling is too stiff to spread.
  3. Spread filling on cookie crust.
  4. Beginning in the center of the pizza begin adding fruit in a circular fashion until it fills the crust.
  5. Stir the jelly or marmalade until smooth and use a pastry brush or spoon spread on top of fruit. Note: if jelly or marmalade won’t smooth out by stirring, microwave for 20 seconds.
  6. Refrigerate 1 to 2 hours before serving.

The Science behind Chocolate Chip Cookies

This article was originally published on Facebook several years ago, the author is unknown. I wanted to share it on my website, www.KitchenMoxy.com for my own reference, and because the article is brilliant, and because science explains why there are so many different kinds of chocolate chip cookies, such as soft, chewy, overcooked, undercooked (the best), hard, and crispy. You might assume that everyone who makes chocolate chip cookies follows a similar recipe, but that is not the case. I have a recipe that I have used for 40 years, and my family always requests it when I bake cookies. This recipe results in cookies that are soft, chewy, and delicious. It includes a box of instant vanilla pudding mix and baking soda, but no baking powder. The article explains the science behind how these ingredients influence the cookie’s texture. I encourage you to experiment with different recipes and find your favorite type of cookie.

Here, relying on the experts’ help and based on the classic Nestle Toll House Chocolate Chip Cookie recipe:

  • Ooey-gooey: Add 2 cups more flour.
  • A nice tan: Set the oven higher than 350 °F. degrees (maybe 360°F.). Caramelization, which gives cookies their nice brown tops, occurs above 356°F. degrees.
  • Crispy with a soft center: Use 1/4 teaspoon baking powder and 1/4 teaspoon baking soda.
  • Chewy: Substitute bread flour for all-purpose flour.
  • Just like store-bought: Trade the butter for shortening. Note that this ups the texture but reduces some flavor; I suggest using half butter and half shortening.
  • Thick (and less crispy): Freeze the batter for 30 to 60 minutes before baking. This solidifies the butter, which will spread less while baking.
  • Cakey: Use more baking soda because it releases carbon dioxide when heated, which makes cookies puff up.
  • Butterscotch flavored: Use 3/4 cup packed light brown sugar (instead of the same amount of combined granulated sugar and light brown sugar).
  • Uniformity: If looks count, add one ounce corn syrup and one ounce of granulated sugar.

Note: Chilling the dough for at least 24 hours before baking deepens all the flavors.

Salted Caramel Cinnamon Cookie

An amazing cookie with a salted caramel finish. Add to your cookie menu for the holidays or just enjoy throughout the year for a special treat.

Ingredients

  • ½ cup butter
  • 3/4 cup of brown sugar
  • ¼ cup granulated sugar
  • ¼ teaspoon baking soda
  • ¼ teaspoon cream of tarter
  • ½ tsp cinnamon
  • 1 egg
  • ½ teaspoon vanilla extract
  • 1-1/2 cup of flour
  • ¼ teaspoon of sea salt
  • 1/2 cup caramel squares, cut into quarters.

Cookie Finish

  • ¼ cup granulated sugar
  • 2 teaspoons of ground cinnamon
  • Coarse Sea salt for sprinkling

Directions

  1. In a medium sized bowl, mix the flour, baking soda, cream of tartar, cinnamon, and set aside.
  2. To brown the butter, heat a medium saucepan to medium high heat. Add the sliced butter. It does not take long for the butter to begin browning on the bottom. When the butter begins to froth, watch carefully and stir. Once the butter turns light brown, remove from heat and let it cool to room temperature. The butter will burn fast, so don’t walk away.
  3. While the butter is cooling, cut the caramel squares into quarters and set aside
  4. In a stand mixer, combine the brown butter, brown sugar and granulated sugar. Mix until blended and smooth.
  5. Beat in egg and vanilla and mix until combined. Slowly add the dry ingredients until combined.
  6. Form the dough into a ball and cover with plastic. Chill in the refrigerator for at least 30 minutes or overnight.
  7. Once you are ready to bake preheat the oven to 350°F.
  8. Measure about 2 tablespoons of dough and roll into a ball, or use a cookie scoop.
  9. Flatten and place a quartered caramel square on top, wrap the cookie dough over the caramel and roll back into a ball.
  10. Mix ¼ cup sugar and cinnamon in a small bowl and roll each cookie in the mixture. Place on a parchment lined cookie sheet 2 inches apart.
  11. Flatten slightly with a fork, and sprinkle lightly with coarse sea salt
  12. Bake for 10 minutes, or until the edges turn light brown. The centers will be soft. Allow it to cool for 2-3 minutes and transfer to a wire cooling rack to cool completely.

Fruit Pizza Dessert

Fruit Pizza

Fruit Pizza Dessert

I’ve seen many recipes for this fruity dessert. I think this one is tastiest. It uses refrigerated sugar cookie dough for the base.  Just roll the cookie dough out, bake and add the rest of the ingredients. You can also make individual, miniature fruit pizzas using shortbread cookies.  Make them the day before, cover with plastic wrap, place in the refrigerator. The next day, the cookies will become soft from the filling and fruit, serve as is, delicious. Consider using all kinds of berries, sliced peaches (fresh or canned), bananas, canned mandarin oranges, strawberries, kiwi, passion fruit. A light ending to your meal.

Crust
1 package (18oz) refrigerated sugar cookie dough

Preheat oven to 350°F.

  1. Unroll the refrigerated sugar cookie dough.
  2. Begin flattening out the dough onto a 12” pizza pan, or 9″ x 13″ baking pan with raised edges.
  3. Work the dough until it is spread out to the outer edges of the pan.
  4. Bake until lightly brown, about 10 – 12 minutes. Remove from oven, allow to cool completely.

Filling

  • ½ cup granulated sugar
  • 1 egg
  • 1 8oz cream cheese
  • 1/4 cup sour cream
  • 1 teaspoon vanilla
  1. With an electric mixer, in a medium bowl combine sugar and egg, beat until sugar is dissolved.
  2. Add cream cheese, sour cream and vanilla, beat until creamy. Add more sour cream if filling is too stiff to spread.
  3. Spread filling on cookie crust.
  4. Beginning in the center of the pizza begin adding fruit in a circular fashion, or make your own design.
  5. Refrigerate until you are ready to eat.

Chewy Salted Caramel Cookie

An amazing cookie with a salted caramel finish. Add to your cookie menu for the holidays or just enjoy throughout the year for a special treat.

Ingredients

  • ½ cup butter
  • 3/4 cup of brown sugar
  • ¼ cup granulated sugar
  • ¼ teaspoon baking soda
  • ¼ teaspoon cream of tarter
  • ½ tsp cinnamon
  • 1 egg
  • ½ teaspoon vanilla extract
  • 1-1/2 cup of flour
  • ¼ teaspoon of sea salt
  • 1/2 cup caramel squares, cut into quarters.

Cookie Finish

  • ¼ cup granulated sugar
  • 2 teaspoons of ground cinnamon
  • Coarse Sea salt for sprinkling

Directions

  1. In a medium sized bowl, mix the flour, baking soda, cream of tartar, cinnamon, and set aside.
  2. To brown the butter, heat a medium saucepan to medium high heat. Add the sliced butter. It does not take long for the butter to begin browning on the bottom. When the butter begins to froth, watch carefully and stir. Once the butter turns light brown, remove from heat and let it cool to room temperature. The butter will burn fast, so don’t walk away.
  3. While the butter is cooling, cut the caramel squares into quarters and set aside
  4. In a stand mixer, combine the brown butter, brown sugar and granulated sugar. Mix until blended and smooth.
  5. Beat in egg and vanilla and mix until combined. Slowly add the dry ingredients until combined.
  6. Form the dough into a ball and cover with plastic. Chill in the refrigerator for at least 30 minutes or overnight.
  7. Once you are ready to bake preheat the oven to 350°F.
  8. Measure about 2 tablespoons of dough and roll into a ball, or use a cookie scoop.
  9. Flatten and place a quartered caramel square on top, wrap the cookie dough over the caramel and roll back into a ball.
  10. Mix ¼ cup sugar and cinnamon in a small bowl and roll each cookie in the mixture. Place on a parchment lined cookie sheet 2 inches apart.
  11. Flatten slightly with a fork, and sprinkle lightly with coarse sea salt
  12. Bake for 10 minutes, or until the edges turn light brown. The centers will be soft. Allow it to cool for 2-3 minutes and transfer to a wire cooling rack to cool completely.