Category Archives: Dessert

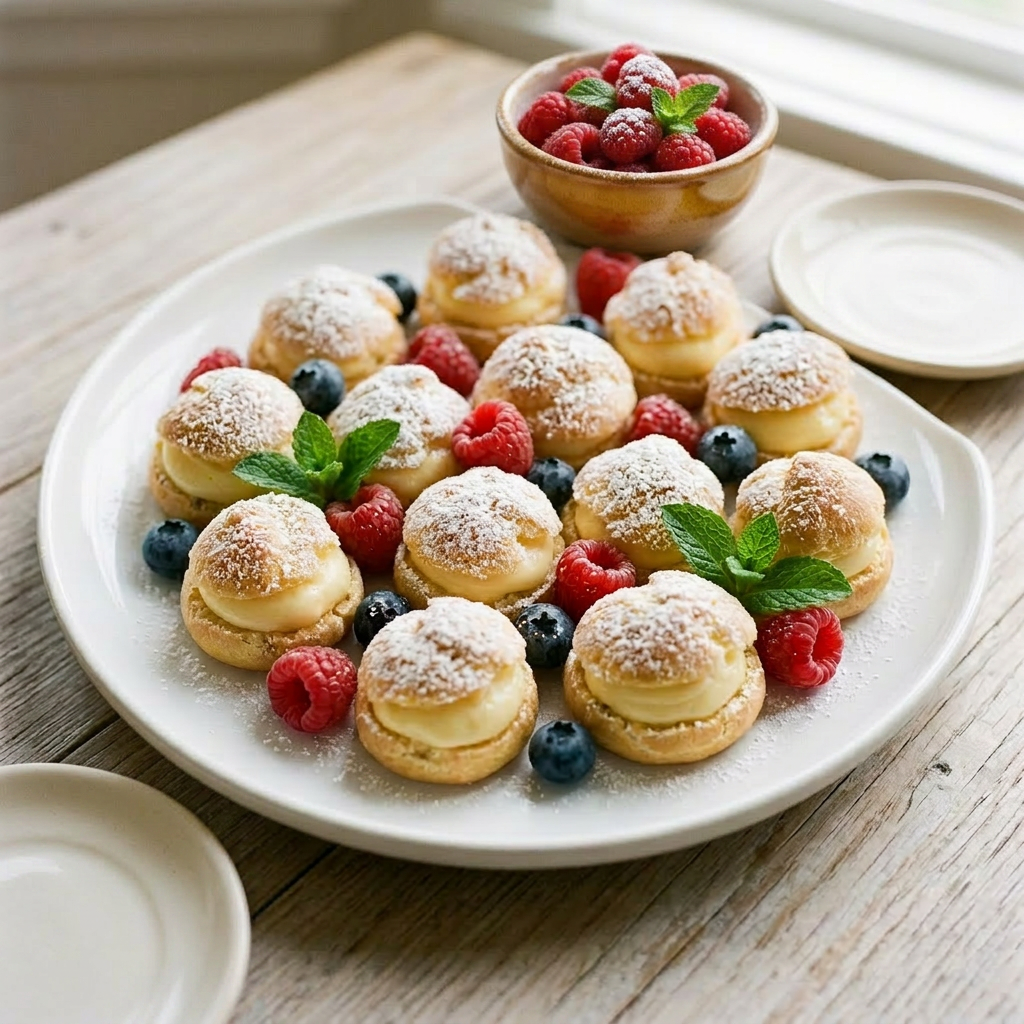
Cream Puffs with Mascarpone Whipped Cream Filling

Tray of small cream puffs filled with cream, topped with powdered sugar, raspberries, blueberries, and mint leaves
A tray of cream puffs dusted with powdered sugar, fresh raspberries, blueberries, and mint leaves

Old-fashioned cream puffs are a timeless dessert that evokes a sense of nostalgia and elegance. These delicate pastries are made from choux pastry, which is baked to achieve a light, airy, and crisp exterior. For Mother’s Day, cream puffs are an ideal choice for a light and airy dessert that can be both elegant and satisfying. Their fluffy interior and this creamy Mascarpone cheese whipped cream filling make them a perfect treat to celebrate the special occasion without feeling overly heavy. Additionally, cream puffs can be customized with various fillings and toppings, such as chocolate glaze, powdered sugar, or fresh berries.

Ingredients

Pastry

  • 1 cup of water
  • 1/2 cup of butter (4 ounces)
  •  1 cup of all-purpose flour
  •  1/4 teaspoon salt
  •  4 large eggs

Process

  1. Preheat the oven to 400°F.
  2. In a small bowl, whisk together the flour and salt; set aside.
  3. In a medium-sized saucepan, bring 1 cup of water to a boil.
  4. Add the butter. 
  5. When the butter has melted, add the flour mixture all at once and stir vigorously. 
  6. Continue stirring until the mixture forms a ball that doesn’t separate.
  7. Remove from the heat and cool slightly (about 1 minute).  Add the eggs, one at a time, beating after each one until the dough is smooth.
  8. Place spoonfuls of dough, about 2 inches apart, onto a baking sheet lined with parchment paper. Alternatively, put the batter into a pastry bag fitted with a round tip and pipe circles approximately 2 inches wide and 1 inch apart onto the baking sheet.
  9. Bake the puffs for about until they are golden brown and puffy, about 25 to 30 minutes.
  10. If the puffs are mini-sized, bake for about 17 to 20 minutes. 
  11. Remove the cream puffs from the oven and cool on a cooling rack.

Mascarpone Cheese Filling

  • 2/3 cup mascarpone cheese
  • 2/3 cup heavy whipping cream
  • 5 tablespoons powdered sugar
  • 2 teaspoons pure vanilla

Process

  1. In a chilled bowl, beat the Mascarpone cheese and vanilla until creamy.
  2. Add the heavy whipping cream, and beat until thick.
  3. Gradually add the powdered sugar, mix until fully incorporated.
  4. Beat mixture on high speed until thick and fluffy.
  5. Cut cooled puffs in half, and set the top half of the puff aside.
  6. Fill the bottom halves of the puffs with the cream mixture, then replace the tops.
  7. Drizzle with melted bittersweet chocolate or dust with powdered sugar.
  8. Store in the refrigerator until ready to serve.
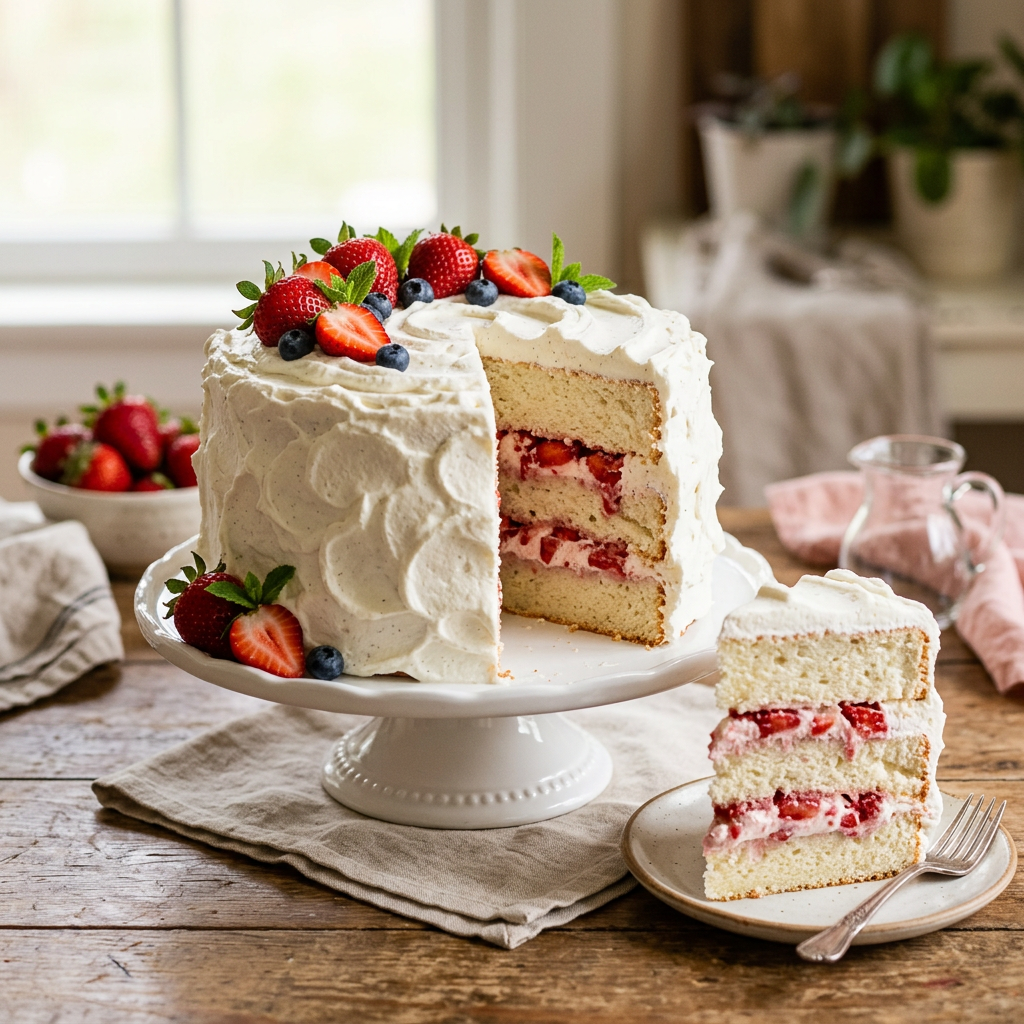
Angel Food Summer Fruit Cake

Layered vanilla cake with white frosting, strawberries, and blueberries on top
A beautifully decorated layered cake filled with strawberries and cream.

Experience the light and airy delight of our Angel Food Summer Fruit Cake, expertly layered with fresh seasonal fruit and luscious filling. This elegant dessert combines the fluffy texture of angel food cake with vibrant fruit toppings and a smooth filling, making it a perfect centerpiece for summer gatherings or a special treat. Its delicate sweetness and refreshing flavors are sure to please every palate.

Ingredients

  • 1 Angel Food Cake
  • 2 pints of fresh strawberries (see note below)
  • 1 Large container of Cool Whip
  • 1 regular-size box of instant vanilla pudding
  • 1 stick of butter (soft)
  • 2 cups of powdered sugar

Cake Filling

  1. In a mixer bowl, add 1 cup of milk to 1 regular-size box of instant vanilla pudding – beat for 2 minutes.
  2. Add half of the container of Cool Whip, blend the pudding mix and Cool Whip with a spoon, and refrigerate until ready to assemble the cake.
  3. Refrigerate the remaining Cool Whip to use for frosting.

Process

  1. Prepare cake according to box directions, cool completely.
  2. Slice the cooled cake into 2 layers.
  3. Slice strawberries into thin pieces.
  4. Spread half of the pudding filling onto the bottom layer.
  5. Spread sliced strawberries on top of the filling.
  6. Cover with the first layer of cake.
  7. Repeat the filling and strawberry layers, then place the top cake layer on and press gently to set.

Frosting

  1. Beat the butter until it becomes smooth and creamy.
  2. Add powdered sugar and mix until combined.
  3. Fold in the remaining half of the container of Cool Whip.
  4. Frost the sides of the cake and then the top. Decorate with sliced fruit.
  5. Keep cake refrigerated until ready to serve.

Note

You can use any fruit for this cake. The original recipe used canned mandarin oranges, sliced lengthwise.

  • Mandarin oranges (canned), sliced lengthwise
  • Strawberries
  • Blueberries
  • Blackberries
  • Any mix of the above

Bourbon Peach Cobbler

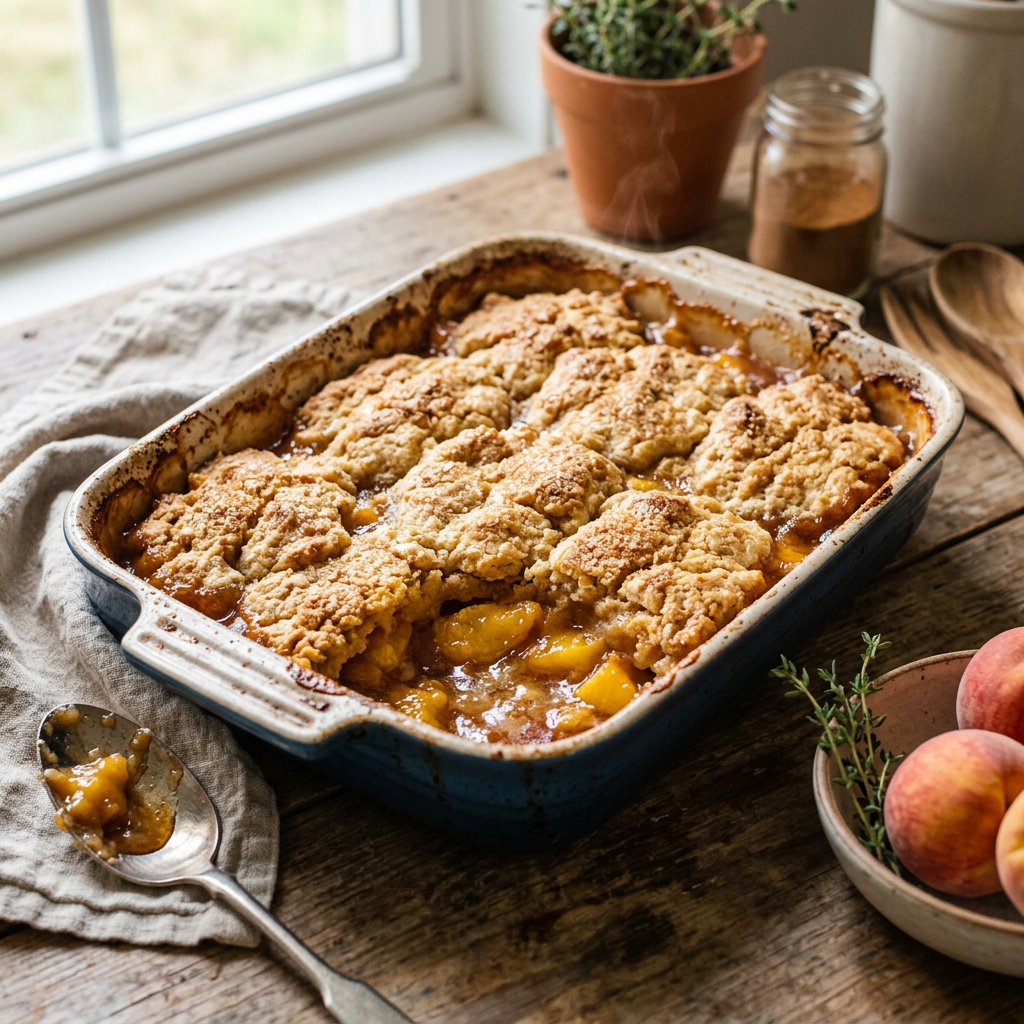
Baking dish with steaming peach cobbler and golden crust
A warm bourbon peach cobbler straight from the oven, ready to serve

Two of my favorite things, peaches and bourbon, are together in this wonderful recipe.  Peaches will be in season in a couple of months, and I look forward to enjoying them in my cereal, pies, and this cobbler.  Bourbon is in season all the time. What does good Bourbon taste like?  Flavor descriptors such as toffee, pralines, vanilla, and dried fruit describe the initial rush of flavors in a good, well-aged Bourbon. The charred oak barrels give Bourbon a distinctive, spicy, oak-firmness unique to American whiskeys. All this wonderful flavor in a sweet cobbler, who could ask for more? 

Note: While fresh peaches are always preferred, canned or frozen will work just as well.

CRUMBLE TOPPING

  • 4 tablespoons of butter
  • 1/2 cup rolled oats
  • 1/2 cup all-purpose flour
  • 1 pinch fine sea salt
  • 1 dash black pepper
  • 2 teaspoons of ground cinnamon
  • 2 teaspoons vanilla extract
  • 1/2 lemon (zest and set aside)
  • 1/2 cup of brown sugar
  • 1 tablespoon extra virgin olive oil

Directions for Crumb Topping

  1. Mix the crumb topping ingredients in a bowl with a fork or pastry cutter until the butter chunks are evenly incorporated into the dry ingredients. Refrigerate until ready to bake.

PEACH FILLING

  • 5 Large peaches, pitted and sliced
  • 1-1/2 Tablespoon of pure Maple Syrup
  • 1/2 lemon – juiced
  • 1/3 cup of dark brown sugar
  • 3 tablespoons butter (room temperature)
  • 2 tablespoons of olive oil
  • 3 teaspoons of ground cinnamon
  • 1 teaspoon of vanilla extract
  • ¼ teaspoon sea salt or kosher salt
  • ¼ teaspoon fresh ground black pepper
  • 1 ounce of fine bourbon

Process

Preheat oven to 375°F.

1.     In a bowl, combine peaches with the remaining ingredients and mix well.

2.     Layer in a pie plate.

3.     Cover with crumb topping.

4.     Bake for 30 – 40 minutes or until bubbly.

5.     Serve with vanilla bean ice cream and enjoy!

Vanilla Extract – Homemade

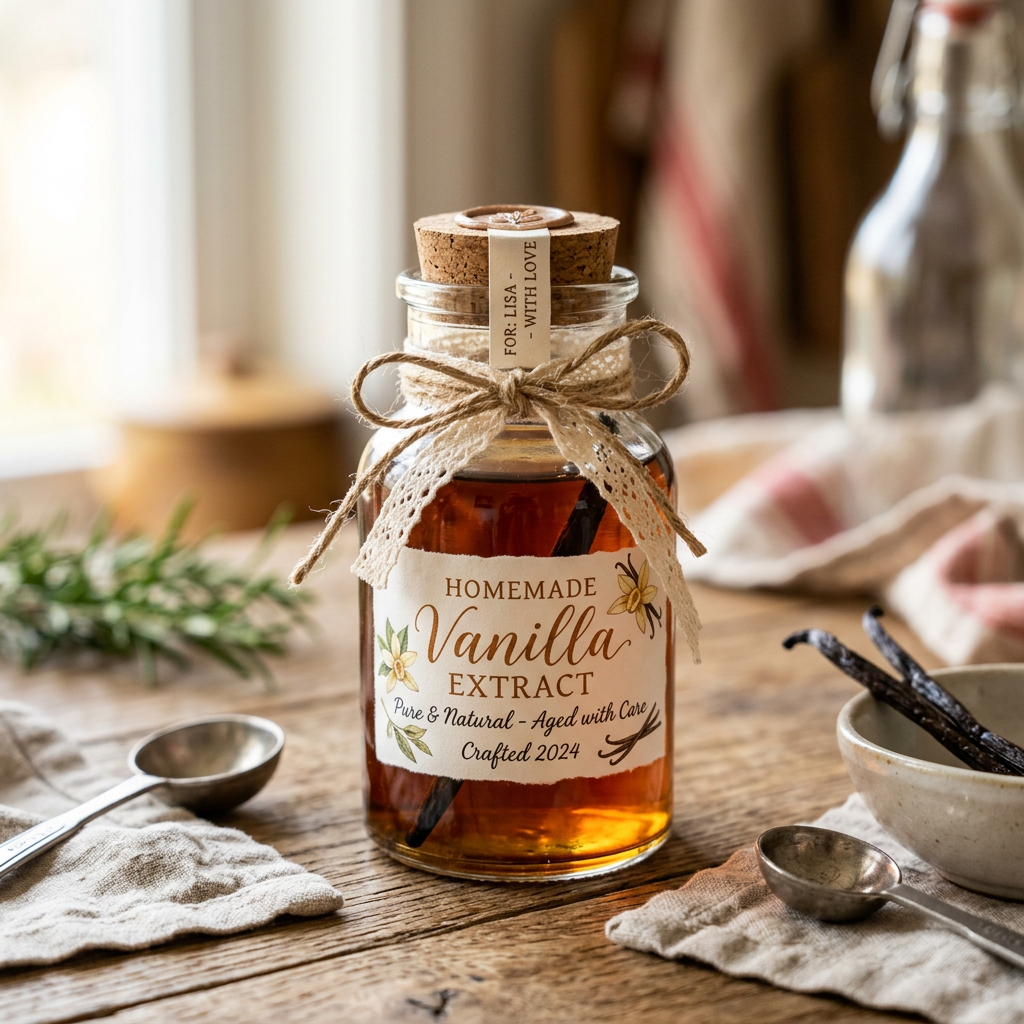
Glass jar of homemade vanilla extract with cork stopper and decorative label
A charming homemade vanilla extract jar tied with a rustic bow, perfect for gifting.

Ever wondered why bother making your own vanilla extract when store-bought options are so easy? Well, here’s the scoop: store prices for vanilla are all over the place, making homemade a smart, budget-friendly choice. Plus, you get to tweak the flavor strength to your liking—no more settling for weak, artificial vanilla. Many commercial brands skimp on real vanilla, opting for imitation or synthetic ingredients, or they just add less vanilla to save costs. When you craft your own, you’re paying for rich, authentic flavor, not just convenience. Homemade vanilla is a game-changer for bakers craving depth and quality in every drop!

Ingredients

  • 8 grade A vanilla beans (see note below for types of vanilla beans)
  • 8 ounces of vodka (or other liquor – see note below)

Process

  1. Begin by slicing the vanilla bean down the center to release the seeds.
  2. The rule of thumb is one vanilla bean to one ounce of liquor. I prefer unflavored vodka because it provides a clean, neutral base that lets the true flavor of the vanilla beans shine.
  3. In an 8-ounce glass jar with a tight-fitting lid, combine 8 sliced vanilla beans with the liquor of your choice.
  4. Store the infused vanilla out of direct sunlight and give it a shake once per week.
  5. Vanilla will be ready to use in 2 months.
  6. Vanilla sediment is normal, edible, and adds another depth of flavor. The sediment consists of tiny vanilla seeds and bean particles released during extraction. Filtering the sediment is optional. Some people prefer to leave the specks because they indicate real vanilla. If you want a clearer appearance for gifts, you can pour the vanilla through a coffee filter. After filtering, you can put the beans back into the vanilla, so they continue to release flavor when given as a gift.
  7. Long Shelf Life: The high alcohol content in unflavored vodka acts as a preservative, allowing the vanilla extract to last for years when stored properly in a cool, dark place. This longevity makes it a practical choice for making large batches of vanilla extract at home.

Note: Use 80-proof alcohol, such as vodka, bourbon, brandy, or rum. You don’t need expensive alcohol; cheaper options are fine. The vanilla flavor comes from vanilla beans, so buy good-quality beans. Avoid flavored vodka because it often contains artificial flavors that are not suitable for making pure vanilla extract.

Types of grade A vanilla beans:

  • Madagascar Vanilla – very common and has a creamy and rich flavor
  • Mexican Vanilla – has a darker, almost smoky flavor
  • Tahitian Vanilla – also very common and has a rich floral flavor

Vanilla Bean Syrup

Vanilla Bean Sugar

Vanilla Bean Sugar Cubes

Vanilla Bean Syrup

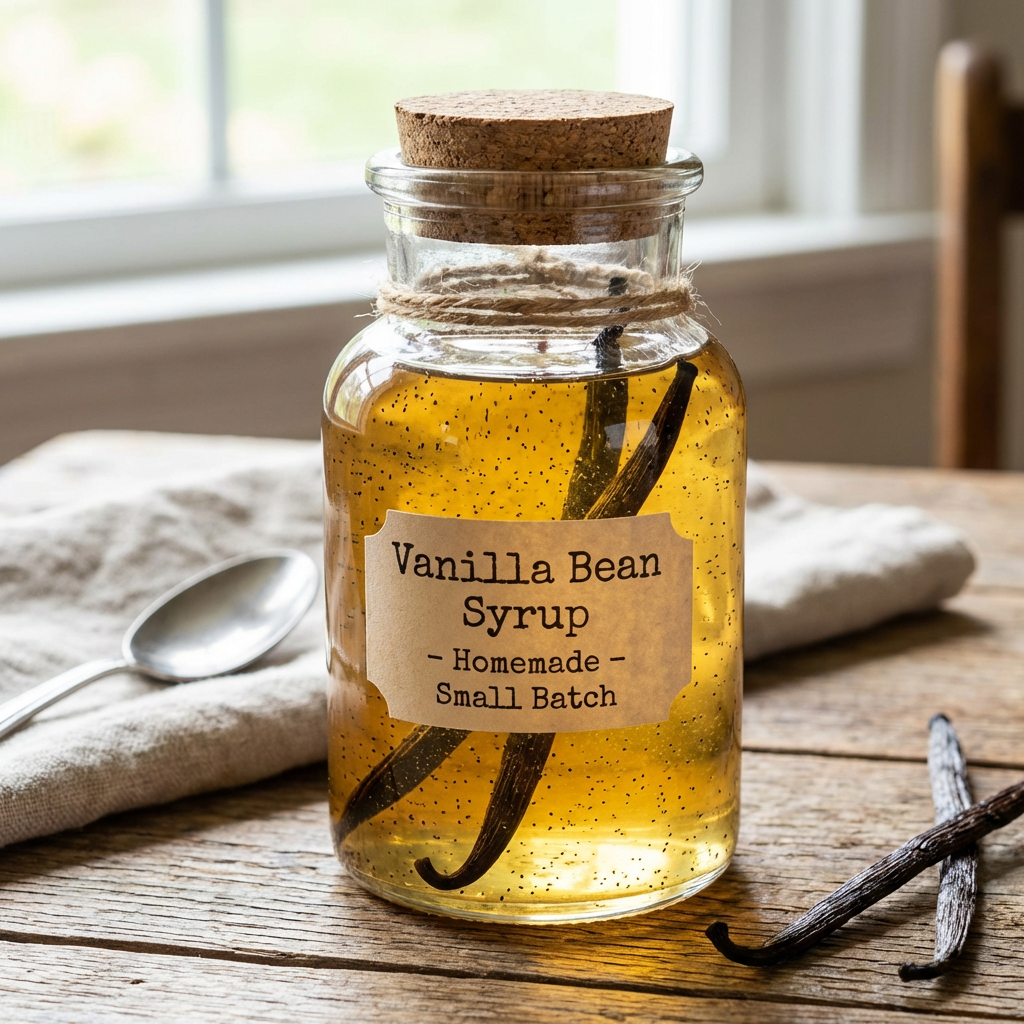
Glass jar labeled Vanilla Bean Syrup - Homemade - Small Batch filled with vanilla-infused liquid.
Elevate your morning coffee with this artisanal, small-batch homemade vanilla bean syrup.

Vanilla Bean Syrup is a versatile delight! Drizzle it on pancakes, waffles, or mix into coffee and tea for a sweet twist. It’s also perfect in cocktails or sparkling water, turning everyday drinks into fun, flavorful treats. Discover endless ways to enjoy this delicious, aromatic syrup in your favorite recipes

Ingredients

  • 1 vanilla bean (use 2 for a stronger vanilla flavor)
  • 1 cup granulated sugar or raw sugar
  • 1 cup of water

Process

  1. Split vanilla bean lengthwise with a sharp knife. Scrape the seeds and reserve the bean.
  2. Place vanilla bean, seeds, sugar, and water in a small saucepan. Bring to a boil over medium-high heat, stirring until the sugar has dissolved.
  3. Once the mixture boils, reduce the heat to low and simmer, swirling the pan occasionally, for 5 minutes.
  4. Remove the pan from the heat, cover, and let sit for at least 1 hour at room temperature.
  5. Discard the vanilla bean and refrigerate the syrup in a covered container for up to 1 month.

Vanilla Bean Extract

Vanilla Bean Sugar

Vanilla Bean Sugar Cubes

Blueberry Corn Muffins with Vanilla Butter

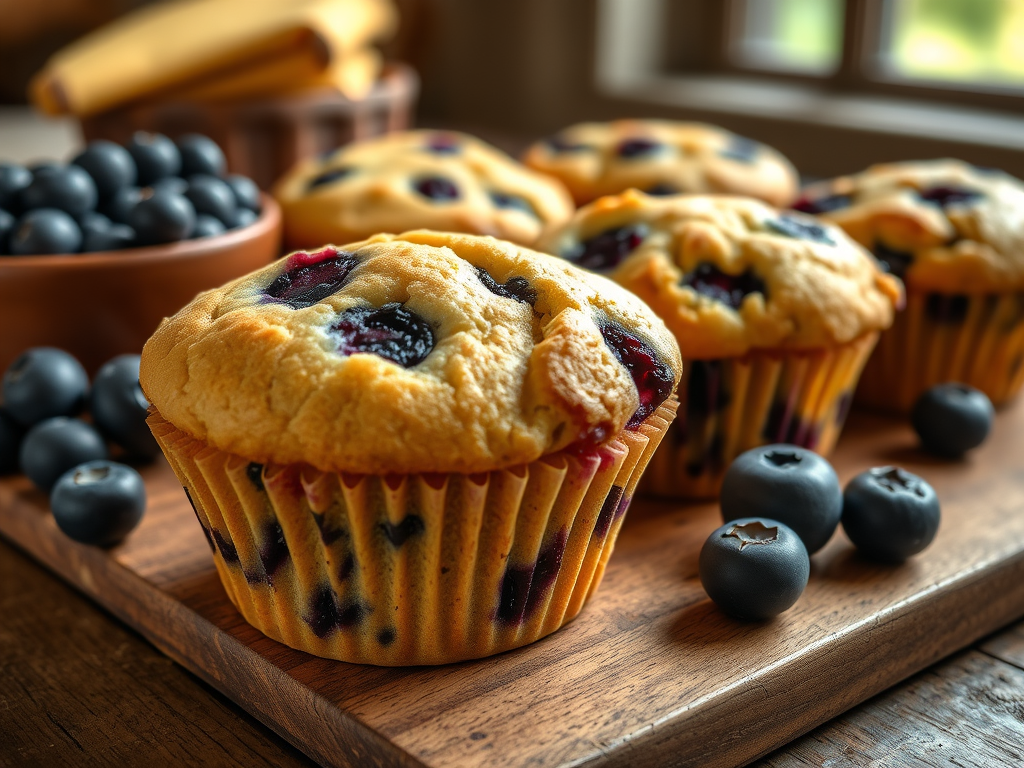
Enhancing this rustic treat is a spread of vanilla butter, which adds a layer of creamy richness and aromatic sweetness. The vanilla butter melts gently over the warm muffins, infusing each bite with a fragrant vanilla essence that elevates the overall flavor experience. This combination of textures and flavors makes blueberry cornbread muffins with vanilla butter an ideal choice for breakfast, brunch, dinner side dish, or a cozy snack.

Ingredients

  • 1 cup of yellow cornmeal
  • 1 cup all-purpose flour
  • 2 teaspoons of baking powder
  • 1⁄2 teaspoon baking soda
  • 1⁄2 teaspoon salt
  • 1⁄2 cup unsalted butter, melted and cooled
  • 2 tablespoons vegetable oil
  • 1⁄2 cup granulated sugar
  • 2 large eggs
  • 1 cup of buttermilk
  • 1 teaspoon vanilla extract
  • 1 cup fresh blueberries or frozen (not thawed)

Instructions

  1. Preheat the oven to 400°F. Line a 12-cup muffin pan with paper liners or grease the cups with cooking spray.
  2. In a large bowl, mix the dry ingredients together until well combined. Set aside.
  3. In a separate mixing bowl, beat the melted butter, oil, and sugar until smooth and thick. Add the eggs one at a time and mix until combined.
  4. To add the dry ingredients to the buttermilk mixture, start and end with the flour. Mix gently by hand until about halfway combined. Add the blueberries and stir just until no streaks of flour are visible.
  5. Divide the batter evenly between the muffin cups, filling each all the way to the top.
  6. Bake for 15-18 minutes or until a toothpick inserted into the center comes out with just a few moist crumbs.
  7. Let the muffins cool in the pan for 5 minutes before removing them to a cooling rack.

Vanilla Butter

Ingredients

  • 1 cup of good unsalted butter
  • 2 vanilla pods
  • 3 tablespoons powdered sugar
  • ½ teaspoon flakey sea salt (Maldon)
  •  

Process

  1. Let the butter come to room temperature.
  2. Using a very sharp knife, cut the vanilla pods in half lengthwise, exposing the seeds. Using the knife, scrape out the seeds and add to the butter.
  3. Combine the butter, vanilla seeds, sugar and salt to a mixing bowl and whip until light and fluffy.

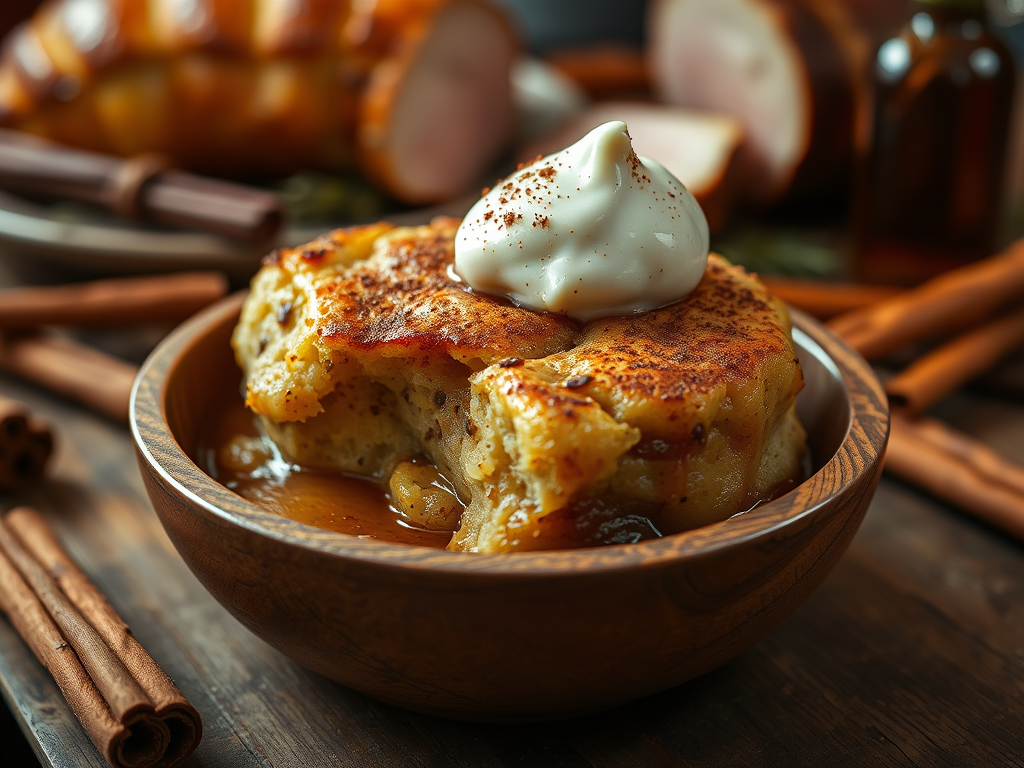
Cinnamon Bread Pudding with Vanilla Bourbon Sauce

Discover the ultimate bread pudding recipe that fills your home with irresistible aromas of brown sugar, cinnamon, and vanilla. Perfect for holiday brunches or cozy weekends, this rich, comforting treat is totally addictive. Feel free to get creative with your bread—stale French bread, day-old glazed doughnuts, cinnamon rolls—anything goes! Bake, enjoy, and watch everyone rave about this delightful, fun dessert that warms both your heart and your home.

Ingredients

Pudding

  • 1 cup firmly packed brown sugar
  • ½ cup granulated sugar
  • 1 loaf or 10 cups of cubed brioche or other stale bread *see note below
  • 1-1/2 cups of Half and Half
  • 1/2 cup of heavy whipping cream
  • 4 eggs
  • 2 teaspoons cinnamon
  • ¼ teaspoon nutmeg
  • 1 teaspoon vanilla extract
  • ½ cup melted butter

Vanilla Bourbon Sauce

  • 1 cup heavy cream
  • ½ cup granulated sugar
  • ½ cup bourbon
  • 1-1/2 teaspoons pure vanilla extract
  • 2 tablespoons of butter
  • 1 tablespoon cornstarch (optional)

Process

  1. Preheat oven to 350°F.
  2. Spray a 9 x 13-inch baking dish with cooking spray. Spray a piece of aluminum foil with cooking spray to cover the bread pudding while it is baking.
  3. In a large mixing bowl, beat together the eggs, sugars, cinnamon, nutmeg, vanilla, and melted butter until smooth.
  4. Stir in the Half and Half, and whip cream and mix well. Add the cubed bread and let the mixture sit for 2 hours, stirring occasionally to ensure the bread absorbs the custard mixture.
  5. Pour bread pudding batter into pan. Cover with foil and bake for 50 minutes to 1 hour or until center of pudding is firm.

NOTE: This can be made about 1 or 2 days in advance, reheating it at 250°F. for 30 minutes before serving.

Vanilla Bourbon Sauce

  1. In a saucepan over medium heat, combine the cream, sugar, and vanilla.
  2. Heat until the mixture is warm but not boiling.
  3. In a separate bowl, mix the bourbon with a bit of the cornstarch to thicken the sauce.
  4. Whisk in the bourbon mixture and continue to cook for another minute until slightly thickened.
  5. Remove from the heat and stir in the butter until melted.

Cut pudding into squares and serve with a generous serving of bourbon sauce and a dollop of whipped cream or ice cream.

NOTE: If your bread is not stale, start by cutting a fresh loaf into small 1” pieces. Place the pieces on a baking sheet lined with parchment paper. Dry the bread in a 350°F oven, stirring once. Remove when the bread is slightly dry.

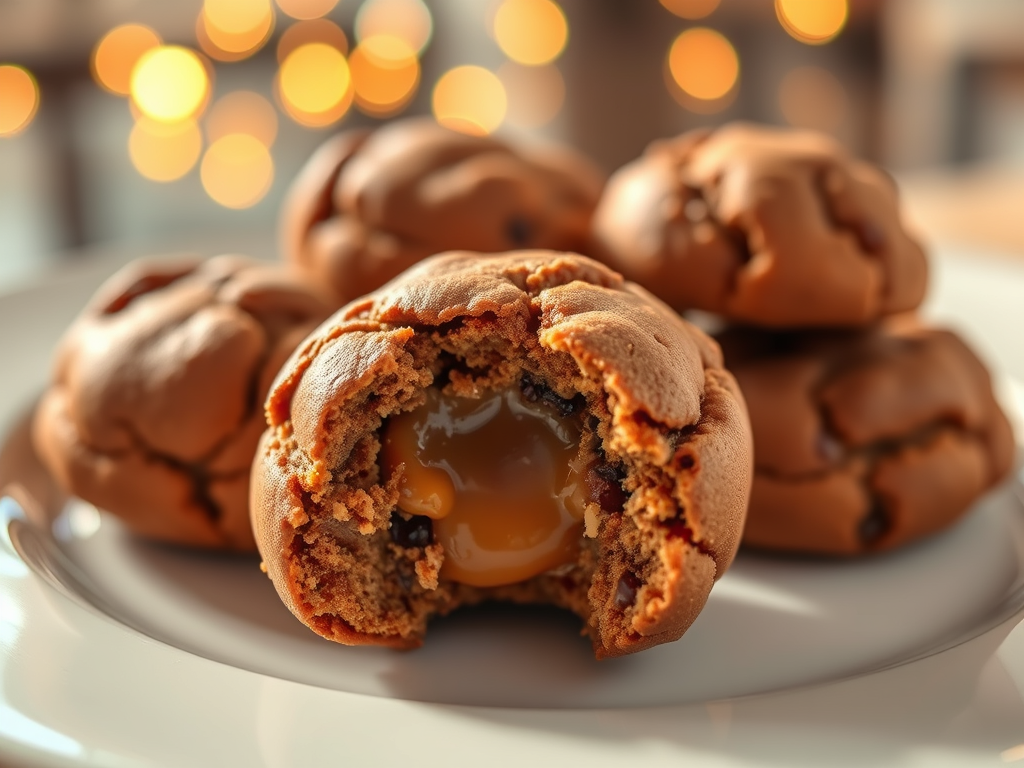
Chewy Salted Caramel Cookie

This cookie features a salted caramel finish, making it an excellent addition to holiday menus or a year-round indulgence, offering a sophisticated treat for discerning palates throughout the year.

Ingredients

  • ½ cup butter
  • 3/4 cup of brown sugar
  • ¼ cup granulated sugar
  • ¼ teaspoon baking soda
  • ¼ teaspoon cream of tarter
  • ½ tsp cinnamon
  • 1 egg
  • ½ teaspoon vanilla extract
  • 1-1/2 cup of flour
  • ¼ teaspoon of sea salt
  • 1/2 cup caramel squares, cut into quarters.

Cookie Finish

  • Mix ¼ cup granulated sugar and 2 teaspoons of ground cinnamon together in a small bowl. Set aside.
  • Set aside coarse sea salt for sprinkling or Maldon Sea Salt Flakes (use sparingly)

Process

  1. In a medium sized bowl, mix the flour, baking soda, cream of tartar, cinnamon, and set aside.
  2. To brown the butter, heat a medium saucepan to medium high heat. Add the sliced butter. It does not take long for the butter to begin browning on the bottom. When the butter begins to froth, watch carefully and stir. Once the butter turns light brown, remove from heat and let it cool to room temperature. The butter will burn fast, so don’t walk away.
  3. While the butter is cooling, cut the caramel squares into quarters and set aside
  4. In a stand mixer, combine the brown butter, brown sugar and granulated sugar. Mix until blended and smooth.
  5. Beat in egg and vanilla and mix until combined. Slowly add the dry ingredients until combined.
  6. Form the dough into a ball and cover with plastic. Chill in the refrigerator for at least 30 minutes or overnight.
  7. Once you are ready to bake preheat the oven to 350°F.
  8. Measure about 2 tablespoons of dough and roll into a ball or use a cookie scoop.
  9. Flatten and place a quartered caramel square on top, wrap the cookie dough over the caramel and roll back into a ball.
  10. Mix ¼ cup sugar and cinnamon in a small bowl and roll each cookie in the mixture. Place on a parchment lined cookie sheet 2 inches apart.
  11. Flatten slightly with a fork, and sprinkle lightly with coarse sea salt
  12. Bake for 10 minutes, or until the edges turn light brown. The centers will be soft. Allow it to cool for 2-3 minutes and transfer to a wire cooling rack to cool completely.

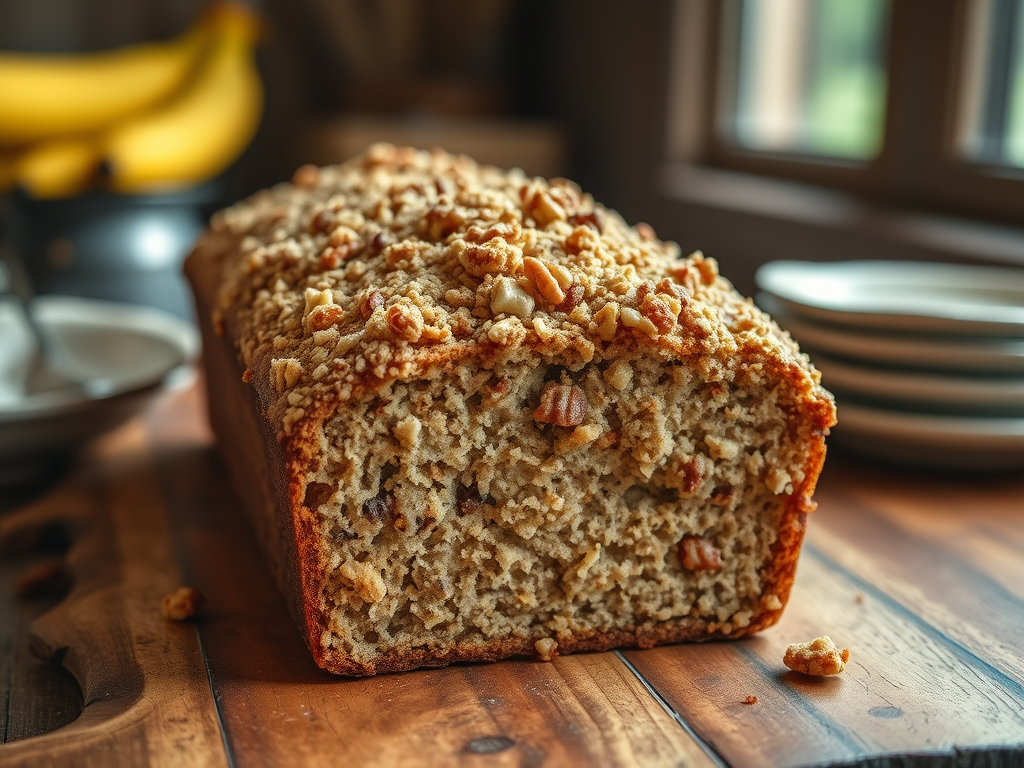
Cream Cheese Banana-Nut Bread

There are so many recipes for Banana Nut Bread and truthfully, they are all pretty good. I discovered this recipe about 10 years ago and decided it is the best recipe I have ever made for Banana Nut Bread, moist, dense with an intense banana flavor highlighted by toasted walnuts and cinnamon streusel topping. This recipe makes two loaves, great for gifting or freezing for later use.

Ingredients

  • ¾ cup butter, softened
  • 1 8oz package of cream cheese, softened
  • 2 cups of sugar
  • 2 large eggs
  • 3 cups of all-purpose flour
  • ½ teaspoon baking powder
  • ½ teaspoon baking soda
  • ½ teaspoon salt
  • 1-1/2 cups mashed ripe bananas (about 4 with dark spots) *
  • 1 cup chopped toasted walnuts
  • 1 teaspoon vanilla extract

Process

  1. Preheat oven to 350°F. Grease and flour two 8 x 4-inch bread pans.
  2. Mix butter and cream cheese with an electric mixer until smooth.
  3. Gradually add sugar and beat until the mixture is light and fluffy.
  4. Add eggs one at a time, beating until just blended after each addition.
  5. COMBINE flour and next three ingredients
  6. Gradually add to the butter mixture at low speed until blended.
  7. Add bananas, vanilla and nuts.
  8. Spoon batter into two greased and floured bread pans.
  9. Top with streusel topping.
  10. Bake for 1 hour until a toothpick inserted in the center comes out clean and sides pull away from pan.
  11. Cool pans on wire rack for 10 minutes before removing from pans.
  12. Cool completely before slicing.

STREUSEL TOPPING

Ingredients

  • ½ cup firmly packed brown sugar
  • ½ cup chopped toasted walnuts
  • 1 tablespoon melted butter
  • 1 tablespoon flour
  • 1/8 tsp ground cinnamon.

Process

  1. Mix all ingredients for streusel together in a bowl.
  2. Sprinkle over the batter before baking
  3. Press streusel into the dough with the back of a spoon to ensure streusel is baked into the loaf and doesn’t shed when removed from the pan.

*Note: the riper the bananas (black even) the more banana flavor will impart in your recipe. I use frozen bananas that have been defrosted in the refrigerator, they are overripe and work wonderfully.

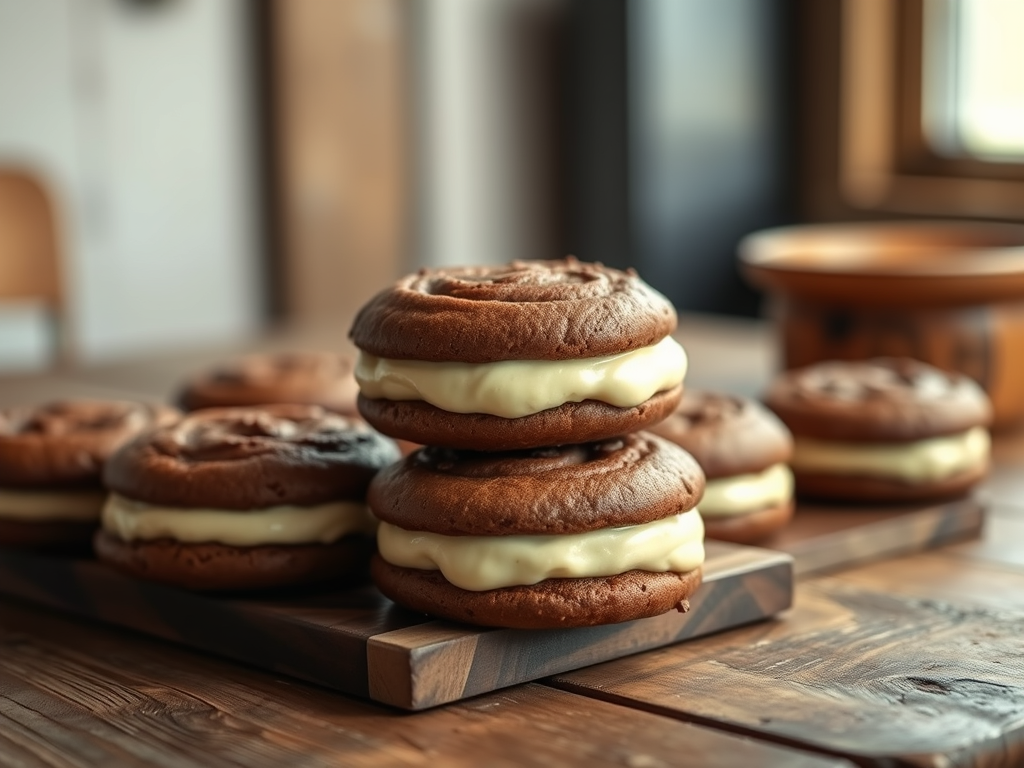
Whoopie Pies

The history of Whoopie Pies is an interesting part of American food culture, mainly in the Northeastern U.S. They likely started in the early 1900s, possibly in Pennsylvania or Maine. The name “Whoopie” may come from children’s exclamations of joy or surprise when discovering the sweet filling inside. These treats have become a beloved regional specialty, reflecting local culinary traditions and history.

Cookie Ingredients

  • 1 cup sugar
  • ½ cup shortening
  • 1 egg
  • 1 egg yolk
  • 2 cups of all-purpose flour
  • 2/3 cup unsweetened cocoa powder
  • ¼ teaspoon salt
  • 1 teaspoon of baking soda
  • ½ cup hot water
  • 2/3 cup buttermilk

Cookie Process

  1. Preheat oven to 350°F. Line 2 cookie sheets with parchment paper.
  2. Beat together sugar and ½ cup shortening at high speed with a stand mixer until fluffy.
  3. Add the egg and egg yolk and beat until incorporated.
  4. In a separate bowl, stir together the flour, cocoa powder, and salt; set aside.
  5. Dissolve baking soda in the ½ cup of hot water; cool slightly.
  6. Add the flour mixture, the soda mixture, and 2/3 cups of buttermilk alternately to the sugar, shortening mixture.
  7. Beat at a medium speed until well mixed.
  8. Drop batter by rounded tablespoonfuls 2 inches apart onto a parchment paper lined cookie sheet. Bake for 8 – 10 minutes.
  9. Cool cookies on a cookie rack. Yields 48 cookies.

Filling Ingredients

  • 2 cups sifted powdered sugar
  • ½ teaspoon of meringue powder
  • 1 teaspoon vanilla
  • ½ cup shortening (such as white Crisco)
  • ¼ cup butter

Filling Process

  1. In a stand mixer, add shortening and butter, vanilla, 1 teaspoon of water and beat at high speed until light and fluffy.
  2. Turn mixer to low and gradually add powdered sugar and meringue powder.
  3. Beat on high until mixture is light and fluffy. If mixture is too thick to spread, add 1 teaspoon of water at a time, until it is spreading consistency.
  4. Spread some filling on the flat side of half the cookies, top with the remaining cookies, flat side down.
  5. Store in the refrigerator.