Butternut Squash Ravioli Won Tons

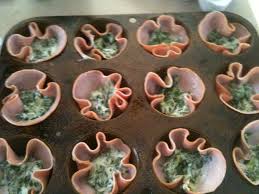
Butternut Squash Ravioli with Spinach Pesto uses supermarket wonton wrappers to create a shortcut weeknight ravioli treat.

Yield: Serves 6

Ingredients

  • 1 butternut squash, halved lengthwise and seeded (about 1 1/2 pounds)
  • Cooking spray
  • 1 tablespoon chopped fresh oregano
  • 2 tablespoons unsalted butter, melted
  • 2.5 ounces Parmesan cheese, grated and divided
  • 3/8 teaspoon salt, divided
  • 1/2 teaspoon freshly ground black pepper, divided
  • 36 wonton wrappers
  • 1 large egg, lightly beaten

6 quarts water

Directions

Preheat oven to 400°.

  1. Place squash halves, cut sides down, on a foil-lined baking sheet coated with cooking spray.
  2. Bake at 400° for 30 minutes or until tender. Cool. Scoop out pulp; discard peel. Mash pulp.
  3. Combine oregano, squash pulp, and butter in a large bowl.
  4. Stir in 2 ounces (about 1/2 cup) cheese, 1/4 teaspoon salt, and 1/4 teaspoon pepper.
  5. Working with 1 wonton wrapper at a time (cover remaining wrappers with a damp towel to keep them from drying), spoon about 1 1/2 teaspoons squash mixture into center of each wrapper.
  6. Moisten edges of wrapper with beaten egg; bring 2 opposite corners together. Pinch edges together to seal, forming a triangle. Repeat procedure with remaining wrappers, squash mixture, and egg. Cover ravioli loosely with a towel to prevent drying.
  7. Bring 6 quarts water to a boil in a large Dutch oven. Add half of ravioli; cook 3 minutes or until thoroughly cooked.
  8. Remove ravioli with a slotted spoon. Repeat procedure with remaining ravioli.
  9. Add ravioli to pesto; toss gently to coat. Arrange 6 ravioli on each of 6 plates; sprinkle each serving with 1 teaspoon walnuts.

Pesto

  • 2 garlic cloves
  • 1 1/2 cups fresh baby spinach
  • 1/2 cup fresh basil
  • 1/4 cup walnuts, toasted, chopped, and divided
  • 2 tablespoons extra-virgin olive oil
  • 2 tablespoons organic vegetable broth
  • 1 teaspoon fresh lemon juice


  1. Place garlic in a food processor, and pulse until finely chopped.
  2. Add remaining 1/2 ounce (about 2 tablespoons) cheese, remaining 1/8 teaspoon salt, remaining 1/4 teaspoon pepper, spinach, basil, and 2 tablespoons walnuts.
  3. With processor on, slowly pour oil, broth, and juice through food chute. Process until well blended. Place pesto in a large bowl.

Kitchen Moxy’s Chocolate Chip Cookies

Choc ChipThis is the only chocolate chip recipe I use. The cookies are soft, chewy, sweet, and tasty.  I have been using this recipe for so many years now and truthfully, I don’t remember where I got it. My son, who does not eat sugar, and lives a very healthy lifestyle, does fortunately make an exception during the holidays when I bake cookies and this is one of his favorites.

Kitchen Moxy’s Chocolate Chip Cookies

Preheat oven to 375 degrees, line cookie sheets with parchment paper

Ingredients:

  • 2-1/4 cup of all purpose flour
  • 1 teaspoon baking soda
  • 1 cup butter (softened)
  • 1/4 cup granulated sugar
  • 3/4 cup firmly packed brown sugar
  • 1 teaspoon vanilla
  • 1 package (4 oz) Instant Pudding mix (vanilla)
  • 2 eggs
  • 1 bag of chocolate chips (*see note)
  • 1/2 half bag of mini chocolate chips
  • 1 cup of chopped nuts (optional)

Directions:

  1. Mix flour with baking soda, set aside.
  2. Combine softened butter, sugar, brown sugar, vanilla and Instant Pudding Mix together. Beat until creamy and smooth.
  3. Beat in eggs one at a time until combined.
  4. Stir in flour mixture on low speed until combined.
  5. Stir in chocolate chips, and nuts with a wooden spoon, batter will be stiff.
  6. Drop by tablespoons 2 inches apart onto prepared cookie sheets. I prefer to use parchment paper but if it is not available, drop dough onto ungreased cookie sheets.
  7. Bake for 8 to 10 minutes, remove and let cool on racks.

*NOTE:  I use Hershey chips, and love extra chocolate in my cookies, you can eliminate the mini chips and the nuts if you prefer.  You can also use chocolate instant pudding mix in your batter rather than vanilla for Chocolate Chocolate Chips.

Also, if you only want to bake half the batter, roll 1/2 of the batter in a log and wrap with plastic wrap, place in a freezer bag, and pop in the freezer for later.

Baked Potato Skins

Loaded Potato Skins

Loaded Potato Skins

Crispy cheese potato skins, baked to a crisp, then topped with cheddar cheese, bacon, sour cream and green onions. Don’t stop there, consider topping with sliced jalapenos, chopped chilies, black or green olives, diced tomatoes, shredded chicken, use your imagination! As an appetizer in restaurants, potato skins have been around since approximately the 1970s with T.G.I. Friday’s having documented making them as early as 1974. These skins are not deep fried as original recipes call for, they are twice baked at high temperatures; leaving the skins crispy and the meat tender.  I eat pot stickers as a dinner why not loaded potato skins?  Served as an appetizer or a main entree, make enough because they will go fast!

• Yield: Serves 4 to 6.

Ingredients

  • 6 small to medium sized russet baking potatoes (total 3 pounds)
  • Olive oil
  • Canola oil or coconut oil
  • Kosher salt
  • Freshly ground pepper
  • 6 strips of bacon
  • 4 ounces grated cheddar cheese
  • 1/2 cup sour cream
  • 2 green onions, thinly sliced, including the greens of the onions

Instructions:
Preheat oven to 400°F

    1. Rub potatoes with olive oil and bake in a 400°F oven for about an hour until the potatoes are cooked through and give a little when pressed.
    2. While the potatoes are cooking, cook the bacon strips in a frying pan on medium low heat for 10 to 15 minutes, or until crisp. Drain on paper towels. Let cool. Crumble.
    3. Remove the potatoes from the oven and let cool enough to handle. Cut in half horizontally. Use a spoon to carefully scoop out the insides, reserving the scooped potatoes for another use, leaving about 1/4 of an inch of potato on the skin.
    4. Increase the heat of the oven to 450°F. Brush or rub canola or coconut oil (or another high smoke point oil) all over the potato skins, outside and in. Sprinkle with kosher salt.
    5. Place on a baking rack in a roasting pan (do not use a cookie sheet, it will warp, use a roasting pan or broiler pan that can take the heat). Cook for 10 minutes on one side, then flip the skins over and cook for another 10 minutes.
    6. Remove from oven and let cool enough to handle.
    7. Arrange the potato skins skin-side down on the roasting pan or rack. Sprinkle the insides with freshly ground black pepper, cheddar cheese, and crumbled bacon. Return to the oven. Broil for an additional 2 minutes, or until the cheese is bubbly. Remove from oven. Use tongs to place skins on a serving plate. Add a dollop of sour cream to each skin, sprinkle with chopped green onions. Serve immediately.

Baked Eggs in Ham Cups – easy

baked eggs ham crispsNeed a great breakfast for mom that is easy and delicious? Try this recipe. You can leave your eggs whole or beat them with your vegetables and cheese.  Serve with a side of roasted red potatoes, steamed asparagus and fruit salad.  You can substitute the shallots with a small red or sweet onion, use your favorite vegetables, if you don’t have sour cream, substitute plain yogurt. The possibilities are endless. You can’t mess this up. Makes 6

Ingredients:

• ¼ cup finely chopped shallots
• 2 cups of any vegetables you love, suggestions: chopped mushrooms, chopped red pepper (or jarred roasted red peppers)
• 1 tablespoon of olive oil or coconut oil or butter
• ½ cup of your favorite shredded cheese
• 2 tablespoons of sour cream or yogurt
• 6 slices of Virginia Ham
• 6 large eggs
• Salt and pepper to taste
Directions
Preheat oven to 400 degrees
1. Melt and heat your butter, or coconut oil, or olive oil in a large pan on medium heat
2. Sauté your favorite vegetables, and the chopped shallots until soft. Stirring often.
3. If adding spinach, slice it into small pieces – add last after your vegetables are softened just to wilt it. You don’t want mushy spinach.
4. Spray your muffin tins with baking spray, this recipe makes 6
5. Line each muffin cup with a slice of ham, ends will stick up and hang over the sides. baked eggs ham crisps2
*If making scrambled egg cups: using an egg beater or fork, beat your eggs with 2 tablespoons of milk, a pinch of salt and pepper, divide your sautéed vegetables in each of the muffin cups and pour egg mixture into each cup using a ladle. Sprinkle a tablespoon of shredded cheese on top of each cup.
*If leaving eggs whole, divide the sautéed vegetables among the 6 muffin cups 

  1. Crack one egg into each cup, sprinkle with a dash of salt and pepper
  2. Sprinkle a tablespoon of shredded cheese on top of each cup
  3. Bake for 15 minutes until eggs are set and cooked to your likeness

Maple Bacon

maple baconMaple glazed bacon, who doesn’t love the smell and taste of bacon, dress it up with a coating of pure maple glaze and you have a gourmet dish or appetizer. Glazed maple bacon can add a savory note to desserts, just crumble the bacon into maple flavored frosting for cupcakes.  Or consider sweet and savory appetizers; wrap maple bacon around sweet potato slices, or asparagus before baking. Wrap around prawns or cream cheese stuffed jalapeno peppers, or small smokey links before baking. Maple syrup adds a sweet note to thick-cut bacon slices, which are obviously delicious served right  alongside pancakes, eggs or waffles.

Ingredients

  • 1/4 cup maple syrup (use the real stuff)
  • 12 slices good-quality thick-cut bacon
  • coarse ground pepper (optional)

Directions

Preheat the oven to 375 degrees F. Line a baking sheet with a silicone baking mat or parchment paper.

  1. Pour the maple syrup into a shallow bowl and give each bacon slice (both sides) a generous dip in the syrup.
  2. Lay the bacon on the prepared baking sheet. Sprinkle with pepper if desired.
  3. Bake for 20 minutes. Flip the bacon over and bake until it is crisp at the edges and caramelized on the bottom, another 10 to 15 minutes.*Note: this cooking time is depending on the thickness of your bacon, keep an eye on it while baking so it does not burn, especially if using a thinner bacon.
  4. Remove the baking sheet from the oven.
  5. Lift the slices from the liner so they don’t stick after cooling. Cool for about a minute, transfer to a long platter to serve.

Chocolate Coconut Clusters


Coconut Oil

Coconut Oil

In the never ending quest for healthy food and a healthier diet I have been convinced by my son and his wife to try Coconut oil in place of vegetable, or canola oil, and even butter. I did my research and have found that Coconut oil can positively affect our hormones for thyroid and blood-sugar control. People who eat coconut oil also tend to have improvements in how they handle blood sugar since coconut can help improve insulin use within the body. Coconut oil can boost thyroid function helping to increase metabolism, energy and endurance. It increases digestion and helps to absorb fat-soluble vitamins.
Coconut oil lowers cholesterol by promoting its conversion to pregnenolone, a molecule that is a precursor to many of the hormones our bodies need. Coconut oil can help restore normal thyroid function. When the thyroid does not function optimally, it can contribute to higher levels of bad cholesterol. Use Coconut oil to fry with, to bake with and to add to everyday dishes like Oatmeal, tea, or coffee. Use on vegetables in place of spreads or butter, Coconut oil is a great moisturizer for hair and skin, use organic if using on skin or for massage. Studies have shown that you can consume to 2 tablespoons daily for healthy benefits.

Chocolate Coconut Clusterscoconut clusters

Ingredients:

  • 1 (5 oz) bag Flaked or shredded coconut- unsweetened
  • 2/3 cup melted coconut oil + 1 TBSP
  • 1/2 cup almond butter
  • 1 tsp vanilla
  • 1 cup dark chocolate or semi-sweet chocolate chips

Directions:

  1. In medium bowl, mix coconut flakes, 2/3 cup melted coconut oil, vanilla, and almond butter until well mixed.
  2. Using hands, form into 1 inch balls and put on a plate.
  3. Put the plate in the freezer until the clusters harden completely.
  4. Once the clusters have hardened, melt the chocolate in a double boiler with 1 TBSP coconut oil until smooth.
  5. Dip the clusters into the chocolate and put back on a plate or in a small baking dish
  6. Put them into refrigerator and eat once they get cold.
  7. Enjoy the awesome mixture of crunchy chocolate shell and chewy coconut center!

Chipotle Aioli

Chipotle Aioli:
1 clove garlic
1 canned chipotle chile in adobo sauce, drained
1 cup mayonnaise
Squeeze of fresh lime juice
Kosher salt and freshly ground black pepper

Chipotle Aioli:

Put the garlic and chipotle in a food processor and puree until very smooth. Add the mayonnaise and lime juice and blend until smooth; season with salt and pepper. Store in an airtight container for up to 1 week.

Spread a thin layer of Chipotle Aioli on the cut sides of the rolls and put them on a baking sheet, cut-sides up. Broil until the aioli browns slightly and the rolls are toasted on the edges


Cinnamon Cream Cheese Roll-ups

Cinnamon Cream-cheese Roll-ups

Cinnamon Cream-cheese Roll-ups

Sometimes we just need something quick to prepare to satisfy that sweet tooth.  These decedent desserts are made with bread believe it or not.  Dough is dough. The best part is you can make them for unexpected guests and pop them in the freezer. Very quick and easy.

My dad used to bring home hot, fresh out of the oven glazed doughnuts every Sunday morning as a treat after church.  Not healthy, but yummy and the funny thing was, we were not over weight as children. I guess that was because we were outside playing a lot.  We burned off those calories quick.  So before you indulge your sweet tooth, consider your lifestyle, if you are active, walk, hike, or exercise maybe a treat once in a while isn’t so bad.

Cinnamon Cream Cheese Roll-ups

Ingredients

  • 20 slices quality white bread, crusts removed (you can find high fiber white bread)
  • 8 oz package cream cheese, softened
  • 1 large egg
  • 1 cup sugar, divided
  • 1 1/2 teaspoons ground cinnamon
  • 1/4 cup butter, melted

Alternative ingredients might be jelly or jam, or lemon curd – make a “jelly roll-up”, bake and drizzle with a sugar glaze. Recipe below

Directions
Heat oven to 350 degrees
Line 2 baking sheets with parchment paper

  1. Roll out bread slices with a rolling pin until flattened; arrange on work surface
  2. Beat together cream cheese, egg and 1/4 cup sugar
  3. Combine remaining 3/4 cup sugar and cinnamon in a shallow bowl or pie plate
  4. Divide cream cheese mixture onto bread, spreading about 1 level tablespoon on each
  5. Roll up bread to enclose filling
  6. Brush rolls all over with butter and roll in cinnamon sugar mixture. Arrange on prepared baking sheets. (To make ahead, prepare to this step and cover baking sheets with aluminum foil. Freeze. Do not thaw roll-ups before baking.) Bake until the roll-ups begin to puff, 15 to 18 minutes
  7. Serve warm.

Sugar Glaze
Mix Together:

  • 1 1/4 cups confectioners’ sugar
  • 3 tablespoons milk
  • 1/2 teaspoon of vanilla extract

Beef Stew – Old Fashioned

beef stewOld fashioned stew, the smell fills your house with mouthwatering aromas. The trick to good stew is seasoning the meat, browning the meat and of course what you add to the broth. The fun thing about stew is you can add any kind of vegetables you love to eat. My stews are usually full of onions, carrots and small red skin potatoes, I even add mushrooms, celery, and sometimes at the end of the cooking period I will throw in a box of frozen peas. My sauce will usually thicken as it cooks but if it does not, you can thicken it at the end of the cooking time with a roux. Search roux in the search box for instructions. I use boneless chuck for my meat because it becomes so tender when cooked it melts in your mouth. But you can use beef round.

INGREDIENTS

  • 3 pounds of boneless chuck *(pot-roast) cut into 1 inch cubes
  • ½ cup seasoned flour in a large zip lock bag as follows:
    • ½ cup flour
    • 1-1/2 teaspoon salt
    • 1 teaspoon pepper
    • 1 teaspoon garlic salt or powder
    • 1 teaspoon Old Bay seasoning (or paprika)
  • ½ cup vegetable oil
  • 2 large onions cut into quarters
  • One bag of mini carrots or 4 large carrots cut into chunks
  • About 6 small red skinned potatoes cut in half or 1 lb. of regular white potatoes quartered
  • 3 ribs of celery, cut into 1-inch pieces
  • 1 pound of mushrooms, cut into halves or quarters (depending on size)
  • 1 large garlic bulb, cloves separated and paper removed
  • 4 cups of beef broth
  • 2 tablespoons tomato paste
  • 2 tablespoons of Dijon mustard
  • ½ teaspoon salt
  • ¼ teaspoon pepper

DIRECTIONS

  1. Cut all your vegetables and gather into a bowl, set aside.
  2. In small batches place meet cubes in the zip-lock bag and shake to coat, remove from flour mixture and put on a plate until ready to use.
  3. Heat the oil over medium-high heat. Be sure the oil is hot (rippling but not smoking) before adding the meat in small batches. Brown meat on all sides, remove with a slotted spoon to a dish and add another batch of meat until all is browned.
  4. After the meat has browned, turn heat to medium low.
  5. Add the cut-up vegetables to the hot oil in the pan, there should be only about a tablespoon of oil left in the pan, if not, add and let get hot.
  6. Cook about 5 minutes stirring once or twice until lightly browned.
  7. Add the beef broth, tomato paste, and mustard, stirring to scrape up browned bits. Bring to a boil.
  8. Return the browned meat to pot, reduce heat to low.
  9. Cover and simmer for about 4 hours, or until meat is cooked through, and tender.
  10. Season to taste with salt and pepper.

Roux – What is it??

Roux is used to thicken a broth, sauce or gravy. It is a substance created by rouxcooking flour and fat, traditionally butter, in equal amounts. In Cajun cuisine, roux is made with bacon fat or oil instead of butter and dark brown in color, which lends much richness of flavor, albeit less thickening power. Central European cuisine uses lard (in its rendered form) or more recently vegetable oil instead of butter for the preparation of roux. Light (or “white”) roux provides little flavor other than a characteristic richness to a dish, and is used in French cooking and some gravies or pastries throughout the world. Darker roux is made essentially by cooking the roux longer. Darker roux, sometimes referred to as “blond”, “peanut-butter”, “brown” or “chocolate” roux depending on the color achieved, add a distinct nutty flavor to a dish

I use roux to thicken my soups where necessary, such as for Ham and Bean soup, I also use it in stews to thicken the broth or gravy. I use butter, the butter will darken the longer you cook it with the flour, I usually pull it off the heat just as it is turning light brown.

Always start with an equal amount of butter and flour.  Melt ¼ cup butter in a saucepan, add ¼ cup flour.  Melt the butter over medium heat; slowly add the flour to the butter, whisking constantly. Within 2 to 3 minutes the roux will have a consistency of a cake frosting. A white roux is done when the flour loses its “raw” smell and begins to develop a toasty aroma. If you desire a darker roux cook longer, stirring constantly, until the desired color.

If you’re not adding liquid, or adding to liquid immediately remove the pan from the heat and transfer the roux to another container to cool. Be very careful: the hot fat-flour mixture can cause painful burns. Refrigerated or frozen roux will keep well for up to two months and can be added directly to soups or sauces for quick thickening. Increase your recipe and you can freeze your roux in ice cube trays for future use.