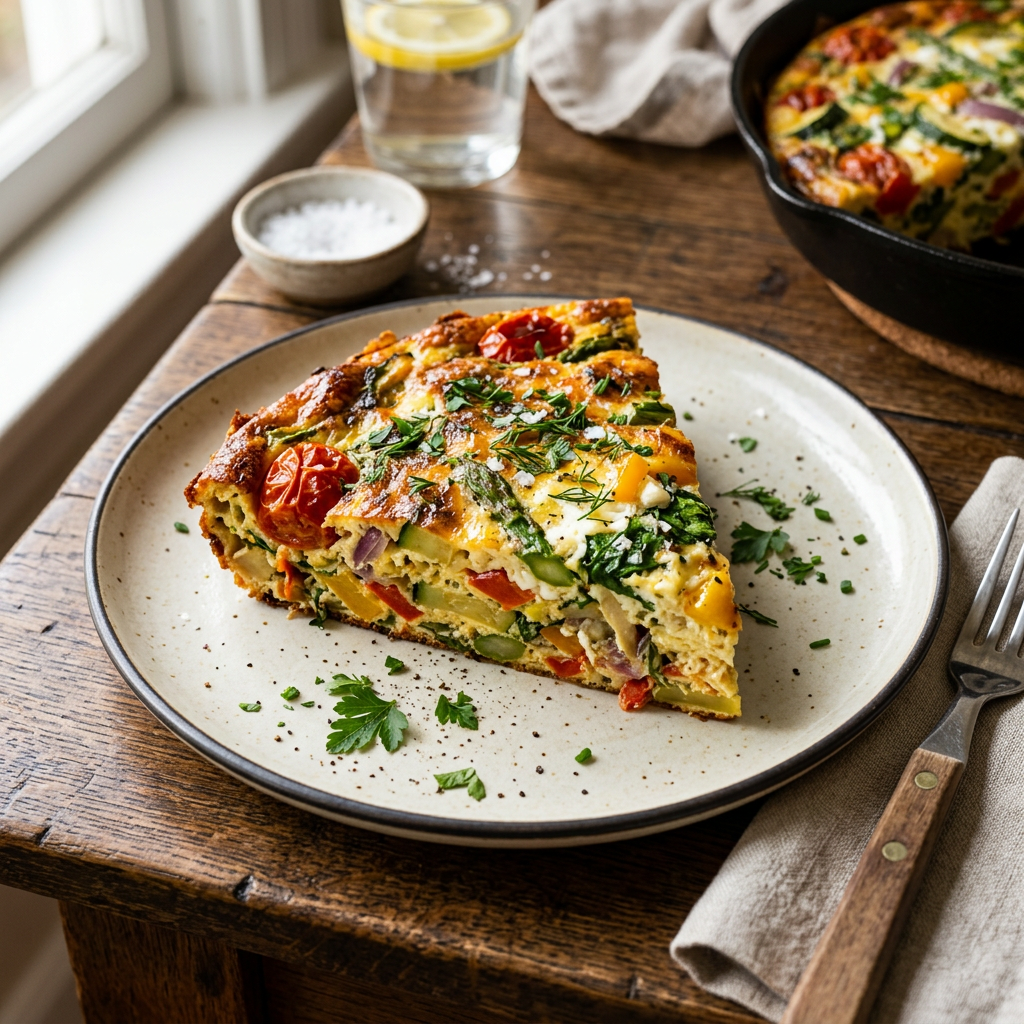
Category Archives: Vegetables

Bourbon Baked Beans

Large blue Dutch oven filled with bourbon baked beans garnished with bacon and thyme
Dutch oven filled with rich bourbon baked beans garnished with bacon

Let’s keep the bourbon love going! Here’s a fun twist on baked beans—skip the soaking and grab canned beans for quick prep. Mix in your favorite barbecue sauce, and for an extra kick, try my homemade Bourbon Barbecue Sauce. Perfect for parties or a cozy night in, this recipe adds a delicious, spirited touch to your meal. Cheers to good food and great times!

Ingredients:

  • 8 slices bacon, halved
  • 1 medium onion, cut into small dice
  • 1 medium green pepper, cut into small dice (Optional: add 1 diced jalapeno pepper for heat)
  • 2 (15-ounce) cans of pinto beans, drained and rinsed
  • 1 (15-ounce) can of navy beans, drained and rinsed
  •  3/4 cup barbecue sauce (Try my Bourbon Barbecue Sauce)
  •  1/2 cup dark brown sugar
  •  1/4 cup cider vinegar
  •  ½ cup of strong coffee
  • 1/4 cup Bourbon
  • 3 teaspoons dry mustard or 2 tablespoons Dijon

Process

Adjust the oven rack to the lower-middle position and heat the oven to 400° F.

  1. Fry bacon in a large, deep sauté pan or skillet until partially cooked, releasing about 1/4 cup of drippings.
  2. Remove bacon from the pan and drain on paper towels. Set aside.
  3. Add diced onions and peppers to the drippings in the pan and sauté until tender, about 5 minutes.
  4. Add barbecue sauce, brown sugar, cider vinegar, coffee, mustard, and bourbon. Bring to a boil, remove from heat.
  5. Add the beans and stir.
  6. Pour the beans into a greased 13 x 9-inch pan or a large Dutch oven. Top with reserved bacon pieces. Bake uncovered for about 30 minutes until the edges bubble and the mixture thickens. If the beans seem too watery, bake for an additional 5 minutes. For a darker, caramelized top, briefly broil the dish for a minute or two.
  7. Since canned beans are used, they tend to be slightly firmer. Lightly mash the beans with a spoon to break them up a bit. This helps create a texture similar to that of beans cooked for a longer time, making the dish more uniform and appealing.
  8. The beans thicken as they cool.

Bourbon Barbecue Sauce

Wonton Butternut Squash Ravioli

Ravioli pasta served with fried sage leaves, walnuts, and grated cheese in a rustic bowl

Embark on a delightful culinary adventure by transforming simple wonton wrappers into irresistibly tasty butternut squash dumplings! This fun and easy recipe combines the sweet, nutty flavor of roasted butternut squash with the delicate, chewy texture of wonton wrappers, creating a perfect bite-sized treat. Perfect for a cozy night in or impressing guests at your next gathering, this recipe proves that even simple ingredients can turn into a delightful culinary creation!

Ingredients

  • 1 butternut squash, halved lengthwise and seeded (about 1 1/2 pounds)
  • Cooking spray
  • 1 tablespoon chopped fresh oregano
  • 2 tablespoons unsalted butter, melted
  • 1/2 cup of Parmesan cheese, freshly grated
  • ½ teaspoon salt
  • 1/4 teaspoon freshly ground black pepper
  • 36 wonton wrappers
  • 1 large egg, lightly beaten

Pesto sauce recipe below

Process

  1. Preheat oven to 400° F.
  2. Place squash halves, cut sides down, on a foil-lined baking sheet coated with cooking spray.
  3. Bake for 30 minutes or until tender. Cool. Scoop out pulp, discard peel. Mash pulp.
  4. Combine oregano, squash pulp, and butter in a large bowl.
  5. Stir in Parmesan cheese, salt, and pepper.
  6. Working with 1 wonton wrapper at a time, spoon about 1 1/2 teaspoons of the squash mixture into the center of each wrapper.
  7. Moisten edges of wrapper with beaten egg; bring 2 opposite corners together. Pinch edges together to seal, forming a triangle. Repeat procedure with remaining wrappers, squash mixture, and egg. Cover wonton ravioli loosely with a towel to prevent drying.
  8. Bring 6 quarts of water to a boil in a large Dutch oven. Add half of the wonton ravioli; cook 3 minutes or until the ravioli begins to float to the top of the water.
  9. Remove wonton ravioli with a slotted spoon. Repeat the procedure with the remaining ravioli.
  10. Add ravioli to pesto; toss gently to coat.

Spinach Basil Pesto Ingredients

  • 2 garlic cloves
  • 1 1/2 cups of fresh baby spinach
  • 1/2 cup fresh basil
  • 1/4 cup walnuts, toasted, chopped, and divided
  • 2 tablespoons of Parmesan cheese, freshly grated
  • 2 tablespoons extra-virgin olive oil
  • 2 tablespoons organic vegetable broth
  • 1 teaspoon fresh lemon juice

Process

  1. Place garlic in a food processor, and pulse until finely chopped.
  2. Add cheese, 1/8 teaspoon salt, 1/4 teaspoon pepper, spinach, basil, and 2 tablespoons toasted walnuts to the food processor.
  3. With the processor on, slowly pour oil, broth, and juice through the food chute. Process until well blended.
  4. Plate with Wonton Ravioli. Arrange 6 ravioli on each of 6 plates: sprinkle each serving with 1 teaspoon walnuts, sprinkle with parmesan cheese.

Vegetable Wonton Dumplings

Plate of steamed dumplings garnished with green onions and sesame seeds next to a bowl of dipping sauce
A plate of steamed dumplings served with soy-based dipping sauce

Making vegetable dumplings from wonton wrappers is a fantastic way to enjoy a homemade, customizable, and satisfying treat that’s sure to impress family and friends alike. This fun and easy recipe invites you to get creative with fresh vegetables, turning them into bite-sized pockets of flavor. Start by chopping a colorful mix of vegetables such as carrots, cabbage, and green onions. Sauté or steam the vegetables until tender, then season with soy sauce, sesame oil, and a hint of ginger for an extra zing. Next, spoon the flavorful filling onto each wonton wrapper, fold and seal to create perfect little parcels. Whether you prefer steaming, pan-frying, or boiling, each method offers a unique taste experience. These vegetable dumplings are not only a healthy snack but also a fun activity for cooks of all ages.

Ingredients

  • Cooking spray
  • 2 teaspoons of Sesame oil (or olive oil)
  • 1-1/2 cups of green cabbage, finely shredded
  • 1/2 cup(s) carrot(s), shredded
  • 2 cloves garlic, grated or pressed
  • 1 teaspoon of grated ginger
  • 1 scallion, minced
  • 2 teaspoons of soy sauce
  • 24 wonton wrappers

Process

  1. Preheat oven to 350ºF. Coat a large baking sheet with cooking spray.
  2. Heat oil in a large skillet over medium-high heat. Add cabbage, carrots, garlic, and minced scallion: sauté until cabbage wilts, about 2 minutes.
  3. Remove from heat and stir in 2 teaspoons of soy sauce.
  4. Place wonton wrappers on a flat surface. Drop vegetable mixture by teaspoonfuls onto the center of each wrapper. Moisten the edges of the wrapper with wet fingers, fold over one corner to form a triangle, and press the sides together to seal.
  5. Transfer filled wrappers to the prepared baking sheet and coat the surface with cooking spray.
  6. Bake for 15 minutes, or until the wontons are golden brown.

Sauce

  • ¼ cup of soy sauce
  • 1 minced scallion
  • 1 teaspoon of seasoned rice vinegar
  • 1 teaspoon of Sesame oil
  1. In a small bowl, combine 1/4 cup of soy sauce, minced scallion, and sesame oil.
  2. Mix well and serve with vegetable wontons.

Pierogi Wontons

Golden-brown pierogies topped with bacon bits and green onions on a plate with sour cream
Golden-brown pierogies garnished with bacon bits and green onions, served over saurekraut with sour cream

Using Wonton wrappers is a fantastic shortcut for making pierogies, allowing you to create these delicious dumplings quickly and easily. Pierogies can be served boiled and then pan-fried or baked, and are best complemented with toppings like sautéed onions, sour cream, bacon, or fresh herbs like basil. Serve alongside kielbasa, sauerkraut, roasted vegetables, salads, or soups for a crowd-pleasing meal that is easy to make and enjoy.

Ingredients

  • 2 russet potatoes, washed, peeled, and cut into 1-inch pieces
  • 2 garlic clove(s) peeled and sliced lengthwise
  • ½ cup diced onion
  • ½ cup sharp cheddar shredded
  • 2 – 3 Tbsp sour cream
  • Salt and pepper to taste
  • 1 36-count package of wonton dumpling wrappers
  • 2 tablespoons of butter for sautéing pierogies
  • Salt for boiling water

Directions

  1. Combine cut potatoes and garlic in a medium saucepan. Cover with water, add 1 teaspoon of salt, and set the pan over high heat. Bring to a boil, lower the heat, and boil for 15-20 minutes until fork-tender.
  2. In a small pan over medium heat, melt the butter and add the diced onions. Cook onions until soft and translucent. Remove from heat.
  3. Drain and transfer the potato and garlic to a large bowl; add the cheese, onion, and sour cream, and salt and pepper to taste. Mash the mixture together. The mixture should not be dry; it should hold together so it can be scooped with a spoon, and it should not be loose or runny.
  4. Place wonton wrappers on a flat surface. Add a large spoonful of filling in the center of each wrapper. Wet the edges with your fingers, fold the wrapper in half to form a semicircle, and press the edges to seal. To prevent the dumplings from drying out, cover with plastic wrap or place the dumplings on a flat cookie sheet and freeze until ready to use.
  5. When you are ready to cook, bring a large pot of water seasoned with 1 teaspoon of salt to a boil. Drop the pierogies in the boiling water and stir. After 2 – 3 minutes, pierogies should float to the top and be finished cooking. Remove from the water with a slotted spoon and drain.
  6. Heat a skillet with 2 tablespoons of butter on medium heat. When the butter is melted, drop the boiled pierogies into the melted butter and sauté until golden brown on either side.

Old Fashioned Chicken Stew

Homemade chicken stew is a comforting and hearty dish that has the power to transform your space into a warm, inviting haven. Crafted with tender chicken, fresh vegetables, and aromatic herbs, this stew embodies the essence of home-cooked comfort food. The slow simmering process allows the flavors to meld beautifully, creating a rich and savory aroma that fills every corner of your kitchen and living area.

Whether enjoyed on a chilly evening or as a weekend treat, chicken stew is a versatile dish that brings comfort and a sense of belonging. Its aroma not only satisfies the palate but also creates an environment that feels like a warm embrace, making your space smell like home and fostering a sense of well-being and contentment.

Ingredients

  • One 2- to 3-pound chicken fryer, cut up
  • 3 carrots, diced
  • 2 celery stalks, diced
  • 1/2 medium onion, diced or 1 bag of frozen pearl onions
  • ½ bag of frozen peas (optional)
  • 1-1/2 teaspoon salt
  • 1/4 teaspoon black pepper
  • 1/2 teaspoon ground thyme
  • 1/4 teaspoon turmeric
  • 2 bay leaves
  • 16 ounces egg noodles
  • 2 teaspoons finely minced fresh parsley
  • Beurre Manié (recipe below) to thicken soup

Process

  1. Put the chicken pieces in a large stock pot and cover the chicken with water. Add a teaspoon of salt.
  2. Bring the water to a boil and then reduce the heat to low. Simmer for 45 minutes.
  3. Remove the chicken from the pot. Set the chicken aside to cool briefly.
  4. When cool enough to handle, shred the chicken with 2 forks, reserving the bones. Return the bones to the pot and boil for 25 minutes.
  5. With a slotted spoon remove the bones from the pot and discard. Reserve the liquid in the pot.
  6. Add the shredded chicken, carrots, celery, onions and peas to the pot. Then add ½ teaspoon salt, pepper, thyme, bay leaves and turmeric. Bring the mixture to a gentle boil and then reduce the heat and simmer for 10 minutes. Stir in the noodles.
  7. Simmer until the noodles are tender, about 15 minutes. Remove the bay leaves with a slotted spoon.
  8. Add the Beurre Manié to thicken the broth gradually, this method allows you to control the thickness more precisely and adds a rich flavor without the risk of lumps. Let stew simmer for 5 minutes and then taste the stew and add more salt or pepper to taste. Sprinkle the minced parsley on top and serve with a rustic loaf of bread and butter.

Beurre Manié

Ingredients

  • 2 tablespoons of flour
  • 2 tablespoons of salted butter, room temperature

Process

  1. Mix the flour and softened butter together with a fork or hands.
  2. Knead together until a soft paste forms.

Cooking Endive

How to cook endive. Endive belongs to the chicory genus, which includes several similar bitter leafed vegetables. I am talking about the little bullet shaped endives, not the curly leaf or chicory. Endives are rich in many vitamins and minerals, especially in foliate and vitamins A and K, and are high in fiber. Endive has a bitter-sweet taste, but I thought it was very savory, almost nutty. I served it up with my baby potatoes and flounder; it made a very filling side dish. Let your kids eat these little “boats” with their fingers. Make it fun.

Here are a few suggestions on how to enjoy your endive:

Baked endive:

  1. Preheat oven to 375° F.
  2. Slice endive lengthwise, remove core. Keep the root end intact as it will hold the leaves together after slicing.
  3. Brush both halves with olive oil.
  4. Slice a fresh garlic clove into very thin slices and place the slices in between the endive leaves.
  5. Sprinkle with kosher salt and pepper, and a little garlic powder.
  6. Bake at 375°F. for 20 minutes.
  7. Remove them from the oven and sprinkle balsamic vinegar over them.

Pan braised endive:

  1. Slice your endives in half.
  2. Sprinkle cut side with kosher salt and pepper, and any other seasoning you might like.
  3. Melt 1 tablespoon of butter in a heavy pan along with 1 tablespoon coconut oil.
  4. Place the endive halves cut side down in the pan, cook on medium-high heat until they are brown.
  5. Add ½ cup chicken broth and simmer until almost all liquid is gone. Remove from pan sprinkle with Kosher salt, and drizzle with balsamic vinegar

Maple glazed endive:

  1. Preheat oven to 350°F.
  2. Halve 6 small endives, remove as much of the core as possible.
  3. Arrange endive into one layer on a baking sheet with raised edges.
  4. In a small saucepan, melt 2 tablespoons of butter then stir in 2 tablespoons of real maple syrup, 2 teaspoons of thyme and ¼ teaspoon salt. When hot, pour over the endive and bake until tender and the edges begin to brown, 20 to 25 minutes.

Brussels Sprouts with Bacon, Garlic, and Onion

Brussels sprouts are often overlooked but offer many health benefits and culinary uses. They taste similar to small cabbages and can be made more appealing by adding ingredients like bacon, garlic, or sweet onions. These vegetables go well with beef or pork dishes. To keep their nutrients, it’s best to steam or stir-fry Brussels sprouts, as boiling can reduce important compounds like sulforaphane. They also contain indole-3-carbinol, which is being studied for its potential to help repair DNA and slow cancer growth in lab tests. Including Brussels sprouts in your meals can support a healthy diet and add variety to your cooking. Their nutritional value and versatility make them a good choice for many recipes, helping more people enjoy this nutrient-rich vegetable.

Brussels Sprouts with Bacon, Garlic, and Onion

Ingredients

  • 6 slices bacon
  • ½ cup sweet onion, diced
  • 2 pounds Brussels sprouts, trimmed and halved
  • 4 garlic cloves, grated
  • 1/2 cup fat-free chicken broth
  • 1/8 teaspoon salt
  • 1/8 teaspoon red pepper flakes or Korean Red Pepper Powder
  • 1 tablespoon red currant jelly

Process

  1. Heat a large nonstick skillet over medium-high heat. Add bacon, and sauté until bacon begins to brown. Remove pan from heat. Remove the bacon from pan, reserve one tablespoon drippings in pan (discard the remaining drippings).
  2. Chop bacon into small pieces
  3. Return pan to medium-high heat, and stir in bacon pieces, onion, and Brussels sprouts; sauté 4 minutes.
  4. Add garlic, and sauté for 4 minutes or until garlic begins to brown, stirring frequently.
  5. Add the chicken broth and bring it to a boil. Cook for 2 minutes until the broth reduces and is almost completely gone and the sprouts are crisp-tender, stirring occasionally.
  6. Remove from heat; stir in salt and red pepper flakes, toss with a tablespoon of currant jelly.
  7. For a colorful, special Thanksgiving or Christmas dinner or any holiday dinner, try stirring in pomegranate seeds.

Barley, Leek, Mushroom and Rosemary Gratin

This rustic dish combines grains, vegetables, and herbs for a nutritious meal. Barley offers a nutty, chewy texture and is versatile beyond soups. I found a recipe to serve with pork roast. Mushrooms are optional, but fresh rosemary is essential. Using butter enhances the flavor, and fresh herbs provide the best taste. The dish is filling and healthy enough to be a standalone lunch. You can customize it by adding vegetables like spinach. Overall, it’s a simple, tasty, and adaptable meal that promotes healthy eating and enjoyment.

Ingredients

  • 2 cups of canned reduced sodium vegetable broth
  • 2/3 cup of medium pearl barley, rinsed in cold water
  • 3 leeks (white and light green part only)
  • 1/2 pounds of button mushrooms sliced
  • 1 – 2 tablespoons of fresh rosemary leaves, chopped
  • 2 cloves of garlic, minced or grated
  • ¼ teaspoon salt
  • ¼ teaspoon pepper
  • 1 tablespoon butter
  • 1 tablespoon olive oil
  • ½ cup of freshly grated Swiss, or Apple smoked Gruyere cheese

Process

  1. Bring vegetable broth to a boil, add rinsed barley cover and cook barley in vegetable broth until tender about 25 minutes. Do not drain.
  2. Preheat oven to 375° F – spray a 2-quart baking dish with cooking spray.
  3. Clean and slice mushrooms. I wipe mushrooms off with a paper towel. I do not “wash” mushrooms as they will retain the moisture and will not brown.
  4. Slice off root and dark green leaves of leeks, slice the remaining white part lengthwise. Run under cool water to remove sand between leaves.
  5. Slice leeks into thin slices.
  6. Remove rosemary leaves from stems by pulling downward with thumb and finger, chop fine.
  7. Heat butter in pan until melted, add mushrooms, cook until brown, remove from pan.
  8. Heat oil in same pan until hot, add leeks and cook on medium-high heat until limp, about 10 minutes, add rosemary and garlic, cook for about 1 minute more, add barley, mushrooms, salt and pepper.
  9. Stir in half cheese.
  10. Transfer barley mixture to baking dish
  11. Sprinkle with remaining cheese
  12. Bake for 15 minutes or until heated and bubbly

Shrimp Lettuce Wraps

This recipe involves wrapping a tasty filling in lettuce leaves, creating a satisfying vegetable and shrimp wrap. A store-bought rotisserie chicken, shredded, can substitute for the shrimp. For variety, consider experimenting with other vegetables such as snow peas, mushrooms, or canned bamboo shoots. These additions can enhance the dish’s flavor and texture, making it more exotic and satisfying. The preparation is simple, and the result is a healthy, flavorful wrap that can be enjoyed as a snack or light meal. Feel free to customize the ingredients to suit your taste preferences and create new flavor combinations.

Ingredients:

  • 1 tablespoon of sesame oil to coat pan
  • 2 tablespoons low sodium soy sauce
  • 1 tablespoon dry sherry or apple cider vinegar
  • 1 tablespoon hoisin sauce
  • 1 teaspoon rice vinegar
  • ¼ teaspoon red pepper flakes
  • 1 tablespoon minced garlic
  • 1 tablespoon minced peeled ginger
  • 1 (14 oz) bag of coleslaw
  • 1/2 cup sliced scallions
  • 1 small, peeled zucchini, sliced very thin with a vegetable peeler
  • About 12 Bibb lettuce leaves rinsed, and dried, or Boston lettuce.
  • 1 lb. of deveined and peeled medium shrimp
  • 1/4 cup chopped cashews or peanuts

Process

  1. In a bowl, mix soy sauce, dry sherry, hoisin sauce, red pepper flakes, and rice vinegar. Set aside.
  2. In a small bowl combine minced garlic and minced ginger. Set aside.
  3. In another bowl, combine coleslaw, scallions and zucchini, set aside

Directions:

  1. Heat a large wok or frying pan on medium-high heat, add 1 tablespoon of sesame oil and swirl oil to coat pan or use a pastry brush.
  2. Add garlic and ginger, cook for about 30 seconds, stirring to prevent burning.
  3. Add soy sauce mixture, coleslaw, and vegetables. Cook for 1 minute stirring.
  4. Add shrimp and stir fry until shrimp is pink and cooked through. Coleslaw and veggies should be crisp tender at this point.
  5. Divide mixture among lettuce leaves, sprinkle with cashews and enjoy.

Spaghetti Squash

Tonight, I prepared spaghetti squash for dinner. Instead of steaming it in the oven, which is my usual method, I roasted the squash, and it turned out excellent. Spaghetti squash can be cooked in various ways, including baking, boiling, steaming, and microwaving. It is versatile and can be served with or without sauce, making it a good substitute for traditional pasta. The seeds of the squash can also be roasted, like pumpkin seeds, providing an additional snack. When raw, the flesh is firm and similar to other raw squash. After cooking, the flesh easily separates into ribbons or strands resembling spaghetti. Nutritionally, spaghetti squash is rich in nutrients such as folic acid, potassium, vitamin A, and beta carotene. It is low in calories, with approximately 42 calories per one-cup (155 grams) serving. Although it does not taste like traditional spaghetti, it absorbs the flavors of the ingredients it is cooked or served with. Besides being healthy, it is also gluten-free, making it suitable for various dietary needs.

Ingredients

  • 1 large spaghetti squash
  • 2 tablespoons of olive oil
  • 1 large Roma tomato finely chopped
  • 2 tablespoons of fresh basil
  • ¼ cup shredded mozzarella or parmesan cheese
  • 1 teaspoon each coarse salt and pepper
  • 1 teaspoon garlic powder

Directions

Preheat oven to 400°F. degrees

  1. Place the squash on a towel to reduce the rocking, if cutting lengthwise, cut the stem end off first. Split the squash in half lengthwise using a very sharp knife.
  2. Use a fork to remove the seeds and center strings.
  3. Drizzle the inside of the two halves with the olive oil, using hands or a brush to be sure all surfaces have been coated.
  4. Sprinkle the coarse salt, pepper and garlic powder all over the inside surface of the squash.
  5. Using an oven safe dish or pan place the cut ends of the squash down on surface.
  6. Bake in a 400° F. degree oven for 40 – 50 minutes or until the squash is soft and the strands pull up easily with a fork.
  7. Remove from the oven and fluff the squash with a fork, pulling the strands away from the sides – leave squash in shell
  8. Turn oven onto broil
  9. Add the tomatoes and fresh basil to the fluffed squash and sprinkle each half with the cheese.
  10. Place under broiler for 3 to 4 minutes or until the cheese is melted and lightly browned.

Allow to cool 5 minutes before serving.