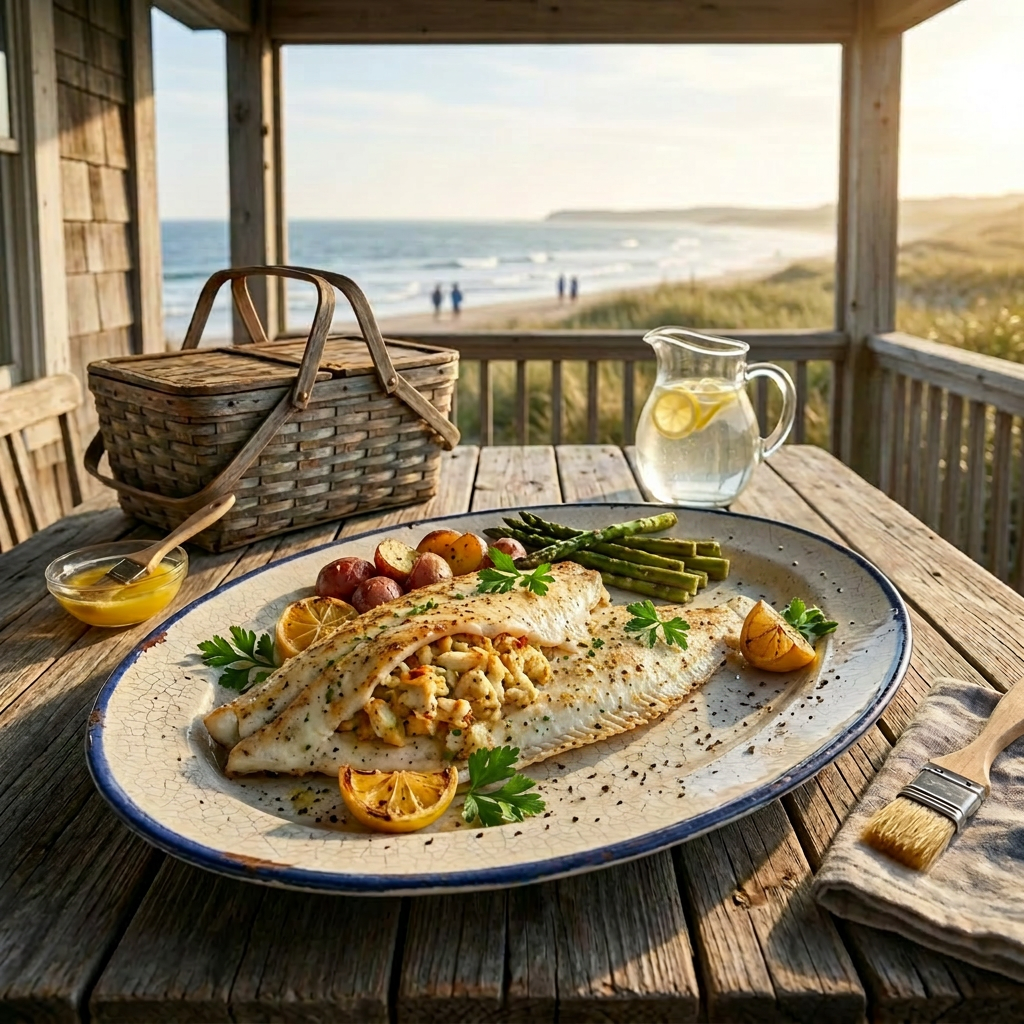
Tag Archives: dinner

Bloody Mary Pickled Eggs

Mason jar labeled 'Bloody Mary Pickled Eggs' filled with red eggs, celery, and lemon in brine.

Embark on a flavor adventure with the delightful art of making Bloody Mary Pickled Eggs! This fun culinary project combines the savory richness of traditional pickled eggs with the bold, spicy kick of a classic Bloody Mary cocktail. Perfect for brunch tables, snack platters, or a quirky gift, these eggs are sure to impress and amuse your friends. When ready to serve, enjoy these eggs as a savory snack, garnish for cocktails, or a unique addition to salads. Their striking appearance and complex flavor profile make them a conversation starter and a fun twist on traditional pickled eggs. So, gather your ingredients, embrace the process, and enjoy the deliciously bold results of your Bloody Mary Pickled gs adventure! *Just a reminder all of my recipes can be found at www.kitchenmoxy.com; where they can be searched and printed.

Ingredients

  • 10 eggs
  • 1 medium sweet onion, sliced thin (a mandolin slicer is a perfect tool for this job)
  • 1 cup Bloody Mary Mix
  • 1 cup white distilled vinegar
  • 1 tablespoon Worcestershire Sauce
  • 1 teaspoon minced Garlic
  • 1 tablespoon hot sauce
  • 1 tablespoon celery seed
  • 1 teaspoon red pepper flakes
  • 1 teaspoon kosher salt
  • 2 Bay leaves
  • 1 Jalapeño pepper, sliced
  • 10 drops red food coloring (optional) try ¼ cup beet juice

Process

  1. Place eggs in a large pot of water making sure they are fully submerged. Bring water to a boil, reduce heat and simmer for 11 minutes.
  2. First, drain the hot water and put the eggs in cold water. When they are cool enough to handle, peel off the shells. Do not refrigerate, shells are easier to peel when warm.
  3. Wearing gloves, slice the jalapeño peppers about ¼ inch thick. Leave the seeds if you want more heat.
  4. In a large pot, combine the Bloody Mary Mix, white vinegar, Worcestershire sauce, hot sauce, garlic, celery seed, red pepper flakes, salt, bay leaves and food coloring.  
  5. Bring mixture to a boil, stirring occasionally until the mixture is fully incorporated and salt is dissolved. Reduce heat to low. Simmer for about 5 minutes.
  6. Pour the hot brine over the eggs to fill the jar up to 1/4-inch headspace.
  7. Let sit for 30 minutes before adding the lid.
  8. Secure the lid and place in the refrigerator when eggs cool to room temperature. 

Will last 3 to 4 months in the refrigerator. Let eggs pickle for 7 days to develop flavor.

Mustard Pickled Eggs

A large glass jar filled with mustard pickled eggs, labeled MUSTARD PICKLED EGGS - EST. 1923 -.

Pickled eggs come in fun shades like pink, yellow, or deep amber, depending on the ingredients used. These tangy treats are a worldwide favorite, made by boiling eggs and soaking them in a spicy vinegar brine. The process not only preserves the eggs but also adds a zesty flavor, making them a hit in many recipes. After receiving great feedback on my Pickled Beet Eggs, I’m excited to share a new twist: Mustard Pickled Eggs! Get ready for a deliciously tangy adventure that’s sure to spice up your snack game.

Ingredients

  • 10 eggs
  • 1 medium yellow onion, sliced thin (a mandolin slicer is a perfect tool for this job)
  • 4 cups of water
  • 1 cup white vinegar
  • 1 cup sugar
  • 1 tablespoon kosher salt
  • 1 tablespoon mustard seeds
  • 3 tablespoons of yellow mustard or 1-1/2 tablespoon mustard powder
  • 2 teaspoons turmeric

Process

  1. Place eggs in a large pot of water making sure they are fully submerged. Bring water to a boil, reduce heat and simmer for 11 minutes.
  2. First, drain the hot water and put the eggs in cold water. When they are cool enough to handle, peel off the shells. Do not put the eggs in the fridge, as they are easier to peel when warm. In a large pot, combine 4 cups of water, white vinegar, sugar, kosher salt, mustard seeds, yellow mustard (or mustard powder), and turmeric. Bring mixture to a boil, stirring occasionally until the sugar and salt are fully dissolved. Reduce heat to low.
  3. Let mixture simmer for 5 minutes. This step is vital for infusing the pickling solution with the distinctive taste of mustard and spices.
  4. Put the shelled, hard-boiled eggs and sliced onions in a clean, sterilized glass jar.
  5. When the pickling solution has cooled, pour it over the eggs and onions, be sure they are fully submerged. Seal the jar tightly with a lid and place the jar in the refrigerator to marinate for 14 days. Give the jar a stir or shake every day to distribute the flavors.

These tasty treats are golden yellow and full of flavor. They have a tangy taste, a hint of mustard, and a little spice from the turmeric. If kept properly in a sealed container and refrigerated, they will stay good for many months.

Old Fashioned Chicken Stew

Homemade chicken stew is a comforting and hearty dish that has the power to transform your space into a warm, inviting haven. Crafted with tender chicken, fresh vegetables, and aromatic herbs, this stew embodies the essence of home-cooked comfort food. The slow simmering process allows the flavors to meld beautifully, creating a rich and savory aroma that fills every corner of your kitchen and living area.

Whether enjoyed on a chilly evening or as a weekend treat, chicken stew is a versatile dish that brings comfort and a sense of belonging. Its aroma not only satisfies the palate but also creates an environment that feels like a warm embrace, making your space smell like home and fostering a sense of well-being and contentment.

Ingredients

  • One 2- to 3-pound chicken fryer, cut up
  • 3 carrots, diced
  • 2 celery stalks, diced
  • 1/2 medium onion, diced or 1 bag of frozen pearl onions
  • ½ bag of frozen peas (optional)
  • 1-1/2 teaspoon salt
  • 1/4 teaspoon black pepper
  • 1/2 teaspoon ground thyme
  • 1/4 teaspoon turmeric
  • 2 bay leaves
  • 16 ounces egg noodles
  • 2 teaspoons finely minced fresh parsley
  • Beurre Manié (recipe below) to thicken soup

Process

  1. Put the chicken pieces in a large stock pot and cover the chicken with water. Add a teaspoon of salt.
  2. Bring the water to a boil and then reduce the heat to low. Simmer for 45 minutes.
  3. Remove the chicken from the pot. Set the chicken aside to cool briefly.
  4. When cool enough to handle, shred the chicken with 2 forks, reserving the bones. Return the bones to the pot and boil for 25 minutes.
  5. With a slotted spoon remove the bones from the pot and discard. Reserve the liquid in the pot.
  6. Add the shredded chicken, carrots, celery, onions and peas to the pot. Then add ½ teaspoon salt, pepper, thyme, bay leaves and turmeric. Bring the mixture to a gentle boil and then reduce the heat and simmer for 10 minutes. Stir in the noodles.
  7. Simmer until the noodles are tender, about 15 minutes. Remove the bay leaves with a slotted spoon.
  8. Add the Beurre Manié to thicken the broth gradually, this method allows you to control the thickness more precisely and adds a rich flavor without the risk of lumps. Let stew simmer for 5 minutes and then taste the stew and add more salt or pepper to taste. Sprinkle the minced parsley on top and serve with a rustic loaf of bread and butter.

Beurre Manié

Ingredients

  • 2 tablespoons of flour
  • 2 tablespoons of salted butter, room temperature

Process

  1. Mix the flour and softened butter together with a fork or hands.
  2. Knead together until a soft paste forms.

Leg of Lamb – reversed seared with Mint Chimichurri

Roasted leg of lamb on a wooden board with potatoes, carrots, mint sauce, and red wine.
Enjoy a classic Sunday roast with this beautifully cooked leg of lamb served with mint sauce and wine.

The reverse searing technique has become popular among chefs and home cooks because it improves meat texture, especially for a leg of lamb. This method involves cooking the meat slowly at a low temperature first, then finishing with a high-temperature sear. When used on lamb, reverse searing makes the meat more tender, evenly cooked, and flavorful. The final sear creates a tasty crust through the Maillard reaction, adding flavor without overcooking the inside. Since the meat is cooked evenly beforehand, the crust forms without drying out the meat.

Historically, mint has been paired with lamb due to cultural traditions. Instead of traditional mint jelly or fresh mint, try Mint Chimichurri—a vibrant herb sauce made with mint, parsley, jalapeño peppers, garlic, olive oil, honey, and vinegar. This sauce enhances lamb’s flavor with its herbaceous, tangy, and slightly spicy notes. It also pairs well with fresh vegetables, adding a bright, fresh taste that complement rich meats and enhances the overall dining experience. Recipe below

Ingredients

Meat Rub

  • 1/4 cup of fresh rosemary leaves, chopped
  • 1 tablespoon fresh thyme leaves
  • 3 teaspoons of kosher salt
  • 1 teaspoon black pepper
  • 2 Tablespoons of Dijon mustard (optional)
  • ¼ cup extra-virgin olive oil
  • Bone-in leg of lamb, between 5 and 7 pounds

Process

  1. Set a wire rack inside of a half sheet pan. Set the lamb on the wire rack.
  2. In a small bowl, stir to combine the oil, mustard, chopped fresh rosemary leaves, fresh thyme leaves, freshly ground black pepper, and kosher salt.
  3. Rub this mixture all over the lamb leg, making sure to get the underside of the meat.
  4. Let the lamb sit at room temperature uncovered for one hour.
  5. About 15 minutes before the hour is up, preheat the oven to 250℉.
  6. Place the lamb in the oven and cook for 90 minutes to 2 hours, adjusting time based on the size of the leg and preferred donenes.
  7. Around the 90-minute mark, begin checking the lamb with an instant-read or meat thermometer inserted into the thickest part of the meat (make sure the thermometer does not touch the bone).
  8. When the internal temperature is about 5 degrees below your target doneness (see notes below), remove the roast from the oven and let rest for 30 minutes at room temperature.
  9. While the lamb rests, increase the oven temperature as high as it will go, ideally 500℉. If your oven has a convection feature, turn that on too.
  10. Place the lamb back in the oven for about 5 minutes to brown the exterior. Turn the oven light on and watch through the glass to ensure the outside doesn’t get too brown (and to make sure things don’t get too smoky).
  11. The lamb is cooked when the skin starts to peel and crackle like bacon in a pan.
  12. Remove the lamb, then slice and serve right away. No need to rest again. Enjoy!

Internal temperatures for bone-in leg of lamb:

  • Rare: 125°F. – approximately 10 minutes per pound
  • Medium-rare: 130-135°F. – approximately 15 minutes per pound
  • Medium: 135-140°F. – approximately 20 minutes per pound
  • Well-done: 155-160°F. – approximately 25 minutes per pound

Mint Chimichurri

Ingredients

  • 1 cup of mint leaves, tightly packed
  • 1 cup flat-leaf parsley leaves, tightly packed
  • 3 cloves garlic
  • 2 small jalapeño peppers, seeded and roughly chopped
  • 2 tablespoons of honey (optional, balances the heat of the peppers)
  • 2 tablespoons of red wine vinegar
  • 1 tsp. salt
  • 1/3 – ½ cup extra-virgin olive oil

Process

  1. Finely chop the mint and parsley by hand for a rustic texture and add the rest of the ingredients, mix well.  Or use a food processor for convenience.
  2. If using a food processor, add the herbs with garlic, wine vinegar, honey, salt and jalapeno peppers.
  3. With the motor running, pour in the olive oil in a steady stream.
  4. Scrape the sides and pulse a few more times until the mixture is smooth and easy to spoon, with a loose consistency.
  5. Let the sauce sit at room temperature for 10 minutes to blend the flavors.

Roasted Pork

Roast pork with golden crackling on a dining table with flowers, candles, and sides.
A beautifully prepared roast pork dinner serves as the centerpiece of an elegant and festive table setting.

During Easter dinner, the aroma of roasted pork shoulder is both inviting and comforting, filling the room with a warm, savory scent that hints at the rich flavors to come. As the pork cooks, the exterior develops a golden-brown, crispy crust, infused with a blend of herbs and spices such as rosemary, thyme, garlic, and black pepper. This crust releases a tantalizing aroma characterized by hints of caramelization and roasted meat, creating an irresistible smell that stimulates the appetite.

Each bite delivers a satisfying combination of textures and flavors—crispy, tender, savory, and aromatic—making roasted pork shoulder a centerpiece that elevates any Easter celebration. The balance of aroma and taste creates an inviting atmosphere, encouraging guests to indulge and enjoy the festive meal to its fullest.

Ingredients

  • 9-10 lb bone-in Pork Shoulder
    • Bake 1.5 – 2.0 hours per pound in a low heat oven (250° – 275°F.)
    • Will take about 8 – 12 hours to cook
    • It is done when an internal meat thermometer reaches 195 – 205°F. for shredded pulled pork.
    • Or 160°F. for slicing.

Seasoning

  • 2 tablespoons coarse salt to season overnight
  • 4 – 6 garlic cloves
  • 1 tablespoon coarse salt
  • ½ tablespoon fresh cracked peppercorns
  • 1-1/2 tablespoon ground mustard
  • 1-1/2 tablespoon onion powder
  • 3 tablespoons of minced fresh rosemary

Process

  1. Rub the pork shoulder with 2 tablespoons of coarse salt all over, tie it, wrap it air-tight with cellophane, place in a sheet pan or roasting dish, and refrigerate overnight.
  2. Pull the pork out of the refrigerator about 30 minutes before cooking to bring to room temperature.
  3. Preheat the oven to 450°F. line the bottom of a roasting pan with aluminum foil for easy clean up and fit a roasting rack inside the pan.
  4. Cut each garlic clove into slivers. With a small knife poke holes in the pork that are about ½ inch deep (or the length of the garlic clove) to create slits and push the garlic sliver into each slit.
  5. Mix the seasoning together and rub into the pork shoulder, seasoning on all sides.
  6. Place the seasoned pork onto the roasting rack in the pan.
  7. Place the pan into the oven and let it roast for 15 minutes at 450°.
  8. Lower the heat to 275°F.  and let it slowly cook until it reaches the tender internal temperature of 200 – 203°F. internal temperature.
  9. Pull pork out of the oven, tent with aluminum foil and let rest for 1/2 hour up to 1 hour.

Leg of Lamb – reversed seared with Mint Chimichurri

Roasted leg of lamb on a wooden board with potatoes, carrots, mint sauce, and red wine.
Enjoy a classic Sunday roast with this beautifully cooked leg of lamb served with mint sauce and wine.

The reverse searing technique has become popular among chefs and home cooks because it improves meat texture, especially for a leg of lamb. This method involves cooking the meat slowly at a low temperature first, then finishing with a high-temperature sear. When used on lamb, reverse searing makes the meat more tender, evenly cooked, and flavorful. The final sear creates a tasty crust through the Maillard reaction, adding flavor without overcooking the inside. Since the meat is cooked evenly beforehand, the crust forms without drying out the meat.

Historically, mint has been paired with lamb due to cultural traditions. Instead of traditional mint jelly or fresh mint, try Mint Chimichurri—a vibrant herb sauce made with mint, parsley, jalapeño peppers, garlic, olive oil, honey, and vinegar. This sauce enhances lamb’s flavor with its herbaceous, tangy, and slightly spicy notes. It also pairs well with fresh vegetables, adding a bright, fresh taste that complement rich meats and enhances the overall dining experience. Recipe below

Ingredients

Meat Rub

  • 1/4 cup of fresh rosemary leaves, chopped
  • 1 tablespoon fresh thyme leaves
  • 3 teaspoons of kosher salt
  • 1 teaspoon black pepper
  • 2 Tablespoons of Dijon mustard (optional)
  • ¼ cup extra-virgin olive oil
  • Bone-in leg of lamb, between 5 and 7 pounds

Process

  1. Set a wire rack inside of a half sheet pan. Set the lamb on the wire rack.
  2. In a small bowl, stir to combine the oil, mustard, chopped fresh rosemary leaves, fresh thyme leaves, freshly ground black pepper, and kosher salt.
  3. Rub this mixture all over the lamb leg, making sure to get the underside of the meat.
  4. Let the lamb sit at room temperature uncovered for one hour.
  5. About 15 minutes before the hour is up, preheat the oven to 250℉.
  6. Place the lamb in the oven and cook for 90 minutes to 2 hours, adjusting time based on the size of the leg and preferred donenes.
  7. Around the 90-minute mark, begin checking the lamb with an instant-read or meat thermometer inserted into the thickest part of the meat (make sure the thermometer does not touch the bone).
  8. When the internal temperature is about 5 degrees below your target doneness (see notes below), remove the roast from the oven and let rest for 30 minutes at room temperature.
  9. While the lamb rests, increase the oven temperature as high as it will go, ideally 500℉. If your oven has a convection feature, turn that on too.
  10. Place the lamb back in the oven for about 5 minutes to brown the exterior. Turn the oven light on and watch through the glass to ensure the outside doesn’t get too brown (and to make sure things don’t get too smoky).
  11. The lamb is cooked when the skin starts to peel and crackle like bacon in a pan.
  12. Remove the lamb, then slice and serve right away. No need to rest again. Enjoy!

Internal temperatures for bone-in leg of lamb:

  • Rare: 125°F. – approximately 10 minutes per pound
  • Medium-rare: 130-135°F. – approximately 15 minutes per pound
  • Medium: 135-140°F. – approximately 20 minutes per pound
  • Well-done: 155-160°F. – approximately 25 minutes per pound

Mint Chimichurri

Ingredients

  • 1 cup of mint leaves, tightly packed
  • 1 cup flat-leaf parsley leaves, tightly packed
  • 3 cloves garlic
  • 2 small jalapeño peppers, seeded and roughly chopped
  • 2 tablespoons of honey (optional, balances the heat of the peppers)
  • 2 tablespoons of red wine vinegar
  • 1 tsp. salt
  • 1/3 – ½ cup extra-virgin olive oil

Process

  1. Finely chop the mint and parsley by hand for a rustic texture and add the rest of the ingredients, mix well.  Or use a food processor for convenience.
  2. If using a food processor, add the herbs with garlic, wine vinegar, honey, salt and jalapeno peppers.
  3. With the motor running, pour in the olive oil in a steady stream.
  4. Scrape the sides and pulse a few more times until the mixture is smooth and easy to spoon, with a loose consistency.
  5. Let the sauce sit at room temperature for 10 minutes to blend the flavors.

Spinach Salad with Candied Pecans

Cooking with fresh ingredients is a delightful adventure that sparks joy and creativity. Making a spinach salad with candied pecans turns mealtime into a fun, vibrant experience, filling my kitchen with warmth and happiness. It’s a simple way to add excitement and flavor to everyday meals.

Ingredients

  • 1 tablespoon butter
  • ½ cup pecan halves
  • 2 tablespoons brown sugar
  • 2 tablespoons of balsamic or white wine vinegar
  • 2 tablespoons of olive oil
  • 1 6-ounce package of baby spinach, long stems removed
  • 1 Pomegranate, seeded
  • ¼ cup feta or Gorgonzola cheese

Directions

  1. Melt butter in a small frying pan over low heat.
  2. Add pecans and 1 tablespoon of the brown sugar.
  3. Cook for 2 to 3 minutes, stirring constantly until nuts are caramelized.
  4. Spread out on wax or parchment paper to cool.
  5. In a jar with a lid, combine the remaining brown sugar, olive oil and vinegar, shake until sugar is melted.
  6. Place spinach in a large salad bowl and coat with the dressing, mix.
  7. Stir in pecans and pomegranate seeds, sprinkle with feta cheese or Gorgonzola cheese

Optional stir ins:

  • Thinly sliced tart apple
  • Golden raisins
  • Sliced Strawberries
  • Raspberries
  • Blueberries

Baked Ziti

Sunday dinner on a cold winter day is special. Baked Ziti, a classic comfort food, is perfect for this occasion. Serve it with a fresh green salad and toasted garlic bread. You can use traditional pasta or opt for healthier options like whole wheat, protein, or high-fiber pasta. To keep it simple, I use jarred spaghetti sauce, but homemade sauce works well too. Sometimes, I add cooked Italian sausage or meatballs to enhance the flavor. This dish is easy to prepare and ideal for a cozy family meal.

Ingredients

  • 18-ounce box of Ziti, cook and drain as directed on the box. Do not rinse
  • 3-1/2 cups (32-ounce jar of sauce) spaghetti sauce
  • 2 cups of Ricotta cheese
  • 2 cups shredded mozzarella cheese
  • ¼ cup chopped, fresh parsley
  • 1 egg, slightly beaten
  • 1 teaspoon oregano
  • ½ teaspoon garlic powder
  • ¼ teaspoon pepper
  • 1 tablespoon freshly grated parmesan cheese
  • ½ cup shredded mozzarella cheese

Process

  1. Preheat oven to 375°F.
  2. Cook pasta according to directions, drain but do not rinse (rinsing pasta prevents sauce from sticking to it).
  3. In a large bowl combine ½ cup of spaghetti sauce, ricotta cheese, mozzarella cheese, fresh parsley, egg, oregano, garlic powder, pepper and 1 tablespoon of freshly grated parmesan cheese.
  4. In a 3-quart casserole pour another ½ cup of spaghetti sauce on bottom of dish and spread out with a spatula.
  5. Pour contents of ziti mixture into casserole pour remaining spaghetti sauce on top of ziti mixture, sprinkle with mozzarella cheese.
  6. Bake covered with aluminum foil for 30-35 minutes or until hot and bubbly

Baked Salmon with Brown Sugar Rub

Using a brown sugar rub on a salmon fillet not only elevates its flavor profile but also adds an appealing visual appeal, making it a popular choice among seafood enthusiasts and home cooks alike. Applying a brown sugar rub on a salmon fillet is a popular culinary technique that enhances the fish’s natural flavors while adding a subtle sweetness and caramelized crust. Additionally, the brown sugar rub can be customized with herbs or spices to suit personal preferences, making it a versatile option for enhancing the taste of salmon.

Ingredients

  • 1 tablespoon brown sugar
  • 1-1/2 teaspoon kosher salt
  • 1-1/2 teaspoon sweet paprika
  • 1-1/2 teaspoon garlic powder
  • 1 teaspoon Korean Pepper Flakes (optional)
  • ¼ teaspoon freshly cracked black pepper
  • 1 2-pound salmon filet
  • 1 tablespoon olive oil

Process

  1. Preheat the oven to 375° F.
  2. In a small bowl, combine the brown sugar, salt, paprika, garlic powder, pepper flakes, and pepper.
  3. Place the salmon on a parchment or aluminum foil lined, rimmed baking sheet, skin side down. Brush the salmon with the olive oil, then rub it with the spice mixture until completely coated.
  4. Bake in the center of the oven for 15 – 18 minutes, or until the fish flakes easily with a fork. (Internal temperature 145° F. or 63° C.)

Simple Stuffed Turkey Breast

This delicious roulade is perfect for your company or weekly dinners. It is filled with sautéed vegetables and sliced into attractive pinwheels, making it both tasty and visually appealing.
Preparing a turkey breast can be an excellent choice for a nutritious and flavorful meal. Turkey breast is a lean source of protein, making it suitable for health-conscious individuals. A well-prepared turkey breast can be tender, juicy, and full of flavor, especially when cooked with the right techniques and seasonings.

Ingredients

  • 1 whole turkey breast (about 2-3 pounds)
  • 2 tablespoons olive oil or melted butter
  • 1 cup of finely chopped red onion
  • 2 cups of chopped mushrooms
  • 2 carrots, shredded
  • 2 cloves of garlic, grated or pressed
  • 1 10-ounce box frozen chopped spinach, thawed and squeezed dry
  • 2 tablespoons of fresh parsley
  • ¼ cup grated Parmesan cheese
  • ½ teaspoon dried basil leaves
  • ¼ cup dry breadcrumbs
  • 1 cup low-sodium chicken broth
  • 1 tablespoon grated lemon zest
  • Salt and freshly ground black pepper to taste
  • Garlic cloves (minced)

Process

  1. Mix the dry breadcrumbs with ¼ cup of the chicken broth. Set aside.
  2. In a large nonstick skillet, melt the butter. Sauté the onions for 4 minutes. Add the garlic, mushrooms and carrots; sauté until the vegetables are tender, 4-5 minutes.
  3. Stir in the spinach, parsley, cheese and basil; cook for 2 minutes.
  4. Remove from the heat; stir in the breadcrumbs, and lemon zest.
  5. Preheat the oven to 325°F.
  6. Spray a 9×13” baking dish with nonstick cooking spray.
  7. Place the turkey between two sheets of plastic wrap, with a meat mallet or rolling pin, pound to an even thickness.
  8. Remove the top sheet of plastic wrap from the turkey; spread the mushroom mixture over the turkey breast, leaving a 2” border on all sides.
  9. Starting with the short side, roll up the turkey breast jelly-roll style; tie at 2” intervals with kitchen string.
  10. Place the roll, seam-side down in the baking dish, pour the remaining broth over the turkey and cover loosely with foil.
  11. Bake, basting frequently with the pan juices, until an instant-read thermometer inserted in the center of the roll reaches 180°F, 1-1½ hours.
  12. Transfer turkey to a cutting board; let stand 10 minutes before removing the string and slicing.

Serving Suggestions

Slice the turkey breast and serve with a variety of side dishes such as roasted vegetables, mashed potatoes, or a fresh salad. The turkey can also be used in sandwiches or salads for a quick and healthy meal.