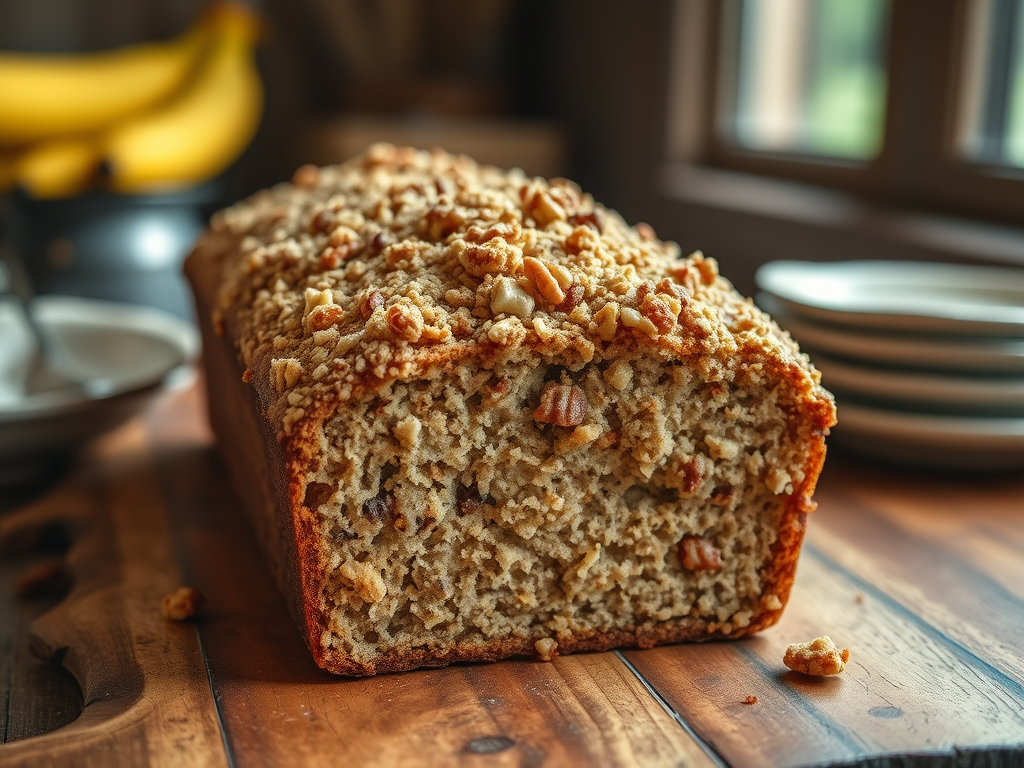
There are so many recipes for Banana Nut Bread and truthfully, they are all pretty good. I discovered this recipe about 10 years ago and decided it is the best recipe I have ever made for Banana Nut Bread, moist, dense with an intense banana flavor highlighted by toasted walnuts and cinnamon streusel topping. This recipe makes two loaves, great for gifting or freezing for later use.
Ingredients
¾ cup butter, softened
1 8oz package of cream cheese, softened
2 cups of sugar
2 large eggs
3 cups of all-purpose flour
½ teaspoon baking powder
½ teaspoon baking soda
½ teaspoon salt
1-1/2 cups mashed ripe bananas (about 4 with dark spots) *
1 cup chopped toasted walnuts
1 teaspoon vanilla extract
Process
Preheat oven to 350°F. Grease and flour two 8 x 4-inch bread pans.
Mix butter and cream cheese with an electric mixer until smooth.
Gradually add sugar and beat until the mixture is light and fluffy.
Add eggs one at a time, beating until just blended after each addition.
COMBINE flour and next three ingredients
Gradually add to the butter mixture at low speed until blended.
Add bananas, vanilla and nuts.
Spoon batter into two greased and floured bread pans.
Top with streusel topping.
Bake for 1 hour until a toothpick inserted in the center comes out clean and sides pull away from pan.
Cool pans on wire rack for 10 minutes before removing from pans.
Cool completely before slicing.
STREUSEL TOPPING
Ingredients
½ cup firmly packed brown sugar
½ cup chopped toasted walnuts
1 tablespoon melted butter
1 tablespoon flour
1/8 tsp ground cinnamon.
Process
Mix all ingredients for streusel together in a bowl.
Sprinkle over the batter before baking
Press streusel into the dough with the back of a spoon to ensure streusel is baked into the loaf and doesn’t shed when removed from the pan.
*Note: the riper the bananas (black even) the more banana flavor will impart in your recipe. I use frozen bananas that have been defrosted in the refrigerator, they are overripe and work wonderfully.
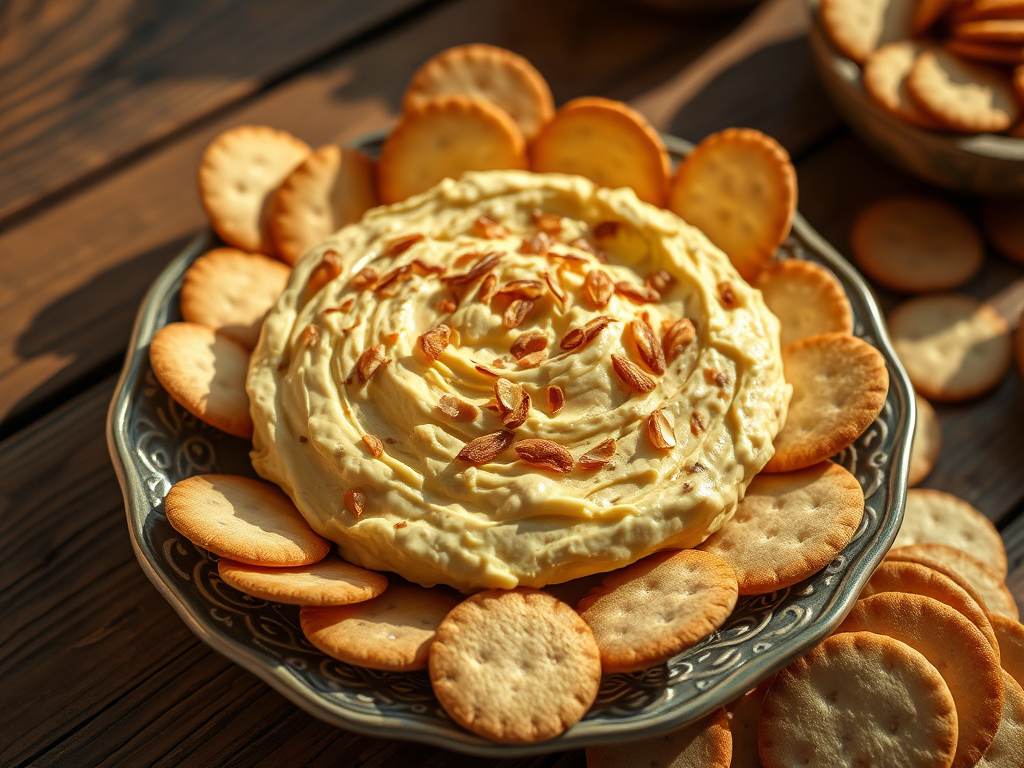
This appetizer from the 1980s is made with toasted almonds to enhance the Swiss cheese flavor. It is usually served with crackers, toasted bread cut-outs, or fresh vegetables. Retro appetizers often use traditional ingredients in recipes that are still enjoyed today. They are perfect for themed parties or gatherings that want a nostalgic feeling. These appetizers combine history, good taste, and social fun, making them popular for celebrations that appreciate the past but are also modern.
Ingredients
1 8oz package cream cheese
1-1/2 cup shredded Swiss cheese
1/3 cup Miracle Whip salad dressing, or mayonnaise
3 thinly sliced scallions
1/8 teaspoon ground nutmeg (fresh if possible)
½ teaspoon pepper
1/3 cup sliced almonds, toasted (see how to toast below)
Process
Preheat oven to 350°F.
In a medium bowl, combine the cream cheese, Miracle Whip or mayonnaise, onions, pepper and nutmeg. Stir in the Swiss cheese. Transfer to small ovenproof glass bowl. Sprinkle 1/2 of the almonds on top.
Bake for 7 minutes. Stir, and bake for an additional 8 minutes. Remove from oven, sprinkle remaining almonds on top and serve.
Serve warm with crackers, toasted rye bread slices or vegetables to scoop the dip.
To Toast Almonds
Preheat the oven to 350°F (175°C).
Spread the almonds in a single layer on a large baking sheet.
Bake the almonds for 11 to 12 minutes for whole almonds, or about 8 minutes for sliced or slivered almonds.
Stir the almonds halfway through to ensure even toasting. Keep a close eye on them, as they can burn quickly.
Once they are brown and fragrant, remove from the oven and let them cool completely on the baking sheet.
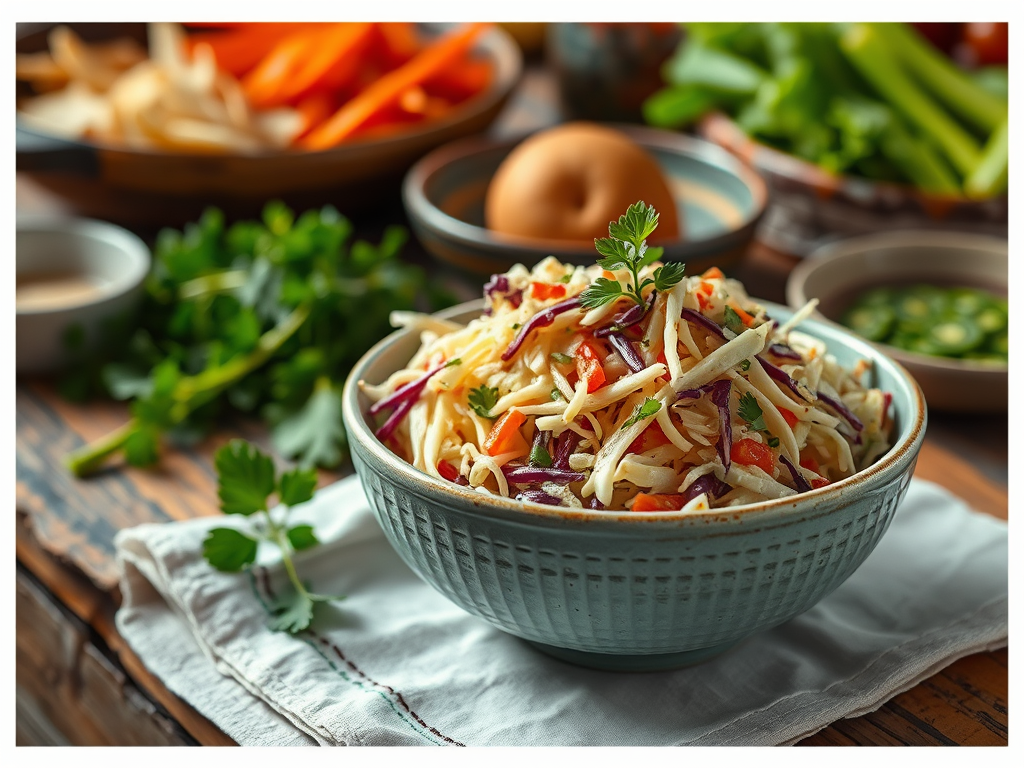
Eating cabbage regularly can improve your health. It helps boost your immune system, aids digestion, and supports overall wellness. Cabbage also benefits your heart by reducing inflammation and oxidative stress thanks to its antioxidants. Besides health benefits, cabbage is versatile in cooking. You can use it on tostadas, sandwiches, fish tacos, or in dishes like Egg Roll in a Bowl. Using pre-shredded coleslaw mix makes it easy to prepare quick cabbage soup or cabbage pancakes. I like the Light Coleslaw recipe during the week. It tastes good and stays fresh for a few days.
LIGHT COLESLAW DRESSING
Ingredients
3 tablespoons of reduced calorie mayonnaise
2 tablespoons cider vinegar (substitutes: rice or white vinegar)
1 tablespoon of dill seeds (substitute: caraway seeds, or none)
1 teaspoon of sugar
¼ teaspoon freshly ground pepper
1 bag of pre-grated coleslaw mix
1 small, sweet onion, grated on a box grater
Process
Mix dressing ingredients together in a larger bowl. Whisk together the mayonnaise, vinegar, dill seeds, sugar, and pepper.
Grate onion.
Stir in the pre-grated bag of coleslaw mix and onion until blended.
Cover and refrigerate for at least 1 hour.
Stir before serving.
Nutrition per serving
Calories: 65kcal | 3 g Total Fat | 1 g Saturated Fat | 3 mg Cholesterol | 74 mg Sodium | 10 g Total Carbohydrate | 2 g Dietary Fiber | 2 g Protein | 48 mg Calcium
TRADITIONAL COLESLAW DRESSING
Ingredients
½ cup mayonnaise
1-1/2 tablespoon apple cider vinegar
2 teaspoons Dijon mustard
1 tablespoon sugar adjust to taste
1 teaspoon kosher salt
¼ tsp black pepper
½ tsp celery seed optional
Process
Whisk together in a large bowl: mayonnaise, vinegar, Dijon mustard, sugar, salt, pepper and celery seed.
Stir in the bag of pre-grated coleslaw until well blended.
Notes: Note that coleslaw reduces in volume as it sits and the cabbage releases its moisture. Don’t be tempted to add more mayo even if it appears dry at first: it will become saucier quickly as it stands (even more so the next day!).
Optional Seasoning add-ins:
Onion powder
Garlic powder
Celery seed
Dry mustard or Dijon mustard
Cilantro
Optional Mix-ins:
You can also add other mix-ins to the coleslaw things like:
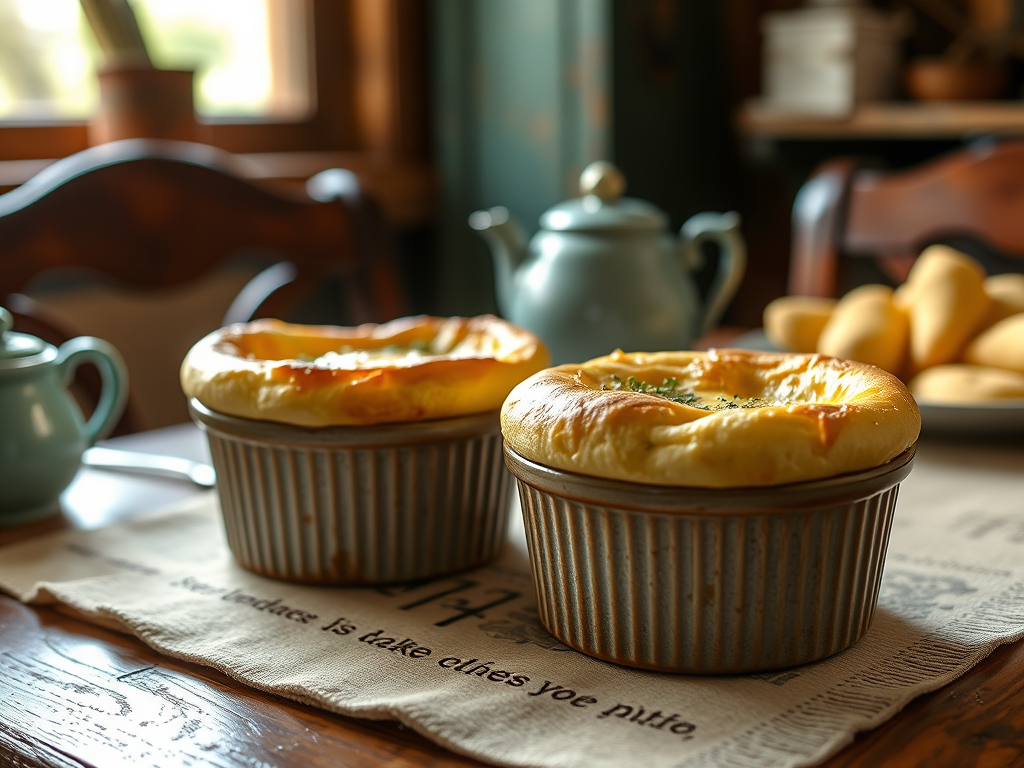
This was my first time attempting to make a cheese souffle, I’ve had the recipe for about 20 years and decided to check out other recipes online to compare ingredients and methods. I decided to use this one with a few ingredient additions because it was simple. I honestly didn’t think it would turn out. But I have to say, even though my 8-ounce ramekins were filled to the top with the egg mixture, they were beautifully puffed, golden, crispy crust and light as air inside. The taste was incredible and I devoured both.
Great for brunch, a light supper or as a versatile side dish, these melt-in-your-mouth souffles are flavorful, fluffy and fun. Served hot, egg soufflés can be accompanied by a fresh salad or a side of toasted bread, making them a wholesome and refined light meal option.
Ingredients
1-1/2 tablespoons of butter
1-1/2 tablespoons of all-purpose flour
½ cup milk, or cream
1 teaspoon Dijon mustard
½ cup shredded cheddar cheese, or Gruyère cheese
¼ teaspoon of cream of tarter
2 eggs, separated
Process
Preheat oven to 350°F. Spray two 8-ounce ramekins with nonstick cooking spray. Set aside.
Crack eggs and separate yolks from whites.
Beat egg yolks with a fork and set aside.
In a saucepan over medium-low heat, melt butter.
Stir in the flour until smooth; gradually add milk.
Bring to boil and cook stirring for 1-2 minutes or until thickened.
Reduce heat, stir in cheese until melted. Remove pan from heat.
Gradually add a small amount of hot cheese mixture to the beaten egg yolks, stirring constantly to prevent cooking. Then, pour the mixture back into the pan, stirring continuously until fully incorporated. Set aside to allow it to cool slightly.
In a mixing bowl, beat egg whites and cream of tartar until stiff peaks form.
Fold a third of the whites into the egg yolk mixture to loosen then fold in the remaining whites, streaky whites are okay, do not overmix. Pour into prepared ramekins. Wipe rims of ramekins clean.
Bake for 25 minutes or until a toothpick inserted near the center comes out clean. *Note: do not open the oven door while cooking.
Serve immediately. They will deflate as they cool, but will still be delicious!
Pancakes for dinner? Why yes! When my kids were young, we often ate breakfast for dinner once a week, usually on Friday. We also had a special night called Taco Tuesday, which they enjoyed. Having a plan where you have one breakfast and one dinner each week can make meal planning easier and healthier. It helps organize meals better, reduces the stress of deciding what to eat, and allows trying new recipes or cuisines. This method also simplifies shopping and helps control portion sizes. As the children grew into teenagers, I encouraged them to plan and cook a family meal on a designated night, which helped them learn cooking skills and become more independent.
Initially, this plan did not provide much relief from the kitchen work. However, as they gained confidence in their skills, planning meals became easier and less tiring. Watching them become more independent turned mealtime into an enjoyable experience.
Light as Air Pancakes
Ingredients
1 cup all-purpose flour
1-1/2 teaspoons baking powder
2 tablespoons sugar
½ teaspoon salt
2 eggs, separated
¾ cup milk
1 teaspoon vanilla extract
Strawberry syrup, to serve (see below
Process
Sift the flour, baking powder, sugar, and salt into a bowl.
Put egg yolks and milk into another bowl and gently beat in the sifted dry ingredients.
Put the egg whites into a clean mixer bowl and beat until stiff peaks form. Using a spatula, fold whites into the batter.
Heat the prepared griddle over medium-low heat. Pour 1/4 cup of batter into the pan and cook in batches over low heat until small bubbles begin to appear on the surface and the underside is golden brown. Flip the pancakes over and cook the other side for 1 more minute.
Spread with whipped butter (recipe below) and maple syrup, strawberry syrup, blueberry syrup, or fresh fruit.
Whipped Butter
½ cup of softened butter
1 ½ teaspoon of whipping cream, milk or water
Whip the butter and liquid of your choice until light and fluffy.
Variations
Add a teaspoon of honey for honey butter or
½ teaspoon of Cinnamon and 1 tablespoon of maple syrup for a sweet topping
Fruit Syrup Ingredients
1 cup sugar
1 cup of water
1-1/2 cups mashed unsweetened strawberries, raspberries or blueberries
This German Käsespätzle is a tasty homemade pasta tossed with onion and Emmentaler cheese. It’s a German version of macaroni and cheese. Made with Spätzle a type of egg noodle that originated in the Swabian region of Germany. The name “Spätzle” translates to “little sparrows” in English, reflecting the small, irregular shapes of the noodles. They are made from a simple batter of eggs, flour, and milk, resulting in a chewy, dumpling-like texture.
Ingredients
2 cups of all-purpose flour
¾ teaspoon freshly grated nutmeg, if possible
¾ teaspoon salt
⅛ teaspoon pepper
3 large eggs
3/4 cup milk more as needed (milk produces a richer Spaetzle) (**add more flour if the dough is too runny, add more milk if it’s too stiff)
3 tablespoons of butter
1 ½ cups shredded Emmentaler cheese (See note for substitute)
1 onion, sliced thin
Process
Gather all ingredients.
Mix flour, nutmeg, salt, and pepper.
Beat eggs in a medium bowl. Alternately mix in milk and flour mixture until smooth. Set aside for 30 minutes.
Bring a large pot of lightly salted water to a boil. Press batter through a spaetzle press into the water. One can also use a rubber spatula to push the batter through the holes of a large-holed colander or a kitchen spoon with holes.
Don’t overload the pot of water. Work in small batches. The spätzle batter will sink to the bottom of the pot of boiling water, then float to the top as it cooks. Cook the spätzle for approximately five minutes. Remove from boiling water with a slotted spoon to a clean colander to drain.
Mix in 1 cup of cheese.
Melt butter in a large skillet over medium-high heat. Add onion and cook until golden. Stir in spaetzle and remaining 1/2 cup cheese until well blended. Remove from heat and serve immediately.
Notes:
Gruyère is the best substitute for Emmental cheese. It’s super easy to find in food stores and should be around the same price as a pack of Emmental. In terms of flavor, gruyere cheese is more complex. Along with the nutty notes it shares with Emmental, there’s also a salty and earthy undertone.
Traditionally Spätzle batter is quite thick because it was cut into noodles using the board & knife method. Even if using a Spätzle press or other method, thicker batter yields a better consistency. If you’re using the Spätzle press yes, it will require some muscle strength – you don’t want the batter to be so runny that it squishes right through with ease. That said, if you’re straining way too hard to press the batter through, go ahead and add a bit more liquid to thin it out.
The history of Whoopie Pies is an interesting part of American food culture, mainly in the Northeastern U.S. They likely started in the early 1900s, possibly in Pennsylvania or Maine. The name “Whoopie” may come from children’s exclamations of joy or surprise when discovering the sweet filling inside. These treats have become a beloved regional specialty, reflecting local culinary traditions and history.
Cookie Ingredients
1 cup sugar
½ cup shortening
1 egg
1 egg yolk
2 cups of all-purpose flour
2/3 cup unsweetened cocoa powder
¼ teaspoon salt
1 teaspoon of baking soda
½ cup hot water
2/3 cup buttermilk
Cookie Process
Preheat oven to 350°F. Line 2 cookie sheets with parchment paper.
Beat together sugar and ½ cup shortening at high speed with a stand mixer until fluffy.
Add the egg and egg yolk and beat until incorporated.
In a separate bowl, stir together the flour, cocoa powder, and salt; set aside.
Dissolve baking soda in the ½ cup of hot water; cool slightly.
Add the flour mixture, the soda mixture, and 2/3 cups of buttermilk alternately to the sugar, shortening mixture.
Beat at a medium speed until well mixed.
Drop batter by rounded tablespoonfuls 2 inches apart onto a parchment paper lined cookie sheet. Bake for 8 – 10 minutes.
Cool cookies on a cookie rack. Yields 48 cookies.
Filling Ingredients
2 cups sifted powdered sugar
½ teaspoon of meringue powder
1 teaspoon vanilla
½ cup shortening (such as white Crisco)
¼ cup butter
Filling Process
In a stand mixer, add shortening and butter, vanilla, 1 teaspoon of water and beat at high speed until light and fluffy.
Turn mixer to low and gradually add powdered sugar and meringue powder.
Beat on high until mixture is light and fluffy. If mixture is too thick to spread, add 1 teaspoon of water at a time, until it is spreading consistency.
Spread some filling on the flat side of half the cookies, top with the remaining cookies, flat side down.
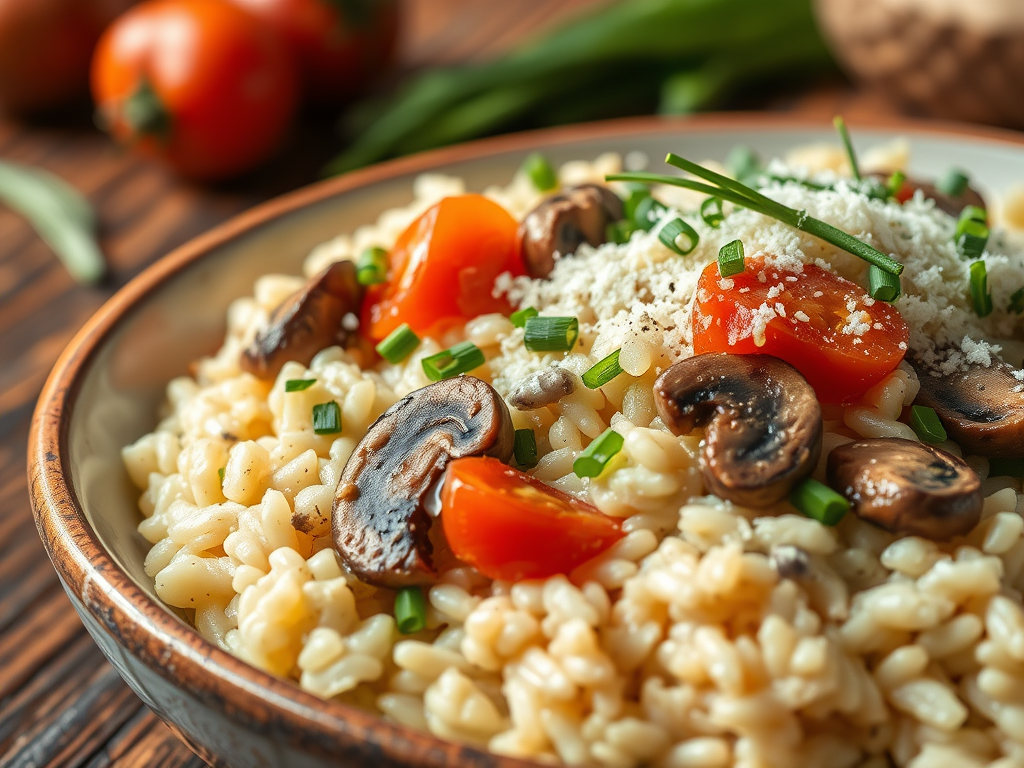
Creamy risotto is a classic Italian dish renowned for its rich, velvety texture and comforting flavor. Made with Arborio rice, which has a high starch content, risotto achieves its signature creaminess through slow cooking and gradual addition of broth. The process involves sautéing onions or shallots in butter or olive oil, then adding the rice to toast it lightly. Gradually, warm broth is added in small increments, allowing the rice to absorb the liquid slowly, releasing its starch and creating a smooth, creamy consistency. Preparing creamy risotto at home takes about 40 minutes, start to finish. Served as a main meal or side dish, it is so worth the effort.
Ingredients
4 cups of Vegetable Stock
8 ounces of button mushrooms, sliced very thin
1 medium onion, or shallots peeled and finely chopped
2 cloves of garlic, peeled and grated or pressed
1-1/2 cups of Arborio Rice
8 ounces of grape tomatoes, quartered or sliced into thirds
¼ ounce chives, snipped fine
4 tablespoons of garlic butter
1 tablespoon of unsalted butter
1/3 cup freshly grated Parmesan cheese (or substitute with Asiago, Sharp Cheddar, Gruyere, or Pecorino Romano)
1 teaspoon Korean red chili flakes
Salt & pepper to taste
Process
Heat vegetable stock in a medium pot, bring to a low simmer.
Heat a drizzle of olive oil in a large pan over medium-high heat. Add sliced mushrooms, spread out in a layer and cook until brown on underside, flip mushrooms and continue to cook until browned and slightly crispy., Season with salt and pepper.
Turn off heat and transfer mushrooms to a plate. Set aside.
In the same pot, drizzle olive oil over medium heat. Add onion or shallots, cook stirring until slightly softened and very lightly browned about 2 – 3 minutes.
Add garlic, rice and 1 tablespoon unsalted butter. Cook, stirring for about 2 minutes until garlic is fragrant and rice is translucent. Season with salt and pepper.
Begin making Risotto by adding ½ cup vegetable stock to the pan with rice. Stir until liquid is mostly absorbed. Repeat with remaining stock, adding ½ cup at a time and stirring until liquid has mostly absorbed until the rice is “al dente” and risotto is creamy. This will take about 30 minutes. Season with salt and pepper.
Stir in mushrooms, tomatoes, garlic herb butter, half of the cheese and half of the chives.
Cook until the tomatoes are softened for about 6 minutes.
If risotto is too thick, stir in a little water or more vegetable stock. Risotto should be soft and creamy, not thick.
Stir in red chili flakes.
To serve, top bowl with remaining chives and remaining Parmesan.
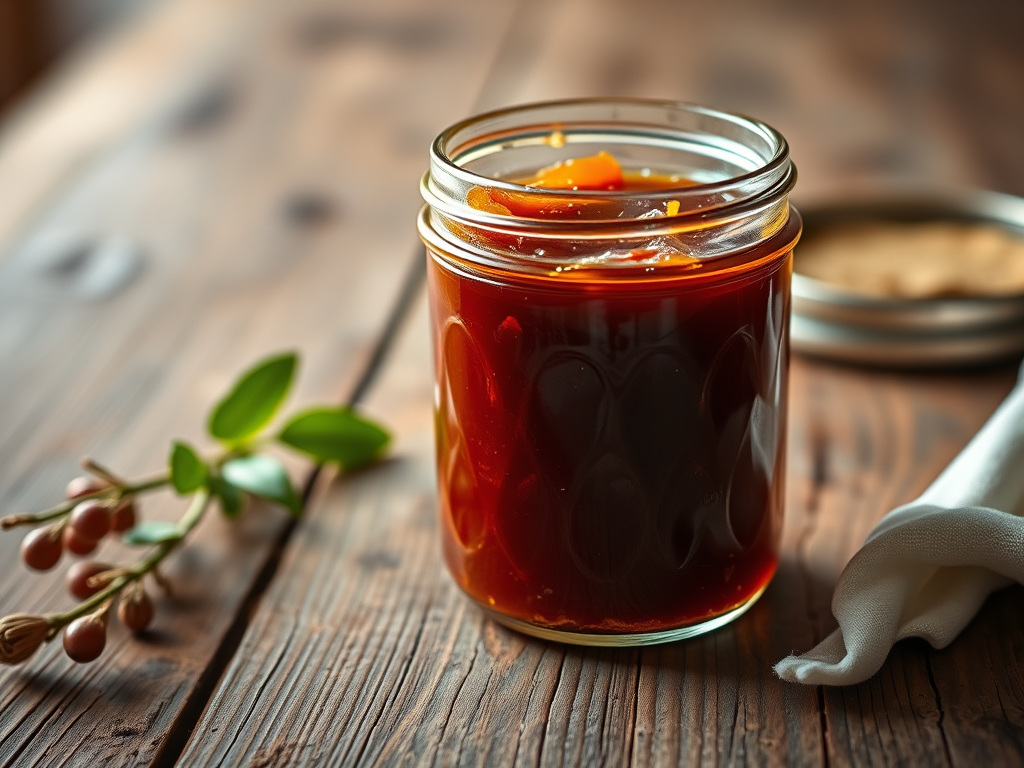
Onion jam is a versatile condiment crafted by slow-cooking onions with honey, vinegar, and spices until they reach a thick, sweet, and tangy consistency. This culinary creation offers a unique blend of flavors that can enhance a variety of dishes. Its rich, caramelized taste makes it an excellent accompaniment to meats, cheeses, and bread, adding depth and sweetness to savory dishes. Onion jam can be used as a topping for burgers, sandwiches, and grilled meats, providing a burst of flavor that elevates the overall dish. It also pairs well with cheese platters, serving as a sweet contrast to sharp cheese like cheddar or blue cheese. Whether spread on toast, dolloped on roasted vegetables, or used as a marinade component, onion jam is a flavorful addition that enhances a wide range of culinary creations.
Ingredients
2 tablespoons of olive oil
About 2 pounds of sweet onion (about 3 large)
2 sprigs of fresh thyme
¼ teaspoon Kosher salt and ground pepper
1 cup of red wine
¼ cup of honey
¼ cup of red wine vinegar
Directions:
Slice onions thin, a mandoline is a great tool for this task.
Preheat a heavy skillet over medium-low heat with 2 tablespoons of olive oil
Add onions, thyme, salt and pepper, cover and cook until onions have wilted, about 10 to 15 minutes. Stir occasionally with a wooden spoon to prevent sticking. You do NOT want to brown the onions, just sweat them
Remove lid. You will not need the lid for the next steps.
Add red wine, cook over medium-high heat until the wine is absorbed into the onions.
Remove pan from high heat. Turn heat down to medium-low. Return the pan to medium-low heat.
Add the honey and red wine vinegar and simmer gently until onions have a jam like consistency, about 15 minutes.
Remove from heat, cool and use immediately or cover and store in the refrigerator.
Compound flavored butters serve multiple culinary purposes. They can be melted over grilled meats, seafood, or vegetables to add moisture and flavor. Perfect to add fun and flair to any breakfast spread. They are also used as finishing touches on baked potatoes, bread, or pasta, providing an extra layer of richness. Additionally, they can be incorporated into sauces, marinades, or used as a base for more complex flavor combinations. Their ease of use and ability to add depth to meals make them popular among chefs and home cooks alike. Following are six compound butters that are equally delicious for all meals.
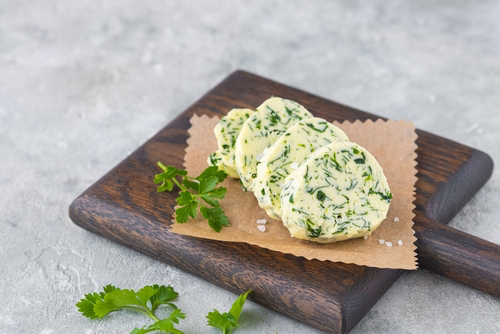
Compound Herb and Garlic Butter
Compound herb and garlic butter is a versatile culinary ingredient that enhances a wide range of dishes with its rich, aromatic flavor. Made by blending softened butter with fresh herbs, this butter offers a fragrant and savory profile that elevates both simple and complex recipes. Its culinary appeal lies in its ability to add depth and richness to meats, seafood, vegetables, and bread.
Ingredients
½ cup of unsalted butter, softened to room temperature
¼ cup of fresh chopped fresh herbs
Example: rosemary, oregano, thyme, parsley, sage, basil or chives. Fresh herbs will give a beautiful display of green flecks in your butter.
2 grated or pressed garlic cloves
½ teaspoon fresh lemon juice
½ teaspoon Kosher salt
Process
Place the softened butter in a small bowl. Add the chopped herbs, garlic, lemon juice and salt and mix well.
Transfer the mixture onto a sheet of plastic wrap. Roll into a log shape and twist ends to seal tightly. Or leave it in a covered bowl.
Refrigerate the butter for at least 2 hours, or until firm.
Room Temperature – Let butter sit out for a few minutes before using to soften. Butters can sit at room temperature for a couple of days, just like plain butter. But if the weather is hot, store it in refrigerator so butter doesn’t melt.
Compound Lemon Dill Butter
Delicious spread over seafood dishes, such as grilled salmon, baked cod or shrimp where the citrus notes complement the natural flavors of seafood. It also works well as a finishing touch for roasted vegetables or spread on warm bread.
Ingredients
1 stick of unsalted butter room temperature
2 tablespoons finely chopped fresh dill weed
1 tablespoon fresh squeezed lemon juice
½ teaspoon lemon zest
¼ teaspoon kosher salt
½ teaspoon freshly ground black pepper
Process
Wash and finely mince the dill leaves.
Zest and juice lemon.
Cut the softened stick of butter in a mixing bowl.
Using a stand mixer or hand beater, mix until light and fluffy.
Add the chopped dill, lemon zest, lemon juice, salt and pepper. Mix until combined.
Transfer the mixture onto a sheet of plastic wrap. Roll into a log shape and twist ends to seal tightly. Or leave in a covered bowl.
Refrigerate the butter for at least 2 hours, or until firm.
Room Temperature – Let butter sit out for a few minutes before using to soften. Butters can sit at room temperature for a couple of days, just like plain butter. But if the weather is hot, store it in refrigerator so butter doesn’t melt.
Compound Maple Bourbon Butter
This is a smooth, sweet butter with a smoky flavor from bourbon. It is great to spread on bread, pancakes, waffles, roasted vegetables or melted over steak.
Ingredients
1 cup (2 sticks) unsalted butter, softened
2 tablespoons pure maple syrup
1 tablespoon bourbon
1 tablespoon brown sugar
1/2 teaspoon cinnamon
1/2 teaspoon vanilla extract
Pinch of salt
Process
Bring butter to room temperature.
In a mixing bowl, add softened butter and beat butter until light and fluffy.
Gradually mix in pure maple syrup, bourbon, brown sugar, cinnamon, vanilla extract and salt.
Taste and adjust sweetness or bourbon as needed.
Transfer the mixture onto a sheet of plastic wrap. Roll into a log shape and twist ends to seal tightly. Or leave in a covered bowl.
Refrigerate the butter for at least 2 hours, or until firm.
Room Temperature – Let butter sit out for a few minutes before using to soften. Butters can sit at room temperature for a couple of days, just like plain butter. But if the weather is hot, store it in refrigerator so butter doesn’t melt.
Compound Hot Honey Butter
One of my favorite ways to enjoy this whipped hot honey butter is on Jalapeno and Cheese Cornbread or Cheddar and Chive Biscuits, sweet potatoes or baked potatoes or corn on the cob.
Ingredients
1 stick of unsalted butter, room temperature
2 tablespoons honey
2 teaspoons hot sauce
½ teaspoon Koren red chili flakes
Process
Bring butter to room temperature.
In a mixing bowl, add softened butter and beat butter until light and fluffy.
Gradually mix in honey, hot sauce and chili flakes.
Transfer the mixture onto a sheet of plastic wrap. Roll into a log shape and twist ends to seal tightly.
Refrigerate the butter for at least 2 hours, or until firm.
Room Temperature – Let butter sit out for a few minutes before using to soften. Butters can sit at room temperature for a couple of days, just like plain butter. But if the weather is hot, store it in refrigerator so butter doesn’t melt.
Compound Orange Butter
Orange butter is a tasty spread that can be used on French toast, pancakes, sweet breads, and more. It is smooth and rich, making it perfect for breakfast and brunch. It adds color and flavor to your dishes, making them more appealing.
Ingredients
1 cup (2 sticks) butter, softened
1 teaspoon of Grand Marnier, substitute with Cointreau, or orange juice.
1 tablespoon orange zest. Be careful not to zest the white pith under the orange skin as it is bitter.
Process
Bring butter to room temperature.
In a mixing bowl, add softened butter and beat butter until light and fluffy.
Gradually mix in Gand Marnier, and orange zest.
Transfer the mixture onto a sheet of plastic wrap. Roll into a log shape and twist ends to seal tightly.
Refrigerate the butter for at least 2 hours, or until firm.
Room Temperature – Let butter sit out for a few minutes before using to soften. Butters can sit at room temperature for a couple of days, just like plain butter. But if the weather is hot, store it in refrigerator so butter doesn’t melt.
Compound Chocolate Butter
Spread chocolate butter on various baked goods such as toast, pancakes, croissants, or bagels, and explore different flavor combinations to enhance your culinary experience.
Ingredients
1 cup butter, softened
2 tablespoons unsweetened cocoa
3 tablespoons powder sugar
½ teaspoon of vanilla extract
Process
Bring butter to room temperature.
In a mixing bowl, add softened butter and beat butter until light and fluffy.
Gradually mix in unsweetened cocoa, powder sugar and vanilla extract.
Transfer the mixture onto a sheet of plastic wrap. Roll into a log shape and twist ends to seal tightly. Or leave in covered bowl.
Refrigerate the butter for at least 2 hours, or until firm.
Room Temperature – Let butter sit out for a few minutes before using to soften. Butters can sit at room temperature for a couple of days, just like plain butter. But if the weather is hot, store it in refrigerator so butter doesn’t melt.