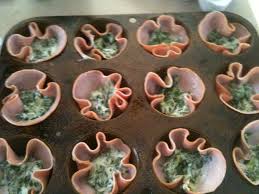
Category Archives: Dinner Ideas

Vanilla Bean Sugar Cubes

Kitchen Moxy's avatarKitchen Moxy

Package these little gems in a pretty jar and give alongside your vanilla bean extract

as a homemade gift. This recipe comes from Janet Johnston.

Ingredients

  • 4 Madagascar vanilla beans
  • 3 cups white sugar
  • 1/4 cup pure Madagascar vanilla extract

Directions

Preheat the oven to 275 degrees F.

  1. Cut the 4 vanilla beans into 1/2-inch pieces and grind to a coarse powder in a coffee grinder or food processor.
  2. In a large bowl, mix the sugar, vanilla bean powder and extract until thoroughly combined (when the extract is completely incorporated the mixture will look a bit like dough).
  3. Pour the sugar mixture into an 8 by 8-inch pan and spread out evenly to a 1/2-inch thickness.
  4. Next, use a knife to score out 1/2-inch by 1/2-inch cubes by running the knife the length of the pan every 1/2-inch and the width of the pan every 1/2-inch.
  5. Bake for 1 1/2…

View original post 91 more words

Vanilla Sea Salt

Re-posting some recipes for holiday gift ideas

Kitchen Moxy's avatarKitchen Moxy

sea salt caramelAnother gift idea to go along with the Vanilla Bean Extract, and Vanilla Bean Sugar Cubes. Vanilla Bean Sea Salt will add a delightful flavor to homemade caramels, chocolates, sweet and salty brownies, and chocolate icings.  Package in a pretty jar and you have a great gift for the gourmet cook in your circle.

Vanilla Sea Salt

Ingredients:

  • 1 cup sea salt
  • 4 vanilla beans, split lengthwise and scraped, seeds reserved

Directions:

1. In a large bowl, combine sea salt and vanilla seeds. Use the tips of your fingers to rub the vanilla seeds into the sea salt until they are thoroughly combined.

2. Spoon salt into individual jars, cover tightly, label, and store in a cool, dry place for a couple of weeks to blend the flavors.


View original post

Shrimp-Bacon-Pineapple Appetizers

Shrimp-Bacon-Pineapple

Shrimp-Bacon-Pineapple

Shrimp is one of my favorite seafood. It makes a wonderful appetizer on it’s own surrounded by ice and lemon wedges with a container of cocktail sauce nearby or sautéed in butter and fresh garlic, chopped onion and button mushrooms or roasted with pineapple and bacon. Be sure to soak your skewers before grilling or roasting to avoid charring them. Shrimp is one of my favorite seafood. It makes a wonderful appetizer on it’s own surrounded by ice and lemon wedges with a container of cocktail sauce nearby or sautéed in butter and fresh garlic, chopped onion and button mushrooms or roasted with pineapple and bacon. Be sure to soak your wooden skewers before grilling or roasting to avoid charring them.

To serve these skewers as an appetizer, just place one shrimp between two pieces of pineapple wrapped in bacon on each skewer.  Or serve as a meal. Enjoy

Enjoy

Shrimp-Bacon-Pineapple Skewers

Yield:
30 skewers

Ingredients

  • 1/2 cup thick teriyaki sauce
  • 1 tablespoon minced fresh ginger
  • 1 tablespoon sugar
  • 1/2 teaspoon crushed red pepper flakes
  • 1 dash kosher salt
  • 3 cloves garlic, minced
  • 2 green onions, sliced
  • Juice of 1/2 lemon
  • 1 fresh pineapple (recommended) or canned pineapple chunks
  • 2 pounds jumbo shrimp, peeled and deveined
  • 1 pound bacon, package sliced in half


Directions

  1. Special equipment: about 30 wooden skewers, soaked in water for at least 30 minutes (up to 2 hours)
  2. Preheat the oven to 400 degrees F. Set a roasting rack in a large baking pan.
  3. To make the marinade, pour the teriyaki sauce in a bowl and then throw in the ginger, sugar, crushed red pepper, salt, garlic, green onions and lemon juice. Stir it around and set it aside.
  4. Next, cut the pineapple into chunks by lopping off the top, slicing off the rind, cutting the pineapple into wedges, slicing off the hard inner core and then cutting the slices into chunks. Store half the chunks in the fridge for snacking.
  5. Place a chunk of pineapple on top of a shrimp and then wrap the whole thing in one of the half-slices of bacon. Stick a skewer through the whole thing so that it holds the pineapple, shrimp and bacon securely, and lay it on the rack in the pan. Continue with the remaining ingredients. Brush each skewer generously with some of the marinade.
  6. Roast the skewers for 10 minutes. Remove them from the oven and brush with a second coat of marinade. Return the pan to the oven and roast until the bacon is sizzling and the shrimp is cooked (pink), about 15 minutes.Serve them hot or at room temperature. Divine!

Tortellini Skewers

Tortellini Skewers

Tortellini Skewers

The holidays are upon us that means parties and food. Appetizers are a great way to feed your guests as they mingle and make new friends. I have a collection of appetizers that are not hard to make and will make a great impression at your next get together. So deck the halls, trim the tree, put up the lights and add some festive music. Enjoy the season

Tortellini Skewers

Yield:
18 skewers

Ingredients

  • 4 tablespoons olive oil
  • 2 tablespoons jarred pesto
  • 2 teaspoons red wine vinegar
  • 2 packages spinach tortellini, cooked and cooled
  • 2 pints cherry tomatoes
  • 12 ounces fresh mozzarella, cubed
  • 1/4 cup minced fresh parsley

Directions

  1. Mix together the olive oil, pesto and vinegar in a bowl.
  2. On small skewers, thread 1 tortellini, 1 cherry tomato and 1 mozzarella cube per skewer.
  3. Lay the skewers on a platter and lightly drizzle the dressing over them with a spoon.Serve immediately or refrigerate. Sprinkle on the minced parsley just before serving.

Edible Shaggy Parasol Mushroom

Shaggy Parasol Mushrrooms

Shaggy Parasol Mushrrooms

A few months back my coworkers and I got into a conversation about foraging for wild mushrooms, I found this discussion fascinating because I am a mushroom lover. I also might add, I don’t know a safe, edible mushroom from a poison one. But made it one of my future adventures that I want to do with friends that know what they are looking for, hopefully this coming spring. My friend brought me in two bags of dried mushrooms that she picked and bagged herself. I put them in my pantry and quickly forgot they were there. But today I was taking inventory of my pantry and found the two bags of dried mushrooms and decided I would try the Shaggy Parasol Mushroom. Maggie gave me written instructions on how to rehydrate the mushrooms, letting them soak for 15 minutes in boiling water. I re-hydrated them and tried to bite into the mushroom and it reminded me of a rubber band. So I thought, okay the rest of her instructions suggest sautéing them and adding them to soups. I decided I was going to give this experiment my “all” and this is the recipe I came up with, after I cooked them I was sorry I didn’t wait until Thanksgiving to add them to my feast, they were absolutely delicious and not rubbery at all. They cooked up “perfect.” If you have the fortune to purchase or pick your own mushrooms, give this a try. Here is a link I found to harvesting your own Shaggy Parasol Mushrooms, http://jpwaldron.wordpress.com/2011/11/22/the-shaggy-parasol/ but I would still suggest every novice hunt with an experienced mushroom picker.

Ingredients:

  • About a cup of dried Shaggy Parasol Mushrooms re-hydrated, and dried on a paper towel
  • ¼ cup of real butter
  • ¼ cup minced fresh sweet onion
  • 1 clove of grated garlic
  • 3 fresh sage leaves, chopped
  • ¼ tsp coarse Kosher salt

Directions

  1. Melt butter in a heavy skillet on medium high heat (don’t let butter brown)
  2. Add onions and stir for about a minute
  3. Add dried, re-hydrated mushrooms
  4. Let mushrooms brown about 4 minutes, turn over and let brown on other side
  5. Add garlic, and sage and stir letting the garlic cook until fragrant
  6. Add about ¼ tsp coarse Kosher salt
  7. Turn off heat
  8. Let sit for about 5 minutes and enjoy with a meal or as a meal in itself

*Note, do not use oil or margarine to brown mushrooms, do not crowd mushrooms, butter should be hot but do not allow the butter to brown, turn the heat down if you see it browning. Eventually the mushrooms and onions will absorb the butter.

Cinnamon Bread Pudding with Vanilla Bourbon Sauce

bread puddingThis is the absolute best recipe for bread pudding, it will fill your home with the warm, welcoming aromas of brown sugar, cinnamon, and vanilla. It also makes a wonderful addition to your holiday brunch. With the holidays around the corner, I feel the need to share some of my favorite recipes for you and your family. This rich, comfort food and so addicting. You can use any kind of bread or pastry – stale French bread, day old glazed doughnuts, cinnamon bread or rolls, your choice. Enjoy

Ingredients for Pudding:

  • 1 cup firmly packed brown sugar
  • 10 cups chopped day old bread or pastry
  • 3 cups half-and-half
  • 2 cups heavy whipping cream
  • ½ cup sugar
  • 5 eggs
  • 1 tablespoon cinnamon

Ingredients for Vanilla Bourbon Sauce:

  • 4 cups heavy whipping cream
  • 2 cups firmly packed brown sugar
  • 1 tablespoon pure vanilla extract
  • ¼ teaspoon cinnamon
  • ¼ to ½ cup bourbon
  • 1 tablespoon cornstarch (optional)

Directions:

  1. For Bread Pudding; mix all ingredients in a large bowl and let sit for 20 minutes, stirring occasionally.
  2. Preheat oven to 350 degrees. Spray a 9 x 13 inch baking dish with cooking spray. Spray a piece of aluminum foil with cooking spray to cover the bread pudding while it is baking.
  3. Pour bread pudding batter into pan. Cover with foil and bake for 1 hour or until center of pudding is firm.
    1. NOTE: This can be made about 1 or 2 days in advance, reheat at 250 degrees for 30 minutes before serving

Directions of Vanilla Bourbon Sauce:

  1. Pour heavy cream into a heavy saucepan and bring to a gentle boil over medium heat. Continue to boil until cream is reduced by almost half, about 30 minutes. Stir periodically to keep cream from scalding.
  2. Add brown sugar, vanilla, cinnamon, and bourbon and allow to boil until sauce thickens slightly (another 15 minutes). For extra thick sauce, add a tablespoon of cornstarch to the boiling liquid, stirring constantly.

Serve warm, drizzling sauce over the top of each pudding square after placing on a plate.

Recreating The Salad

saladHow to build a salad for lunch or dinner

It never fails, when I sit down at work to eat my lunch someone will comment, your salad smells and looks so good, can I pay you to make one for me.  I allow time in the morning to make my lunch, which is usually ½ hour.  If you build your salad the night before do not add the lettuce or dressing, add that in the morning.  At lunch all I have to do is shake my container to distribute my dressing and eat. My unusual salads typically contain any and all leftovers from dinner during the week, things someone would not typically put in a salad, what I get is a plethora of wonderful vegetables marinating in a dressing of:

Dressing:

  • A sprinkling of kosher salt,
  • A dash of pepper,
  • A sprinkle of garlic powder,
  • 2 teaspoons of olive oil,
  • 2 teaspoons of balsamic vinegar, apple cider vinegar, or wine vinegar

 Directions:

I mix all of my vegetables and the dressing together and then add my layer of dry salad greens on top, about 2 cups. I do not mix my lettuce into the dressing as the greens will wilt by lunch time. There is no right or wrong ingredient to add to a salad, I have mixed fruit and vegetables. Things you can add to a salad include the following, canned, frozen or fresh:

Cucumber, shredded cabbage, chives, sliced leek, scallions or sliced onion, jarred roasted red pepper, olives, 1/2 sliced avocado, sliced or quartered mushrooms, left over vegetables; broccoli, cauliflower, mixed vegetables, green beans, peas, canned artichokes, celery, canned beans, carrots, celery, beets, baby corn, alfalfa sprouts, bean sprouts, quartered tomato, sun dried tomatoes, pasta, Pomegranate seeds, asparagus. I have sliced peaches, apples, oranges, strawberries, raspberries, blackberries, etc. and added them to my vegetables. What ever you love to eat.

For protein: A ¼ cup canned white beans, black beans or chick-peas, cheese, hard boiled egg, cooked chicken, left over pork, or beef,  If you use tuna or salmon, pack it in another container or plastic bag and add to your salad at lunch. Add walnuts, peanuts, sunflower seeds etc.  All you need is a 1/4 cup of any protein.

You can put anything you love to eat in a salad.  It is fresh, and filling and it is a meal.  I think the salad is underrated. Don’t eat a boring salad, get rid of the iceberg lettuce, buy a bag of mixed greens, spring mix or use fresh spinach.  Ditch the bottled salad dressing, the flavor of olive oil and balsamic vinegar is amazing and healthier.  Add chopped fresh basil and parsley to your dressing.  Create or rather recreate the healthy salad.  Make it your own – Enjoy!

*To steam fresh vegetables; add to a microwaveable container with a tablespoon of water and cook on high for 2 minutes, remove from microwave and add ice cold water to stop the cooking. Vegetables will be crisp-tender.

Oven Roasted Tomatoes

Roasted Tomatoes

Roasted Tomatoes

It is that time of year where tomatoes are in abundance especially on the East coast where I am from.  Here is a wonderful recipe for roasting your tomatoes, you can then use them in sauces, soups, gravies, appetizers or freeze them.  Try roasting cherry tomatoes for bruschetta. Roasting tomatoes brings out the sweetness in the tomato and just gives it a rustic, hearty flavor.

OVEN ROASTED TOMATOES

This recipe can easily be increased. The important thing is to use a baking dish or pan big enough so that you do not crowd the tomatoes. You want room between them for the moisture to escape, which will concentrate the tomato flavor.

If you use a metal pan, make sure it’s not aluminum or made of another material that might react with the acidic fruits.

 Ingredients

  • 2 tablespoons olive oil
  • ½ tsp of sea salt or kosher salt
  • ¼ tsp of ground pepper
  • 2 cloves garlic, peeled and thinly sliced (throw some unpeeled whole garlic cloves in the pan to roast, you can squeeze the soft garlic out of the clove after the roasting and add to your favorite dish)
  • Fresh herbs; basil, oregano, thyme, rosemary – mix or add your favorite herb
  • 1 pound (450g) tomatoes, (8 small or 4 medium-sized)

 Directions

  1. Preheat the oven to 325ºF
  2. Pour the olive oil into a shallow baking dish or pan and add the herbs and salt and pepper
  3. Cut the tomatoes in half horizontally, then use a sharp knife to remove the stems. (note: stems will come out easy after roasting)
  4. Toss the tomatoes with the oil and seasonings, lay them cut side down in the dish.
  5. Bake for two hours, or until the tomatoes are completely softened and wilted, and start to wrinkle. Depending on the tomatoes, they may take longer to cook.

    Storage: The tomatoes will keep for about five days in the refrigerator. They can also be frozen for up to six months.

Cheese Crisps

Cheese crisps are so versatile and fun served with a salad, as a snack, served as an appetizer or use as

Cheese Crisps

Cheese Crisps

a scoop with your favorite dip. They are very easy to make, and the main ingredient is cheese. You can add fresh herbs or spices to the mixture to suit your theme or just leave plain. They are entertaining little treats full of protein and make great conversational foods at the dinner table, try adding cheese crunches with your next meal.

CHEESE CRISPS

Ingredients:

  • 3/4 cup grated Gruyere cheese or (you can use packaged grated cheese, any flavor you prefer)
  • 1 tablespoon all-purpose flour
  • You can add whatever seasoning you like: A teaspoon of powdered Ranch dressing mix, chili powder, garlic powder, Parmesan cheese, dry or fresh chopped basil, diced fresh parsley, fresh chopped herbs, whatever feels good to you or nothing at all.
  • Do NOT add salt, the crisps will be salty by default because of the cheese.
  • Parchment Paper to line your cookie tray with (nothing else will work)

Directions:

Preheat the oven to 350 degrees F

  1. Toss the cheese with the flour and pepper and any herbs or seasoning to taste in a bowl.
  2. Arrange a teaspoon of the cheese mixture on the parchment paper lined baking sheet and flatten slightly.
  3. Bake until golden, about 7 minutes. Cool slightly, then remove with a spatula to a rack and let cool.

Flourless Cake (Gluten Free)