Southern Buttermilk Biscuits

Southern Buttermilk Biscuits – (Medium ease)

Nothing like the taste and smell of homemade biscuits.  Here are a few tips & hints to help you
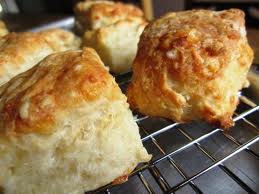
 biscuitsalong;

  • Do not over-bake.
  • The key to real biscuits is not in the ingredients, but in the handling of the dough.
  • The dough must be handled as little as possible or you will have tough biscuits.
  • I have been told that a food processor produces superior biscuits, because the ingredients stay colder and there’s less chance of over mixing.
  • If not using a food processor – Use a fork to mix the wet ingredients into the dry – do not stir to mix – just “fluff” together
  • Rolling with a rolling pin is a guaranteed way to overstimulate the gluten, resulting in a tougher biscuit, use your hands to pat the dough out
  • You can make these biscuits, cut them, put them on cookie sheets and freeze freeze them, place in plastic bags when frozen for up to a month.
  • When you want fresh biscuits, simply place them frozen on the cookie sheet and bake at 450°F for about 20 minutes.

Ingredients

  • 2 cups unbleached all-purpose flour, plus more for dusting the board
  • 1/4 teaspoon baking soda
  • 1 tablespoon baking powder ( use one without aluminum)
  • 1 teaspoon kosher salt or 1 teaspoon salt
  • 6 tablespoons unsalted butter, very cold
  • 1 cup buttermilk ( approx) * You can make your own buttermilk: Place a Tablespoon of white vinegar or lemon juice in a liquid measuring cup. Add enough milk to bring the liquid up to the one-cup line. (if possible use whole milk or heavy cream). Let stand for five minutes. Then, use as much as your recipe calls for.

Directions

  1. Preheat your oven to 450°F.
  2. Combine the dry ingredients in a bowl, or in the bowl of a food processor.
  3. Cut the butter into chunks and cut into the flour until it resembles course meal, using a pastry dough cutter or two knives.
  4. Add the buttermilk and using a fork mix JUST until combined, do not beat.
  5. If it appears on the dry side, add a bit more buttermilk. It should be wet.
  6. Turn the dough out onto a floured board.
  7. Gently, gently PAT (do NOT roll with a rolling pin) the dough out until it’s about 1/2″ thick. Fold the dough about 5 times, gently press the dough down to a 1 inch thick. Use flour to dust the board or counter if dough is sticking.
  8. Use a round cutter to cut into rounds.
  9. You can gently knead the scraps together and make a few more, but they will not be anywhere near as good as the first ones.
  10. Place the biscuits on a cookie sheet- if you like soft sides, put them touching each other.
  11. If you like”crusty” sides, put them about 1 inch apart- these will not rise as high as the biscuits put close together.
  12. Bake for about 10-12 minutes- the biscuits will be a beautiful light golden brown on top and bottom.

What do do with the biscuits when they come out of the oven; drizzle with honey, biscuithoneyspread butter, or jam on your biscuit, eat naked, or squirt some whipped cream on each half and add fresh fruit on top.  Or my fav, Biscuits and Gravy – post to come.

Hint; Never cut a biscuit with a knife, always break in half.

Parmesan Chicken Breast (easy)

Parmesan Chicken Breasts

Ingredients Chicken Parmesan

    • 1/4 cup Parmesan cheese, grated
    • 2 tablespoons dried Italian seasoned breadcrumbs
    • 1/8 teaspoon paprika
    • 1 teaspoon dried parsley (optional)
    • 1/2 teaspoon garlic powder
    • 1/4 teaspoon fresh ground pepper
    • 1/2 teaspoon sea salt
    • 4 boneless skinless chicken breasts ( about 1 pound)

Directions

  1. Preheat oven to 400 degrees.
  2. In resealable plastic bag, combine cheese, crumbs and all seasonings; shake well.
  3. Place one chicken breast in bag of cheese mixture, shake to coat all sides, repeat with remaining chicken.
  4. Spray cooking sheet with non-stick cooking spray (Pam)  and arrange chicken in a single layer
  5. Bake until chicken is cooked through, 20-25 minutes.

Easy Sauté Chicken

Here is an easy chicken dinner that you can handle any evening after work. All you need butterfly chare skinless chicken breasts, some spices you can pick up at the market or maybe have in your pantry already, i.e. pantry is the place you keep your spices, oils, vinegars etc. J A skillet, and olive oil.

If your chicken breast is frozen, wrap in paper towel and defrost in the microwave using the defrost setting. Do not overcook – chicken breast is easier to slice when slightly frozen inside.

Butterflying the Chicken This next step may be a little tricky – You want to “butterfly” the breast by slicing it through the center – not all the way through, you want to open it up and create a large, thin, flat chicken breast.

Here are some suggestions to sprinkle on both sides of your chicken breast. Pick two or three or use your own imagination.

  • Salt
  • Pepper
  • Old Bay seasoning
  • Garlic Powder
  • Thyme
  • Cajon Seasoning
  • Cayenne Pepper (sparingly)
  • Sage (sparingly)

Heat your skillet with two tablespoons of olive oil, when the oil is hot lay your chicken breast in the skillet and cook on medium-high heat for 4-5 minutes per side. Chicken is done when white inside and firm to the touch.

There you go – easy peezy – serve up with your favorite vegetable, salad or rice.

Note: You do not have to butterfly the chicken – you can cook it as is – it will just take longer to cook. Count on about 10 minutes on each side – slice the thickest part of the chicken after 20 minutes to be sure it is cooked through.

Cabbage Rolls

cabbage rolls

cabbage rolls

I grew up with these stuffed cabbage leaves, I consider them a comfort food. Great for a crowd as this recipe makes a lot!

Cabbage Rolls

  • ¾ cup cooked rice (wild or white)
  • 1 large onion, chopped fine
  • 1 tablespoon vegetable oil or butter
  • 1-1/2 pounds of ground beef
  • 1 large egg
  • ½ cup of milk or half-and-half
  • 1 tsp salt
  • ¼ tsp pepper
  • 1 tsp dried marjoram
  • 1 can of tomato sauce or marinara sauce


    Preheat oven to 350 degrees

  1. Place a nice size cabbage head in a pot of salted water and bring to a boil. Boil and simmer for 10-15 minutes, or until the cabbage leave soften. Remove the cabbage from the water.
  2. Cook rice according to directions.
  3. Heat oil in a skillet and sauté onion until soft. Mix the cooked onion, rice, meat and egg together.
  4. Loosen the cabbage leaves carefully from the cabbage head and fill with about 2 tablespoons of meat mixture, fold the ends in and under to form a pillow. Place in layers in a baking dish.
  5. Pour tomato sauce or marina sauce over the cabbage pillows and bake covered for 1-1/2 hours.

Enjoy

Chicken Breasts Stuffed with Feta-Spinach

Feta stuffed Chicken Breasts 
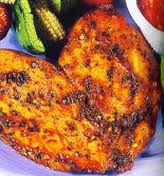
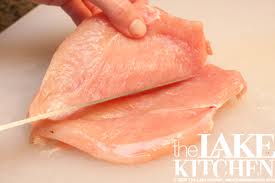
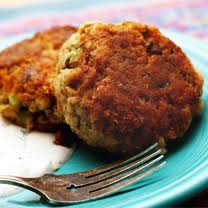
Feta stuffed Chicken Breasts[/caption]

  • 1 package of fresh spinach
  • 1 cup Feta cheese, crumbled (you can use flavored)
  • ½ cup parmesan cheese (try to use freshly grated)
  • 1 egg
  • 1 chopped onion
  • Salt and Pepper to taste (easy on the salt as the feta will be salty); ¼ tsp of salt
  • 6 boneless chicken breasts

Cut a pocket in each chicken breast. Sauté the chicken in equal parts of hot olive oil and butter until lightly browned, about 3 minutes on each side.

In a bowl combine the spinach, feta cheese, parmesan, egg, onion, salt and pepper.

Divide the spinach mixture into 6 parts and stuff each pocket.

Place in a baking dish and bake for 30 minutes covered at 350 degrees

Garlicky Marsala Mushrooms with Pasta

Mushroom Stew

Salsa di Funghi
Mushroom Stew

Always try to use fresh herbs purchased in the vegetable section of your grocery store.  They have a remarkable fresh flavor and add such nice aroma and flavor to your dishes.  Most fresh herbs will last at least a week in your refrigerator, or can be put in a plastic bag and kept in the freezer.  If you use dry herbs, you will not need as much as the recipe calls for; dried herbs have a more pungent flavor.

In this recipe you can replace the type of mushrooms used for another variety you prefer.  Always use fresh mushrooms purchased in the grocery store rather than canned.

Garlicky Marsala Mushrooms with Pasta

  • 5 Tablespoons olive oil
  • 1 pound of white mushrooms – quartered
  • 1 pound of porta bella mushrooms – quartered
  • 2 large garlic cloves, thinly sliced
  • 1 medium shallot, thinly diced or small onion mince
  • 1-1/2 tsp minced rosemary (try to use fresh)
  • ½ cup dry Marsala wine
  • 3 tablespoons balsamic vinegar
  • 1 cup of minced green, yellow and red peppers
  • 1 package of frozen or fresh Tortellini or pasta of your choice
  • 2 tablespoons butter, melted
  • 1/3 cup freshly grated Parmesan cheese
  • 2 large garlic cloves, grated or minced
  1. In a very large skillet, heat 2 tablespoons of the olive oil. Add the mushrooms, season with salt and pepper, cover and cook over high heat, stirring onion, until the mushrooms are browned all over, about 2 – 3 minutes. Add the sliced garlic, the shallot or onion, peppers and rosemary and cook, stirring until fragrant, about 2 minutes.  Add the Marsala and cook until evaporated, about 30 seconds. Add the vinegar and cook, stirring for 30 seconds. Stir in the minced garlic, and remaining 3 tablespoons of olive oil and season with salt and pepper. Cover and keep warm.
  2. Prepare pasta according to directions
  3. After draining the pasta return to the pot or a large bowl, stir in the butter and mushroom mixture, stir in the 1/3 cup of fresh Parmesan cheese until melted.

Enjoy

Baked Apple Pancake

Image

Baked Apple Pancake

Yes, you bake it in an oven in a skillet.  It is fabulous, tasty and makes a great Sunday brunch.

  • 2 – 3 Granny Smith apples, peeled, cored and sliced
  • ½ stick butter
  • ½ cup sugar mixed with 1 teaspoon cinnamon
  • 2 – 3 cups Pancake batter (instant is fine)

Heat oven to 375 degrees

  1. Melt butter in an 8 inch skillet (oven proof), add the sliced applies and stir until tender
  2. Sprinkle with the sugar / cinnamon mixture
  3. Stir and cook until applies are soft and sugar is melted
  4. Add prepared pancake batter on top of apples
  5. Bake in oven for 20-30 minutes until pancake is set (knife inserted in center comes out clean) – remove from oven
  6. Invert onto a plate and cut into wedges

Apple Cake

I got this fabulous recipe from my good friend Judy.  It is a very easy dessert to make and you can substitute apples with rhubarb!

Apple Facts

  • The crab-apple is the only apple native to North America.Two pounds of apples make one 9-inch pie.
  • 2,500 varieties of apples are grown in the United States.
  • 7,500 varieties of apples are grown throughout the world.
  • 100 varieties of apples are grown commercially in the United States.
  • Apples are fat, sodium, and cholesterol free.
  • A medium apple is about 80 calories.
  • The pilgrims planted the first United States apple trees in the Massachusetts Bay Colony.
  • Apple varieties range in size from a little larger than a cherry to as large as a grapefruit.
  • Apples were the favorite fruit of ancient Greeks and Romans.
  • Apples are a member of the rose family.
  • Charred apples have been found in prehistoric dwellings in Switzerland.
  • It takes the energy from 50 leaves to produce one apple.
  • In colonial time, apples were called winter banana or melt-in-the-mouth.
  • In 1730, the first apple nursery was opened in Flushing, New York.
  • Archeologists have found evidence that humans have been enjoying apples since at least 6500 B.C.
  • It takes about 36 apples to create one gallon of apple cider.
  • The old saying, “An apple a day, keeps the doctor away.” This saying comes from an old English adage, “To eat an apple before going to bed, will make the doctor beg his bread.”
  • Many apples after harvesting and cleaning have commercial grade wax applied. Waxes are made from natural ingredients.

Apple or Rhubarb Cake

1 cup granulated sugarapplecake
½ cup margarine
1 egg
1+1/2 cup flour
½ teaspoon baking soda
½ teaspoon cinnamon
½ cup warm coffee (the secret ingredient!)
2 cups of cut-up apple or rhubarb

Topping

½ cup brown sugar
1 teaspoon cinnamon
½ cup chopped nuts

Mix in order given. Pour in a greased and floured 8x12x2 inch pan (or close to it) Sprinkle the brown sugar mixture on top. Bake at 350 degrees for 35 minutes.  Enjoy!

Baked Asparagus with Parmesan Cheese

The Asparagus has played a role in the medicinal field as far back as 2000 BC. Studies show that asparagus has been used in medicine in preventing sleeplessness, to balance female hormones and to assist the reproductive system, to promote fertility, relieve menstrual discomfort and to increase breast milk for nursing mothers. It is used for respiratory diseases and for strengthening the lungs. Also for tuberculosis, AIDS, chronic fatigue, back pain, sports burnout, arthritis, rheumatism, gout, sciatica, coughs, to strengthen bones and marrow, hemorrhaging, stomach pains, kidney stones, cramps, convulsions, gall and liver ailments, to assist with weight loss, stress and nervous tension, intestinal worms, jaundice, skin diseases and to brighten vision. Scientific research has found that asparagus contains a substance that can break up oxalate crystals. Asparagus, being a good source of fiber, is a useful bowel brush with a laxative action that stimulates lazy bowels.

Asparagus contains the vitamins;  A, B, folic acid, C, E and the minerals  calcium, iron, phosphorus, potassium, sodium, zinc, selenium, iodine, magnesium, manganese, sulphur, silicon, florine

Asparagus is awesome and delicious. There are so many ways to cook Asparagus, but first did you know an easy way to remove the “woody” stem from  the stalk?  Don’t cut the stems before cooking. Snapping the stem is an easy natural way to remove the hard part from the delicious part. Just hold the sphere in your hand and grab the end of the stalk with your other hand and snap – it will break in the right spot.

Microwave the perfect asparagus; microwave for 1 minute and 35-40 seconds in a microwaveable plastic container with 2 tablespoons of water.

BAKED ASPARAGUS WITH PARMESAN CHEESE

Preheat oven to 375̊ F.

You need ½ lb of fresh Asparagus and ½ cup fresh grated Parmesan cheese

Make marinade for the Asparagus
1 tablespoon Olive Oilaspargus
1 tablespoon White Wine
1 teaspoon of white vinegar
1 tablespoon sugar
2 garlic cloves, crushed
1/2 teaspoon dill weed
1/4 teaspoon thyme
1/2 teaspoon Salt
1/8 teaspoon Pepper

  1. Wash asparagus and trim the woody ends.
  2. Combine the marinade ingredients and place in a plastic bag.  Add the asparagus and marinade in refrigerator for 15 minutes
  3. Sprinkle Parmesan cheese on a plate and roll each asparagus sphere in cheese until coated
  4. Arrange in a single layer in baking dish or cookie pan with raised edges, sprinkle remaining marinade over asparagus spheres.

Bake in a 375 oven for 15-20 minutes until lightly brown and sizzling hot. Do not overcook.

Salmon Cakes

Salmon Cakes

Salmon Cakes

I just had the best Salmon Cakes I’ve ever tasted and they were pretty easy to make.  Any kitchen should have a mini food processor, such as a Cuisinart Mini-prep plus.  It does all the chopping for you.  Let me start my story with I was hungry and it was lunch and I am home from work to celebrate New Years Day.  So I had time to do this.  I purchased 3 envelopes of Chicken of the Sea Skinless & Boneless Pink Salmon at Walmart *(in the tuna area) the other day, mostly because I eat a lot of salad and like to add protein like tuna, crab or salmon to my salad – which will be another story another time.  So I had this salmon in my pantry and saw a recipe on the back of the envelope for “Simple Salmon Cakes”  I looked at the ingredients I would need and had almost everything I needed except for bread crumbs, but I did make a loaf of bread a few days ago in my bread maker and it was sitting there, and I knew I wasn’t going to finish the bread before it got hard, so I chopped the remaining loaf in my Cuisinart Mini-Prep plus into tiny, soft bread crumbs.  I only needed a cup, so I put the rest in a zip lock and put it in the freezer for another day.

I didn’t have “green onions” so I used my left over red onion and threw it in the Cuisinart and chopped it fine, I had mini bell peppers from another recipe so I did the same with them and chopped them fine. So there you go, you can substitute veggies with what you have.  I also didn’t have any lemon juice, but had lime juice and used that instead.  So here is the actual recipe:

  • 1 5oz pouch of Chicken of the Sea Skinless & Boneless Pink Salmon
  • 1/4 cup chopped green onion (or red or scallions)
  • 1/4 cup Mayonnaise
  • 1 tablespoon lemon or lime juice
  • 1/2 tsp Garlic powder
  • Dash Cayenne pepper
  • 1/4 cup finely chopped bell pepper
  • 1 medium egg (beaten)
  • 1 cup breadcrumbs (fresh is best!)
  • 3 tablespoon butter (I sprayed the pan with “pam” and used 1 tsp of butter)
  • 1/4 tsp of seasoned salt – I didn’t use salt

Combine onion, mayo, lemon or lime juice, and seasonings in a bowl. Add salmon, egg and 1/4 cup breadcrumbs or more if mixture is too loose to gather into your hand, mixture will and should be soft and loose, not stiff and sticky.  Gather about 1/2 cup mixture in your hand and form into a loose ball, roll around in remainder 3/4 cup of breadcrumbs to form a crust and place on a plate while you do the same with the rest.  Heat skillet spray with cooking spray and melt a tsp of butter on skillet.  Add each cake and cook for 4 minutes on the first side on medium heat (electric stove is #5) while this is cooking – wash your dishes.  It is better to be busy instead of bothering the cakes while they cook.  After 4 minutes, flip over and cook for 4-5 minutes.  Finish cleaning your mess.  When they are done, you can eat on a plate with a tablespoon of mayo (I use Kraft Mayo with Olive Oil reduced fat)  and tablespoon of relish (I use Famous Dave’s hot and sweet) or put between bread and dress how you like.  These are really good – you can be creative and use this stuffing in mushrooms and bake in a 350 oven for probably about 20 minutes.  Enjoy!