Tag Archives: recipe

Sautéed Zucchini Noodles

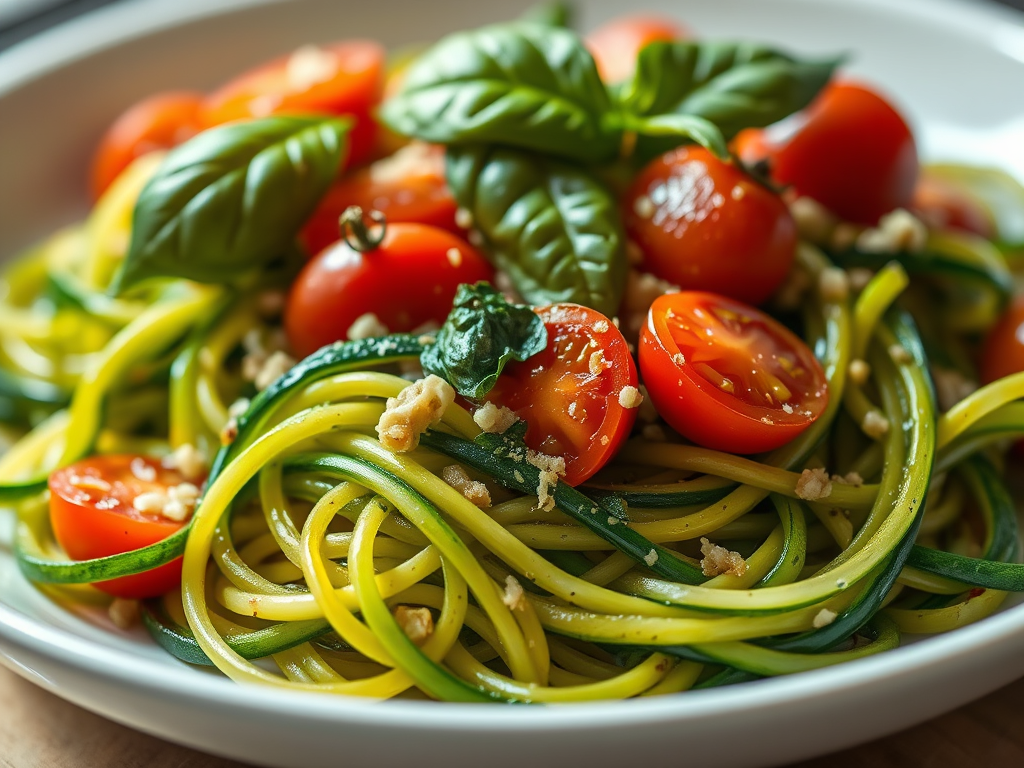
I purchased a small, handheld device that turns zucchini into noodle-like strands, similar to spaghetti. Alternatively, you can use a vegetable peeler to create thin slices, then stack and cut them into strips. A box grater can also be used by sliding the zucchini down its large holes. Additionally, spiralizers or mandolins are effective tools for slicing zucchini into noodles. Many slicers suitable for this purpose are available at market or online offering a variety of options for preparing zucchini noodles easily and efficiently.

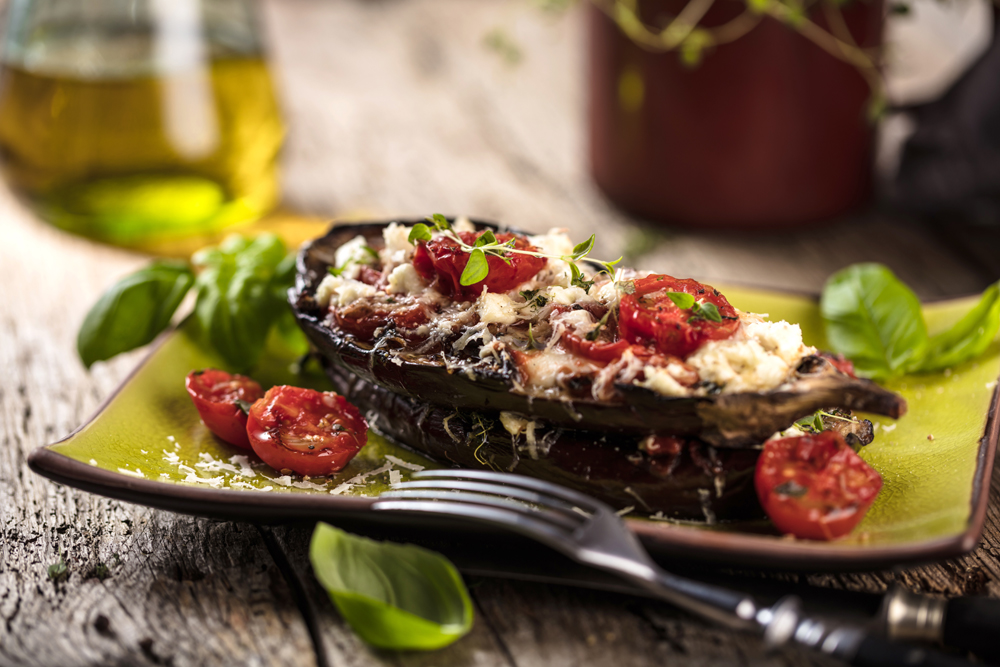
Incorporating zucchini into your diet offers numerous health benefits, making it a valuable addition to a balanced nutritional plan. Zucchini, a versatile and nutrient-dense vegetable, is low in calories but rich in essential vitamins, minerals, and antioxidants. Its inclusion can support overall health, aid in weight management, and promote well-being.

Ingredients

  • 2 – 3 zucchinis’, wash do not peel, remove ends
  • 1 medium sweet onion, diced
  • 3 fresh garlic cloves, sliced on the long side
  • About 1 cup of any other vegetable, such as sweet peppers, mushrooms, broccoli florets, spinach or cauliflower
  • ¼ cup fresh parsley, chopped fine
  • 4 tablespoons Parmesan grated
  • 1 tablespoon of olive oil
  • 2 tablespoons of butter (use real butter)
  • ½ tsp of kosher salt
  • ¼ tsp of red pepper flakes

Process

  1. Set your sliced zucchini aside.
  2. Chop your onions, slice your other vegetables.
  3. Heat a wok or other heavy pan on medium-high with 1 tablespoon of olive oil
  4. When oil is hot, add onions, and vegetables (except fresh spinach, add that last)
  5. Sauté until soft
  6. Push the vegetables to the side of the pan and add butter
  7. When butter is melted, add the garlic and sauté for about 30 seconds, add zucchini noodles and sauté for 3-4 minutes in hot butter. Sprinkle red pepper flakes, Parmesan and salt over vegetables in pan and stir together, if using fresh spinach add it now and stir until wilted.

Add Ins

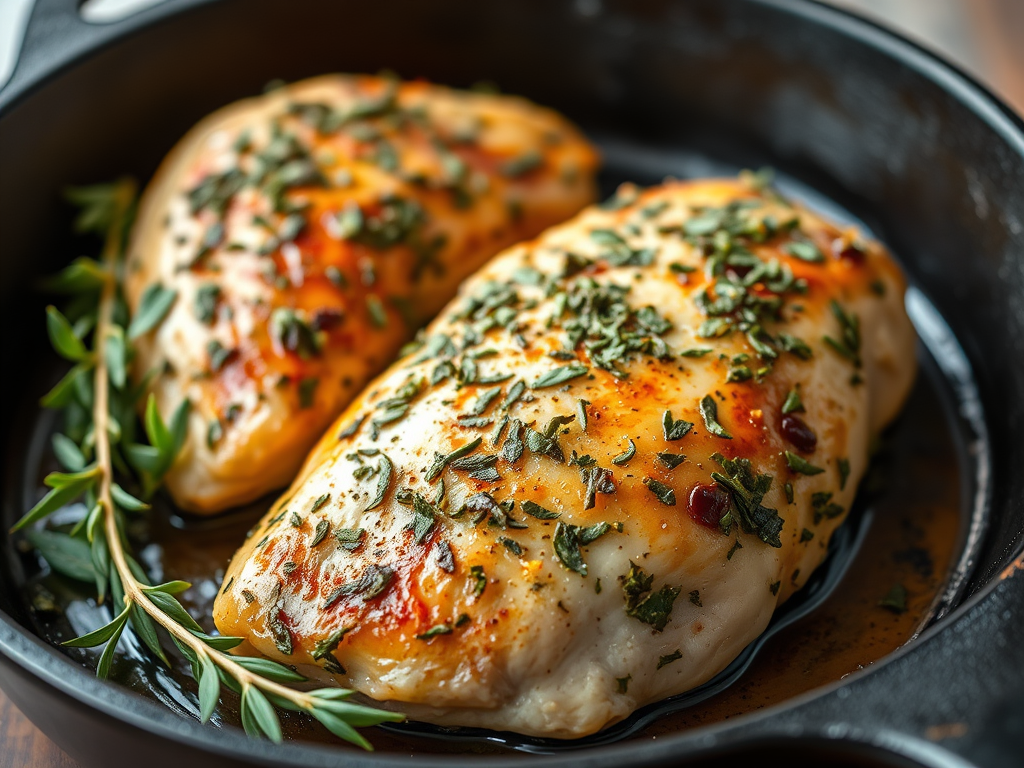
  • Add shredded chicken, scallops, or shrimp to noodles to turn a side dish into a full meal. Include poached eggs for breakfast or add spaghetti sauce with ground beef or turkey for a hearty, satisfying dish.

Notes

Overcooking zucchini strands makes them soggy, similar to overcooked pasta. Aim for a firm texture, or ‘al dente.’ The strands should have a slight bite, not be too soft, ensuring better taste and texture.

Portabella Mushrooms, Stuffed with Feta cheese, Kalamata Olives and Avocado

Portabella mushrooms are healthy and practical. They are low in calories and rich in antioxidants, vitamins, and minerals. They can be used instead of bread or pastry for stuffing, providing nutrition and flavor. Alternative ingredients such as cooked Italian Sausage, sauteed bell peppers, chili peppers, or prosciutto could be considered as additions to the basic stuffing below. This recipe is versatile, allowing you to customize the filling with your favorite vegetables or cheeses. Served with a side salad or soup, enjoy the rich flavors and satisfying texture of this dish.


Ingredients

  • ¼ cup olive oil
  • 1 tablespoon of balsamic vinegar
  • 1 clove garlic, grated
  • ¼ cup of sliced Kalamata Olives
  • 4 or 5 sun dried tomatoes, chopped
  • ¼ cup diced sweet onion
  • 1 cup fresh spinach
  • 1 oz goat cheese
  • ½ Avocado – cut into chunks
  • ¼ tsp Kosher salt or sea salt
  • Sprinkle of freshly grated pepper
  •  4 large Portabella Mushrooms

Process

  1. Preheat oven to 425°F.
  2. Clean the mushrooms with a damp paper towel.
  3. Remove the stems by twisting them off and scrape out the gills using a spoon to create more space for the stuffing.
  4. Marinate the mushrooms for 30 minutes to 1 hour in ¼ cup olive oil and 1 tbsp. balsamic vinegar add 1 grated garlic clove.
  5. Add one teaspoon of olive oil to a skillet on medium-high heat, add Kalamata olives, and the sun-dried tomatoes, stir-fry for about 4-5 minutes until the olives are crispy. Remove from pan.
  6. Turn heat down to medium, add another teaspoon of olive oil and add the diced onions and garlic. Stir-fry for about 2-3 minutes until onions are soft. Add the spinach just until wilted.
  7. Add the olives and tomato mixture to the pan with the onions, garlic and spinach.
  8. Remove from heat, let cool slightly.
  9. Stir in goat cheese, sprinkle with salt and pepper to taste, stir in Avocado chunks.
  10. Place pan in pre-heated oven and bake for 20 minutes until mushrooms are tender.
  11. Remove from the oven and let mushrooms cool slightly before serving.

Cooking Endive

How to cook endive. Endive belongs to the chicory genus, which includes several similar bitter leafed vegetables. I am talking about the little bullet shaped endives, not the curly leaf or chicory. Endives are rich in many vitamins and minerals, especially in foliate and vitamins A and K, and are high in fiber. Endive has a bitter-sweet taste, but I thought it was very savory, almost nutty. I served it up with my baby potatoes and flounder; it made a very filling side dish. Let your kids eat these little “boats” with their fingers. Make it fun.

Here are a few suggestions on how to enjoy your endive:

Baked endive:

  1. Preheat oven to 375° F.
  2. Slice endive lengthwise, remove core. Keep the root end intact as it will hold the leaves together after slicing.
  3. Brush both halves with olive oil.
  4. Slice a fresh garlic clove into very thin slices and place the slices in between the endive leaves.
  5. Sprinkle with kosher salt and pepper, and a little garlic powder.
  6. Bake at 375°F. for 20 minutes.
  7. Remove them from the oven and sprinkle balsamic vinegar over them.

Pan braised endive:

  1. Slice your endives in half.
  2. Sprinkle cut side with kosher salt and pepper, and any other seasoning you might like.
  3. Melt 1 tablespoon of butter in a heavy pan along with 1 tablespoon coconut oil.
  4. Place the endive halves cut side down in the pan, cook on medium-high heat until they are brown.
  5. Add ½ cup chicken broth and simmer until almost all liquid is gone. Remove from pan sprinkle with Kosher salt, and drizzle with balsamic vinegar

Maple glazed endive:

  1. Preheat oven to 350°F.
  2. Halve 6 small endives, remove as much of the core as possible.
  3. Arrange endive into one layer on a baking sheet with raised edges.
  4. In a small saucepan, melt 2 tablespoons of butter then stir in 2 tablespoons of real maple syrup, 2 teaspoons of thyme and ¼ teaspoon salt. When hot, pour over the endive and bake until tender and the edges begin to brown, 20 to 25 minutes.

Chewy Salted Caramel Cookie

This cookie features a salted caramel finish, making it an excellent addition to holiday menus or a year-round indulgence, offering a sophisticated treat for discerning palates throughout the year.

Ingredients

  • ½ cup butter
  • 3/4 cup of brown sugar
  • ¼ cup granulated sugar
  • ¼ teaspoon baking soda
  • ¼ teaspoon cream of tarter
  • ½ tsp cinnamon
  • 1 egg
  • ½ teaspoon vanilla extract
  • 1-1/2 cup of flour
  • ¼ teaspoon of sea salt
  • 1/2 cup caramel squares, cut into quarters.

Cookie Finish

  • Mix ¼ cup granulated sugar and 2 teaspoons of ground cinnamon together in a small bowl. Set aside.
  • Set aside coarse sea salt for sprinkling or Maldon Sea Salt Flakes (use sparingly)

Process

  1. In a medium sized bowl, mix the flour, baking soda, cream of tartar, cinnamon, and set aside.
  2. To brown the butter, heat a medium saucepan to medium high heat. Add the sliced butter. It does not take long for the butter to begin browning on the bottom. When the butter begins to froth, watch carefully and stir. Once the butter turns light brown, remove from heat and let it cool to room temperature. The butter will burn fast, so don’t walk away.
  3. While the butter is cooling, cut the caramel squares into quarters and set aside
  4. In a stand mixer, combine the brown butter, brown sugar and granulated sugar. Mix until blended and smooth.
  5. Beat in egg and vanilla and mix until combined. Slowly add the dry ingredients until combined.
  6. Form the dough into a ball and cover with plastic. Chill in the refrigerator for at least 30 minutes or overnight.
  7. Once you are ready to bake preheat the oven to 350°F.
  8. Measure about 2 tablespoons of dough and roll into a ball or use a cookie scoop.
  9. Flatten and place a quartered caramel square on top, wrap the cookie dough over the caramel and roll back into a ball.
  10. Mix ¼ cup sugar and cinnamon in a small bowl and roll each cookie in the mixture. Place on a parchment lined cookie sheet 2 inches apart.
  11. Flatten slightly with a fork, and sprinkle lightly with coarse sea salt
  12. Bake for 10 minutes, or until the edges turn light brown. The centers will be soft. Allow it to cool for 2-3 minutes and transfer to a wire cooling rack to cool completely.

Fresh Herbed Chicken Breast

This recipe is for a simple, healthy herb-crusted chicken breast. I researched various oven-cooked herb chicken recipes but found many used flour, breadcrumbs, butter and oil. Instead, I chose to prepare my own version using fresh herbs from my garden, fresh herbs are also available at the markets. The preparation takes about 15 minutes from start to finish. The recipe does not include flour, breadcrumbs, or excessive fats, making it a quick and nutritious dinner option. It only takes around 8 minutes to cook, which I consider a fast meal. Overall, this approach emphasizes health, simplicity, and speed, making it suitable for busy weeknights while still delivering a flavorful dish.

Ingredients

  • 6 – 8 oz chicken breast, boneless, skinless
  • ¼ cup of chopped fresh herbs, I used a combination of parsley, sage, oregano, rosemary
  • ¼ tsp kosher salt
  • 2 tsp of coconut oil
  • 1 tsp of butter

Process

  1. Place chicken breast inside a plastic quart bag or between two pieces of plastic wrap and using a meat mallet begin to gently pound the chicken on both sides until all the same width
  2. Take half of the chopped herbs and spread on one side of chicken breast, sprinkle with salt and gently pound the herbs into that side of the chicken breast
  3. Turn chicken over and spread remaining herbs and salt on other side of breast and pound into the chicken breast.
  4. Melt coconut oil and butter in a heavy pan or non-stick pan over medium high heat, when oil is hot place the chicken in the oil and cook uncovered for 4 minutes each side.
  5. Turn the heat down to medium if it looks like it is browning too fast. When the chicken is ready to flip to the other side after 4 minutes, be careful not to splash yourself. Cook the second side for 4 more minutes. Slice the chicken breast to be sure the meat is no longer pink. Cook to an internal temperature of 165°F. (or 74°C)
  • Note: Melted oil must be hot before adding the chicken breast or it will absorb the oil as it is cooking. Hot oil will sear the meat as it hits the pan.
  • Pounded chicken breast cooks relatively fast, prepare your salad and vegetables before you begin cooking.

Brussels Sprouts with Bacon, Garlic, and Onion

Brussels sprouts are often overlooked but offer many health benefits and culinary uses. They taste similar to small cabbages and can be made more appealing by adding ingredients like bacon, garlic, or sweet onions. These vegetables go well with beef or pork dishes. To keep their nutrients, it’s best to steam or stir-fry Brussels sprouts, as boiling can reduce important compounds like sulforaphane. They also contain indole-3-carbinol, which is being studied for its potential to help repair DNA and slow cancer growth in lab tests. Including Brussels sprouts in your meals can support a healthy diet and add variety to your cooking. Their nutritional value and versatility make them a good choice for many recipes, helping more people enjoy this nutrient-rich vegetable.

Brussels Sprouts with Bacon, Garlic, and Onion

Ingredients

  • 6 slices bacon
  • ½ cup sweet onion, diced
  • 2 pounds Brussels sprouts, trimmed and halved
  • 4 garlic cloves, grated
  • 1/2 cup fat-free chicken broth
  • 1/8 teaspoon salt
  • 1/8 teaspoon red pepper flakes or Korean Red Pepper Powder
  • 1 tablespoon red currant jelly

Process

  1. Heat a large nonstick skillet over medium-high heat. Add bacon, and sauté until bacon begins to brown. Remove pan from heat. Remove the bacon from pan, reserve one tablespoon drippings in pan (discard the remaining drippings).
  2. Chop bacon into small pieces
  3. Return pan to medium-high heat, and stir in bacon pieces, onion, and Brussels sprouts; sauté 4 minutes.
  4. Add garlic, and sauté for 4 minutes or until garlic begins to brown, stirring frequently.
  5. Add the chicken broth and bring it to a boil. Cook for 2 minutes until the broth reduces and is almost completely gone and the sprouts are crisp-tender, stirring occasionally.
  6. Remove from heat; stir in salt and red pepper flakes, toss with a tablespoon of currant jelly.
  7. For a colorful, special Thanksgiving or Christmas dinner or any holiday dinner, try stirring in pomegranate seeds.

Steamed Garlic and Herbed Clams

I frequently prepare steamed shellfish, such as clams and mussels, during gatherings, consistently receiving positive feedback. These shellfish are typically steamed with wine, butter, and aromatic spices. Once cooked, the remaining broth can be enjoyed by dipping Italian bread or served over freshly cooked pasta. It is advisable to use dry white wines for cooking, as they do not impart sweetness; the alcohol evaporates during cooking, leaving behind a concentrated flavor. This method enhances the dish’s depth, providing a refined and flavorful experience. Enjoy your meal!

Ingredients

  • 1/2 cup of butter
  • 5 cloves garlic, minced or grated
  • 2 cups of dry white wine (such as a Chardonnay)
  • 1 tablespoon dried oregano or 2 tablespoons of fresh chopped oregano
  • ¼ cup fresh chopped parsley
  • 1 teaspoon crushed red pepper flakes
  • 36 clams in shell, scrubbed

Process

  1. Melt butter in a large skillet over medium heat. Cook garlic in butter briefly. Stir in wine, and season with oregano, parsley, and red pepper flakes.
  2. Place clams in the wine mixture. Cover, and steam until all the clams have opened: discard any that do not open. Serve in soup bowls, and ladle broth generously over them.

Amish Pickled Beet Eggs

Traditional Amish pickled beets and eggs are a simple and tasty way to enjoy Pennsylvania Dutch heritage. This recipe uses basic ingredients to create a colorful and flavorful dish that can last for weeks. Whether you’re hosting a family gathering or trying an authentic Amish recipe, these pickled beets and eggs offer a good mix of sweet, sour, and savory flavors. They have been a favorite for many generations. The 48-hour waiting period might require patience, but the first bite of these colorful, well-flavored eggs shows that some traditions are worth keeping. Make a batch today and see why this simple dish has been popular in Pennsylvania Dutch cooking for over 200 years.

Ingredients

  • 8 eggs
  • 2 15-ounce cans of whole pickled beets, juice reserved.
  • 1 cup reserved beet juice
  • 1 medium red onion, sliced thin (a mandolin slicer is a perfect tool for this job)
  • ½ cup white sugar
  • ½ cup brown sugar
  • ¾ cup apple cider vinegar
  • 12 whole cloves
  • 2 Bay leaves
  • ½ teaspoon kosher salt
  • 1 pinch of ground black pepper

Process

  1. Place eggs in a large pot of water making sure they are fully submerged. Bring water to a boil, reduce heat and simmer for 11 minutes.
  2. Drain hot water and submerge eggs in cold tap water. When cool enough to handle remove the shells. Do not refrigerate, shells are easier to peel when warm.
  3. Slice beets in ¼ inch slices. Do not discard juice from can or jar.
  4. Place eggs, beets, and onion in layers in a 1-quart glass jar.
  5. In a large pot, combine the 1 cup of reserved beet juice, vinegar, sugar, cloves. Bay leaves, salt and pepper.  Bring to a boil, reduce heat and simmer for 5 minutes.
  6. Pour the hot brine over the eggs, beets and onion to fill the jar up to 1/4-inch headspace.
  7. Let sit for 30 minutes before adding the lid.
  8. Secure the lid and place in the refrigerator for 48 hours before eating.   

Oven Roasted Beer Can Chicken

This recipe was popular in the 1980s. It involves setting a roasting chicken on an open can of beer and cooking it on a grill or in the oven. The outside of the chicken becomes crispy and salty, while the inside stays moist because of the steam. If you do not want to use beer, you can use other liquids to keep the chicken moist. Some options are ginger ale, lemon-lime soda, or broth or wine.

For wine or broth, fill a narrow-neck mason jar two-thirds full with your favorite wine or broth and set the chicken on top of the open mason jar. These liquids do not change the flavor of the chicken much but help keep it juicy and flavorful with crispy skin during cooking.

Ingredients

  • 4 lb. Chicken
  • 2 tablespoons minced flat leaf parsley
  • 2 tablespoons of fresh Rosemary, chopped
  • 4 cloves of garlic – grated or pressed
  • 1 teaspoon Kosher salt
  • ¼ teaspoon black pepper
  • 2 Tablespoons Olive Oil
  • 4 Tablespoons of cold butter sliced into thin pieces

Chicken Prep with Herbs

  1. Combine parsley, rosemary, garlic, salt, pepper and olive oil in a bowl.
  2. Gently slide your hand between the skin and meat being careful not to rip the skin.
  3. Rub about half of the herb mixture on meat, don’t forget the thighs.
  4. Slide ½ of the sliced butter inside the skin on top of the herb mixture.
  5. Rub the chicken skin with the rest of the butter and herb mixture, sprinkle with salt and pepper.

Process

  1. Wash the unopened beer can with hot soapy water, dry.
  2. Open can and pour half the beer into a glass for your pleasure.
  3. Puncture 2 more holes in the top of the beer can with a can opener.
  4. Place can on a pie plate if cooking in the oven.
  5. Lower bird onto the can – the can must be inside the cavity. Use legs and bottom of can as a tripod.
  6. Roast until an instant read thermometer reads 180°F. inserted in thigh.
  7. Carefully transfer chicken and beer can to a cutting board and let rest for 10 minutes.
  8. Carefully lift chicken off of the beer can (you may need two people for this, one holding the can and the other one lifting the chicken)
  9. Discard beer or other liquid from the can. Slice Chicken and enjoy.

Barley, Leek, Mushroom and Rosemary Gratin

This rustic dish combines grains, vegetables, and herbs for a nutritious meal. Barley offers a nutty, chewy texture and is versatile beyond soups. I found a recipe to serve with pork roast. Mushrooms are optional, but fresh rosemary is essential. Using butter enhances the flavor, and fresh herbs provide the best taste. The dish is filling and healthy enough to be a standalone lunch. You can customize it by adding vegetables like spinach. Overall, it’s a simple, tasty, and adaptable meal that promotes healthy eating and enjoyment.

Ingredients

  • 2 cups of canned reduced sodium vegetable broth
  • 2/3 cup of medium pearl barley, rinsed in cold water
  • 3 leeks (white and light green part only)
  • 1/2 pounds of button mushrooms sliced
  • 1 – 2 tablespoons of fresh rosemary leaves, chopped
  • 2 cloves of garlic, minced or grated
  • ¼ teaspoon salt
  • ¼ teaspoon pepper
  • 1 tablespoon butter
  • 1 tablespoon olive oil
  • ½ cup of freshly grated Swiss, or Apple smoked Gruyere cheese

Process

  1. Bring vegetable broth to a boil, add rinsed barley cover and cook barley in vegetable broth until tender about 25 minutes. Do not drain.
  2. Preheat oven to 375° F – spray a 2-quart baking dish with cooking spray.
  3. Clean and slice mushrooms. I wipe mushrooms off with a paper towel. I do not “wash” mushrooms as they will retain the moisture and will not brown.
  4. Slice off root and dark green leaves of leeks, slice the remaining white part lengthwise. Run under cool water to remove sand between leaves.
  5. Slice leeks into thin slices.
  6. Remove rosemary leaves from stems by pulling downward with thumb and finger, chop fine.
  7. Heat butter in pan until melted, add mushrooms, cook until brown, remove from pan.
  8. Heat oil in same pan until hot, add leeks and cook on medium-high heat until limp, about 10 minutes, add rosemary and garlic, cook for about 1 minute more, add barley, mushrooms, salt and pepper.
  9. Stir in half cheese.
  10. Transfer barley mixture to baking dish
  11. Sprinkle with remaining cheese
  12. Bake for 15 minutes or until heated and bubbly