Tag Archives: recipes

Summer Delight: Flounder Stuffed with Crab

Stuffed fish on a plate with lemon, potatoes, asparagus, and a pitcher of lemon water on a wooden table by the ocean

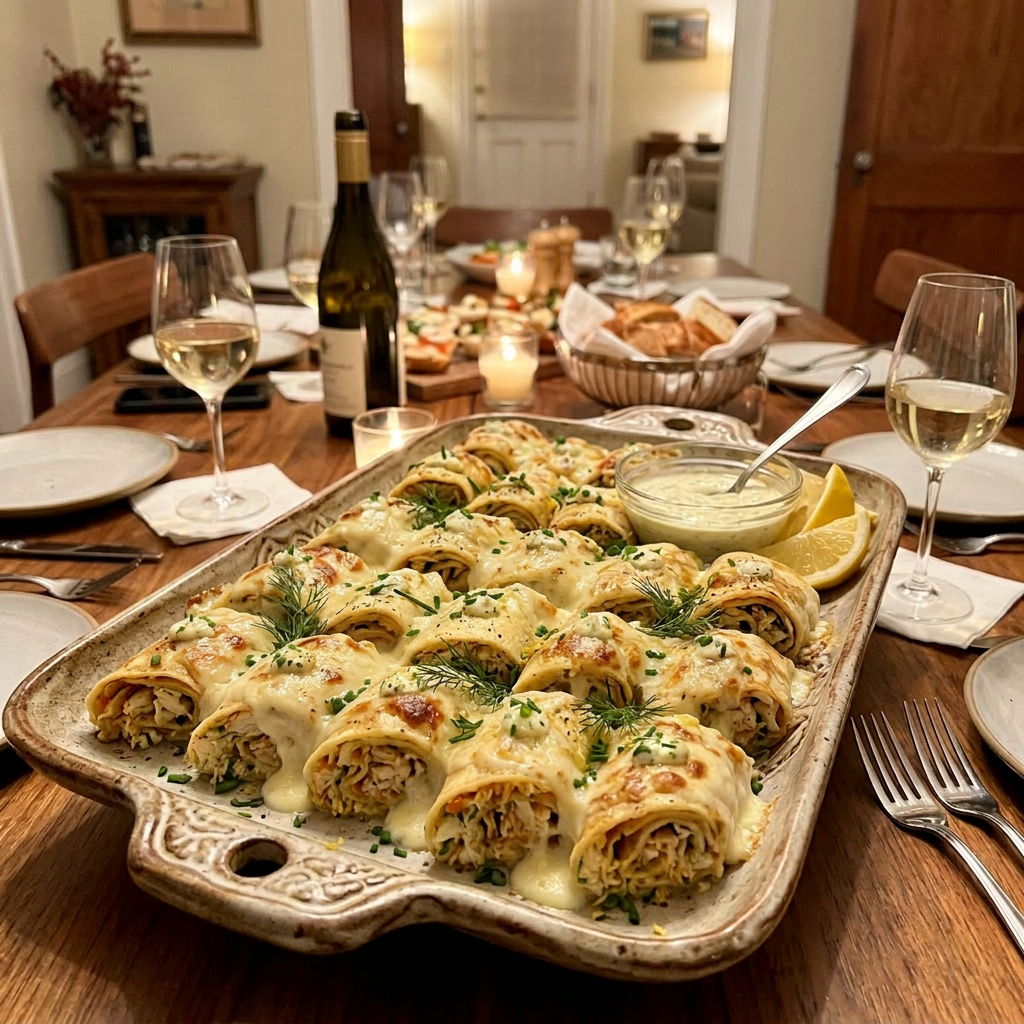
Bring sunshine to the table with a playful, crowd-pleasing dish that’s perfect for summer get-togethers: flounder stuffed with crab. Imagine delicate flounder fillets gently wrapped around a savory, herbed crab filling that’s bright with lemon, kissed by garlic, and uplifted with fresh herbs. Each bite offers tender, flaky fish paired with sweet lump crab—light enough for warm evenings, yet hearty enough to satisfy a hungry crowd. Whether you’re feeding a small group or a boisterous crowd, crab-stuffed flounder brings coastal charm, bright flavors, and a touch of summer whimsy to every gathering.

Ingredients

  • 4 to 5 Large fillets

Preparation

Stuffing Options

  • Sprinkle flounder with salt and pepper. Using a fillet knife, carefully open the flounder by cutting along the left and right sides of the seam down the middle of the fish to make pockets. Lay the cut sides back.
  • Roll method: Place stuffing into a strip of fillet, roll it up, and secure with toothpicks or skewers.
  • Layer method: Place stuffing into a cavity or between two fillets, then cook.

CRAB MIX

Ingredients

  • 2 green onions, thinly sliced (about 1/4 cup)
  • 1 clove garlic, minced
  • 1 red pepper, minced
  • 2 tablespoons fresh parsley, chopped fine
  • 1 egg
  • 1/8 teaspoon cayenne pepper
  • 1/8 teaspoon garlic powder
  • 3 tablespoons heavy cream
  • 1 1/2 tablespoons Dijon mustard
  • 1/2 lemon, juiced
  • 2 tablespoons plain Greek yogurt, or sour cream
  • 10 saltine crackers, crumbled medium to fine
  • 1 pound lump crabmeat, picked clean of shells
  • Salt and freshly ground black pepper

Directions:

  1. Preheat the oven to 350°F.
  2. In a medium skillet, melt the butter and sauté the onions, garlic, parsley, and peppers until soft; set aside to cool.
  3. In a mixing bowl, combine the egg, cayenne pepper, garlic powder, heavy cream, mustard, lemon juice, and Greek yogurt. Add the cooled onions, garlic, peppers, and parsley; gently mix in the Saltine crackers and crabmeat. Add salt and pepper to taste.  
  4. Stuff the flounder with the Crab Mix, and press the sides down to cover the filling. Sprinkle with paprika.
  5. Coat a glass baking dish with cooking spray. Place the fish in the dish and bake for 20 minutes or until internal temperature reaches 145°F.
  6. Without removing the dish from the oven, turn the oven to broil and broil for 5 additional minutes.
  7. When the fish is done, remove it from the oven.

*Optional: Melt ½ cup of butter and drizzle over fillets when finished baking.

Caprese gets playful!

Cut basil leaves into thin ribbons

Juicy tomatoes, pillowy mozzarella and basil shimmy together. Add peppery arugula, drizzle tangy balsamic or basil pesto, or stack these flavors into a ciabatta for a grab-and-go Caprese sandwich. Fold in prosciutto, creamy avocado or charred peppers for surprising textures. Thread ingredients onto skewers for a party-ready bite — bright, fresh, and totally irresistible. Try four fun Caprese variations and even a cheeky eggs Benedict twist with mozzarella, tomatoes, and pesto for a brunch surprise.

Version #1

Classic Caprese layered salad

INGREDIENTS

  • Fresh Spinach, or arugula (optional)
  • 4 medium sized juicy, ripe tomatoes, sliced in ¼ inch slices
  • 6 ounces of fresh mozzarella cheese, sliced
  • 1 bunch of fresh basil, rinsed and pulled apart into individual leaves

PROCESS

  1. Line a plate or platter with washed spinach leaves, stems removed.
  2. Arrange the tomato slices on top of the spinach
  3. Sprinkle with ½ teaspoon of kosher or sea salt
  4. Layer half of the basil ribbons on top of the tomatoes
  5. Layer the mozzarella cheese on top of the basil
  6. Sprinkle remaining basil on top of the cheese
  7. Pour the Balsamic vinegarette on top of layers
  8. Serve at room temperature

Balsamic Vinegarette

  • 2 Tablespoons of extra-virgin olive oil
  • 2 Tablespoons of good balsamic vinegar
  • 2 cloves of garlic sliced into slivers or grated
  • ½ teaspoon of cracked pepper
  • 1 teaspoon Kosher or Sea salt, divided
  • In a small bowl with a lid mix the extra virgin olive oil, balsamic vinegar, ½ teaspoon cracked pepper, ½ teaspoon salt, and garlic. Mix together and set aside for at least 15 minutes to blend flavors.

Version #2

Chopped Tossed Salad

Spinach salad with red and yellow cherry tomatoes, mozzarella balls, and balsamic dressing
A vibrant spinach salad with cherry tomatoes, mozzarella balls, and balsamic drizzle

Chop or dice the tomatoes and the mozzarella and tear up the spinach or arugula, and basil leaves to make the Caprese salad more like a traditional salad served in bowls. This is a nice option if you’re serving the Caprese as a side dish. Serve the Balsamic vinaigrette at the table to let guests choose how much to add.

Version #3

Caprese sandwich with tomato, mozzarella, basil on ciabatta bread and side salad with cherry tomatoes
A delicious caprese sandwich served with a fresh salad and balsamic drizzle

Caprese sandwiches capture the flavors of a Caprese salad in a handheld form. On ciabatta or a baguette split horizontally, drizzle balsamic vinaigrette, then layer tomato slices, fresh mozzarella, basil leaves and a smear of basil pesto. Serve toasted so the cheese melts. For more flavor, add sun-dried tomatoes and a handful of arugula before serving.

Version #4

Caprese Skewers

Skewers with cherry tomatoes, mozzarella balls, and basil leaves on wooden board with balsamic glaze
Fresh Caprese skewers with cherry tomatoes, mozzarella, and basil drizzled in balsamic glaze.

Ingredients

  • Small wooden skewers (or toothpicks)
  • Grape tomatoes
  • Fresh mozzarella cheese pearls
  • Fresh basil leaves
  • 1 tablespoon Extra Virgin Olive Oil
  • 1 teaspoon of Balsamic Glaze
  • Sea salt (to taste)
  • Cracked black pepper

Process

  1. Thread one cherry tomato, followed by a fresh basil leaf (fold in half if large), then a mozzarella pearl. Repeat until all skewers are assembled.
  2. If not using it immediately, cover with plastic wrap and refrigerate for up to 2 hours.
  3. Right before serving, plate the skewers and drizzle with olive oil, and balsamic glaze.
  4. Finish with a pinch of sea salt and cracked black pepper.

Version #5

Caprese Eggs Benedict

Poached eggs on toast with pesto sauce and tomato slices
Delicious poached eggs with pesto on toast and fresh tomato slices

Ingredients

  • 1 tablespoon distilled white vinegar
  • 1 ounce of mozzarella cheese, sliced into 4 pieces
  • 2 English muffins, split
  • 4 large eggs
  • 4 teaspoons pesto
  • Salt to taste

Process

  1. Fill a large saucepan with 3 inches of water and bring to a boil over high heat. Reduce heat to medium-low, pour in vinegar, and keep water at a gentle simmer.
  2. While waiting for water to simmer, place 1 mozzarella cheese slice and 1 tomato slice onto each English muffin half.
  3. Cook in a toaster oven until cheese softens and the English muffin has toasted.
  4. Crack an egg into a small bowl. Holding the bowl just above the simmering water’s surface, gently slip egg into the water. Repeat with the remaining eggs.
  5. Poach eggs until whites are firm, and yolks have thickened but are not hard, about 3 – 3 ½ minutes.
  6. Remove eggs from water with a slotted spoon and dab them on a paper towel to remove excess water.
  7. Place a poached egg on top of each English muffin. Spoon 1 teaspoon of pesto sauce onto each egg and sprinkle with salt.

Cheesy Beer Bread

Round sourdough bread wrapped in parchment paper tied with twine and garnished with rosemary, thyme, and bay leaves on a wooden board
A loaf of Cheesy Beer bread wrapped in parchment and twine, adorned with fresh herbs.

Cheesy Beer Bread transforms humble ingredients into a delightful, crowd-pleasing loaf that’s fun to bake and impossible to resist. Picture a tall, golden cylinder with a slightly crisp crust and a pillowy, cheese-studded interior that releases savory aromas as you slice it. No yeast fuss—baking powder and lively beer bubbles do the rising—so it’s a quick, satisfying bake. The vertical pan traps steam, keeping the crumb tender while concentrating cheesy, toasty flavors in every bite. Serve warm with butter, dunk into soups, or package for fundraisers and friendship baskets—this bread practically sells itself. For variety, try baking the batter in mugs for single servings or in a standard loaf pan for easy sharing. It’s playful, flavorful, and ideal for spontaneous baking adventures.

Ingredients

  • 3 cups of all-purpose flour
  • 2 tablespoons of granulated sugar
  • 1 tablespoon of baking powder
  • 1 teaspoon of kosher salt
  • 1 cup of shredded sharp cheddar cheese
  • 12 oz. beer (see note)
  • ¼ cup of butter melted and divided
  • ½ tsp garlic powder
  • ½ Tbsp minced fresh parsley
  • ¼ cup of shredded sharp cheddar cheese (for top of loaf)

Process

  1. Preheat oven to 350°F.
  2. Spray pan or mugs with nonstick cooking spray; set aside.
  3. Using a large mixing bowl, add the flour, sugar, baking powder and salt; stir until well combined.
  4. Add 1¼ cups of cheddar cheese; stir until well combined.
  5. Add beer; stir until well combined.
  6. Transfer batter into prepared pan, or mugs.
  7. Brush half of the melted butter (2 Tbsp) and sprinkle ¼ cup of cheese evenly on top of the batter.
  8. Bake for 40-45 minutes, or until top of bread is golden brown.

Topping for Bread

  1. Using a small bowl, whisk together the remaining melted butter (2 Tbsp), garlic powder and parsley.
  2. While bread is still hot from oven, brush the butter mixture evenly on top.
  3. Let bread cool for 10 minutes in pan before transferring to a wire rack until completely cool.

Notes

For beer bread, I recommend using a lighter beer like ales or pilsner. Hoppy beers (like IPAs) are not recommended as they tend to overshadow the flavors in the bread.

Sourdough Sandwich Bread

Loaf of golden brown bread on a wooden cutting board with a serrated knife.
A golden loaf of freshly baked bread rests on a wooden cutting board next to a serrated knife.

Sourdough bread undergoes fermentation, which produces lactic acid, giving it a tangy flavor. Traditional sourdough has a chewy texture, large air pockets, and a crusty outside, distinguishing it from bread made with commercial yeast. However, this recipe combines sourdough starter with commercial yeast, resulting in a softer, lighter bread similar to sandwich bread. It lacks the chewy interior and crusty crust typical of traditional sourdough. Many consider sourdough healthier because fermentation helps break down gluten and complex carbs, making the bread easier to digest. This process may also support blood sugar regulation, offering additional health benefits. Overall, this version provides a milder, softer bread while retaining some health advantages of traditional sourdough.

Ingredients

  • 1 cup of Sourdough Starter, see previous post
  • 5 ½  cups of bread flour
  • 1 package active dry yeast
  • 1 ½ cups warm water
  • 3 tablespoons of sugar
  • 3 tablespoons of butter
  • 1 ½ teaspoons of salt
  • ½ teaspoon baking soda

Process

  1. Measure Sourdough Starter; let stand at room temperature for 30 minutes.
  2. Combine 2½ cups of bread flour and the dry yeast in a large mixing bowl. Set aside.
  3. Heat water to 120°F, then add sugar, butter, and salt. When the butter nearly melts, pour the liquids into the flour and yeast mixture, then add 1 cup of Sourdough Starter.
  4. Use a dough hook on a stand mixer. Mix at low speed for 30 seconds, then scrape the sides of the bowl. Increase the speed to high and beat for 3 minutes.
  5. Combine the remaining 2½ cups of flour and baking soda, and add to the yeast mixture. Stir until combined. If using a mixer with a dough hook, mix for about 5 minutes until smooth and elastic.
  6. If not using a stand mixer with a dough hook, turn the dough out onto a floured surface and knead for 6 to 8 minutes until smooth and elastic.
  7. Grease a big bowl with butter or shortening. Make the dough into a ball and put it in the bowl. Turn the dough over once to coat it with butter or shortening.
  8. Cover the bowl with plastic wrap and place it in a warm spot to rise for 60 minutes.
  9. After 60 minutes, punch the dough down with your fist and turn the dough out onto a floured surface.
  10. Cut the dough into two pieces, cover with plastic wrap, and let rest for 10 minutes.
  11. Line two baking sheets with parchment paper. After resting for 10 minutes, place the dough halves onto the baking sheet and shape them into a ball by tucking the edges under.
  12. Alternatively, place the dough into two greased bread loaf pans.
  13. Using a sharp knife, make slashes across the tops of the loaves. Cover and let rise in a warm place until doubled for 30 minutes.
  14. Preheat oven to 375°F. and bake for 30 – 35 minutes or until bread sounds hollow when lightly tapped.
  15. Remove from oven and place on wire racks to cool before slicing.
  16. If using bread loaf pans, remove bread from pans and cool on a cooling rack.

Note:

Keep your sourdough loaf in a paper bag, linen bread bag, or bread box to maintain crust crispness and soft crumb. Avoid airtight plastic bags at room temperature, as they trap moisture and can soften the crust or promote mold growth.

Sourdough Starter

Sourdough Starter

Jar of bubbly sourdough starter on a wooden kitchen counter with cloth cover and label
A glass jar with bubbly sourdough starter ready for baking.

Embark on a delicious adventure with this simple sourdough starter recipe! It takes about a week to develop, but patience pays off with irresistibly fresh, homemade bread. Plus, you get to be the boss of your ingredients, making every loaf healthier and tastier. Baking fun starts now!

Ingredients

  • 1 package of active dry yeast
  • 2 ½ cups of warm water (105°F. to 115°F)
  • 2 cups of all-purpose flour
  • 1 tablespoon of sugar or honey

Process

  1. Dissolve the yeast in ½ cup of the warm water.
  2. Stir in the remaining warm water, flour, and sugar or honey.
  3. Using a wooden spoon, beat until smooth.
  4. Pour mixture into a 5-cup jar and cover with 100% cotton cheesecloth.
  5. Let stand at room temperature (75°F – 85°F) for 5 to 10 days or until the mixture has a fermented aroma and the active bubbling stops.  Your starter is ready to use for baking. 
  6. Be sure to stir your starter 3 times a day.
  7. If you’re not baking bread right after the 10-day fermenting process, store your starter in a 1-quart container after it finishes bubbling. Cover it with a lid and put it in the fridge.
  8. If you don’t use your starter within 10 days of putting it in the refrigerator, add 1 teaspoon of sugar or honey. Keep adding 1 teaspoon of sugar or honey every 10 days while it’s stored in the fridge, unless you replenish the starter after using it in a recipe.

Replenish starter after each use by stirring in:

  • ¾ cup of all-purpose flour
  • ¾ cup warm water
  • 1 teaspoon of sugar or honey
  • Add into the remaining starter for each 1 cup removed for the recipe.
  • Cover replenished starter with cheesecloth and let stand at room temperature for 1 day or until bubbly.
  • Cover with a lid; chill for later use following instructions in step 8 above to keep it active.

Recipe for easy, delicious soft Sourdough Bread to follow in the next post.

Baked Apple Pancake

Dutch baby pancake with caramelized apple slices and thyme in cast iron skillet
Apple pancake

Easy Baked Apple Pancake

Imagine sinking into a warm, fluffy pancake topped with tender, caramelized apples—this baked apple pancake turns breakfast into a fun, delicious adventure that’s perfect for brunch and sweet mornings.

Ingredients

  • 3 Granny Smith apples, peeled, cored, and sliced thin
  • ½ stick butter
  • ½ cup sugar mixed with 1-1/2 teaspoon cinnamon
  • 3 cups of prepared pancake batter (instant is fine)

Process

  1. Heat oven to 375°F.
  2. Heat butter in an 8 or 10-inch oven-safe skillet. Add sliced apples and cook until they become soft.
  3. Add the sugar / cinnamon mixture, cook until the apples are soft and the sugar is melted.
  4. Add prepared pancake batter on top of the apples
  5. Bake the pancake for 20 to 30 minutes until it is firm. Check by inserting a knife in the center; if it comes out clean, it is ready. Then, take the hot pan out of the oven and flip the pancake onto a plate.
  6. Scrape any sugar/apple mixture onto the top of the pancake, cut into wedges, and serve with a dollop of whipped cream and fresh fruit.

Crumb Toppings for your Baked Goods

Nine different homemade mini fruit pies with various toppings on a wooden board
a variety of crumb toppings for desserts

Imagine a tasty treat called a crumble, also known as a brown betty. It comes from Britain and is now enjoyed worldwide. This dish can be sweet or savory, but the sweet version is most popular. Its history dates back to American cuisine during European colonization. The magic happens when it’s baked until the topping becomes crispy. It is often served warm with cooked fruit, custard, cream, or ice cream, making it a perfect cozy dessert. I enjoy trying different toppings, like toasted coconut, chocolate chips, or raw coconut, to add extra flavor. Whether you want a comforting dessert or a savory snack, crumble toppings are a fun way to improve your recipes. I’ve collected creative topping ideas to inspire your cooking. Get ready to enjoy a crispy, delicious treat that is both nostalgic and exciting—happy baking!

#1 BASIC CRUMB TOPPING

Ingredients

  • 1 1/2 cups of all-purpose flour
  • 3/4 cup light-brown sugar
  • 1/3 cup granulated sugar
  • 1/4 teaspoon salt
  • 1/4 teaspoon cinnamon
  • 1 1/2 sticks chilled butter, cut into pieces

Directions

  1. In a bowl, mix flour, light-brown sugar, granulated sugar, salt, and cinnamon.
  2. Cut chilled butter into pieces.
  3. Use a pastry cutter or fork to mix the butter into the sugar until it forms large crumbs.
  4. Refrigerate until ready to use.

#2 FRENCH CRUMB TOPPING:

Ingredients

  • 1/3 cups of chilled butter
  • 1/3 cups of brown sugar
  • 3/4 cups of all-purpose flour
  • 1/2 cup of chopped nuts

Directions

  1. Mix sugar, flour, and nuts together.
  2. Cut in butter with a fork or pastry cutter until blended.
  3. Refrigerate until ready to use.


#3 WALNUT CRUMB TOPPING:

Ingredients

  • 1/2 cup all-purpose flour
  • 3/4 cup walnuts, chopped
  • 1/4 cup packed dark brown sugar
  • 1/4 teaspoon sea salt  
  • 4 tablespoons unsalted butter, at room temperature

Directions

  1. In a medium bowl, stir together flour, walnuts, brown sugar, and salt.
  2. Cut in butter with a fork or pastry cutter until blended.
  3. Refrigerate until ready to use.

#4 OAT CRUMBLE

Ingredients

  • 1 1/2 cups old-fashioned rolled oats
  • 3/4 cup pecans or almonds, chopped
  • 1/2 cup brown sugar
  • 1/3 cup whole-wheat flour or all-purpose flour
  • 3/4 teaspoon ground cinnamon
  • 5 tablespoons canola oil

Directions

  1. Mix dry ingredients together, then stir in canola oil.
  2. Mix with a spoon until the mixture resembles coarse crumbs.
  3. Refrigerate until ready to use.

#5 BAKED CRUMB TOPPING

Ingredients

  • ½ cup Brown sugar
  • ½ cup flour
  • ¼ cup chilled butter
  • ¼ cup of nuts, coconut, flaxseed, or sunflower seeds (all optional but make great texture)

Directions

  1. Preheat oven to 350°F. degrees
  2. Mix ingredients together; it should stick together and form crumbs.
  3. Spread the mixture onto a baking sheet lined with parchment paper.
  4. Bake for 20 minutes.
  5. Crumble any pieces that are clumped together and put the crumbs on everything in sight!

Cook’s Notes:

Add any of the following ingredients to your crumb toppings for extra flavor or texture.

  • Nuts
  • Coconut
  • Flax seed
  • Sunflower seeds
  • Cinnamon
  • Cardamom
  • Toffee
  • Chocolate chips
  • Peanut butter chips
  • Cream cheese chunks
  • Shredded cheddar cheese (great on apple anything)
  • M & M’s
  • Drizzle your crumb topping with caramel sauce, and sprinkle lightly with sea salt.

The sky is the limit where your dessert is concerned.

Mini Fresh Berry Bread Puddings

Four square desserts with mixed berries and berry sauce on a round gray plate with a spoon
Fresh Berry Bread Puddings

Imagine a dessert that’s as fun to make as it is delicious to eat—welcome to the world of bread pudding! This treat has a rich history, dating back centuries when clever cooks needed to rescue stale bread from the trash. Instead of wasting it, they turned it into hearty, flavorful dishes, both savory and sweet. Today, bread pudding has evolved into a luxurious delight, often made with fancy breads like brioche and infused with indulgent ingredients such as vanilla beans, bourbon, Gruyère cheese, or crunchy pecans. It’s a versatile dessert that can be dressed up with luscious sauces or fresh fruit, making every bite a delightful experience. Whether you’re reminiscing about childhood or impressing guests with a gourmet twist, bread pudding offers a perfect blend of history, comfort, and elegance. So, gather your ingredients and get ready to create a fun, flavorful masterpiece that celebrates both tradition and decadence.

Makes 6

Ingredients

  • 5 cups of mixed fresh berries, such as blackberries, blueberries, and raspberries (about 3 pints)
  • 2 tablespoons fresh lemon juice
  • 2 tablespoons of water
  • 1 vanilla bean split lengthwise
  • 1/2 cup of sugar
  • Pinch of salt
  • 18 thin slices of white sandwich bread (Challah bread can be used; roll out a slice to make thin)

Directions

  1. In a saucepan, cook berries, water, and lemon juice over medium heat until berries release their juices but still hold their shape, about 2 minutes. Slice a vanilla pod down the center and scrape the beans; add the beans to the berry mixture. Stir in sugar and salt; cook until the sugar is dissolved, 3 to 5 minutes. Strain the sauce into a bowl through a sieve or colander; do not discard the berries. Set both aside to cool.
  2. Take a piece of plastic wrap that is 6 inches longer than the cupcake tin. Press it into the cups of the tin. Alternatively, place another muffin tin on top of the plastic wrap to help press it into the cups.
  3. Using a 2-3/4-inch cookie cutter, cut six rounds from the bread slices and set one round in the bottom of each muffing tin.
  4. Using a smaller 2-1/4-inch cookie cutter, cut twelve rounds from the bread and set aside.
  5. Pour 1 tablespoon of sauce into each cup; add 1 tablespoon of reserved cooked berries. Top with smaller bread rounds; add another tablespoon each of sauce and berries. Make another layer of bread, sauce, and berries; top with remaining bread rounds. Press down firmly with the bottom of a glass.
  1. Cover the puddings with plastic wrap. Place a baking sheet on top and add a heavy skillet to weigh it down. Keep it in the refrigerator for at least 4 hours.
  2. To serve, pull up the plastic wrap, and gently unmold each pudding onto plates; drizzle with leftover sauce.

Cook’s Note

Using a cupcake tin lined with plastic wrap makes it easy to form, transport, and unmold the chilled puddings. Spray the tins with cooking spray to help the plastic wrap stay in place.

Classic Strawberry Shortcake

Fresh strawberry shortcakes topped with whipped cream and mint leaves on a wooden board
Delicious fresh strawberry shortcakes topped with whipped cream and mint leaves.

This refreshing old-fashioned recipe for Strawberry Shortcakes is a delightful dessert that combines the sweetness of ripe strawberries with the light, fluffy texture of freshly baked shortcakes. This classic treat is perfect for summer gatherings, picnics, or any occasion where a cool, fruity dessert is desired. The key to a perfect strawberry shortcake lies in selecting fresh, juicy strawberries, which are sliced and often lightly sweetened to enhance their natural flavor. The shortcakes themselves are made from tender biscuit-like dough, baked until golden, then split open to hold the luscious strawberries and whipped cream. For an added touch of freshness, some recipes incorporate a hint of lemon zest or a splash of vanilla into the shortcake batter. This dessert is not only visually appealing with its vibrant red strawberries and fluffy layers but also offers a harmonious balance of sweetness and acidity.

Ingredients

Filling

  • 6 cups of fresh strawberries, sliced
  • ½ cup sugar
  • 1 teaspoon vanilla extract

Whipped Cream

  • 1 cup heavy whipping cream
  • ¼  cup of powdered sugar
  • 1 teaspoon of vanilla extract

Biscuits

  • 2-3/4 cups of all-purpose flour
  • ¼ cup sugar
  • 4 teaspoons baking powder
  • 3/4 cup of cold butter, cut up
  • 2 large eggs, lightly beaten
  • 1 (8-oz.) container of sour cream
  • 1 teaspoon vanilla extract

Preparation

  1.  Combine strawberries, 1/2 cup sugar, and vanilla extract. Cover and chill in the refrigerator for about 2 hours.
  2.  Beat whipped cream at medium-high speed with an electric mixer until foamy.
  3. Gradually add powdered sugar and vanilla, beating until stiff peaks form. Note: do not overbeat or the whipped cream will become butter! Cover and chill in the refrigerator until ready to use.

Biscuits

  1. Preheat oven to 450°F.
  2. Line a baking sheet with raised edges with parchment paper.
  3. Combine flour, sugar, and baking powder in a large bowl;
  4. Cut butter into the flour mixture with a pastry blender or two forks until crumbly.
  5. In a separate bowl, whisk together eggs, sour cream, and vanilla until blended
  6. Add to flour mixture, stirring just until dry ingredients are moistened.
  7. Drop dough into 10 mounds on an ungreased baking sheet; flatten each mound with the back of a spoon until about ¾ inch thick.
  8. Bake for 10 – 12 minutes until golden.

Presentation

  1. Cool on a wire rack for about 10 minutes. Cut shortcakes in half horizontally. Spoon half of the berries and whipped cream over the bottom layers.
  2. Replace the top layers and cover with the remaining strawberries and whipped cream.

Cream Puffs with Mascarpone Whipped Cream Filling

Tray of small cream puffs filled with cream, topped with powdered sugar, raspberries, blueberries, and mint leaves
A tray of cream puffs dusted with powdered sugar, fresh raspberries, blueberries, and mint leaves

Old-fashioned cream puffs are a timeless dessert that evokes a sense of nostalgia and elegance. These delicate pastries are made from choux pastry, which is baked to achieve a light, airy, and crisp exterior. For Mother’s Day, cream puffs are an ideal choice for a light and airy dessert that can be both elegant and satisfying. Their fluffy interior and this creamy Mascarpone cheese whipped cream filling make them a perfect treat to celebrate the special occasion without feeling overly heavy. Additionally, cream puffs can be customized with various fillings and toppings, such as chocolate glaze, powdered sugar, or fresh berries.

Ingredients

Pastry

  • 1 cup of water
  • 1/2 cup of butter (4 ounces)
  •  1 cup of all-purpose flour
  •  1/4 teaspoon salt
  •  4 large eggs

Process

  1. Preheat the oven to 400°F.
  2. In a small bowl, whisk together the flour and salt; set aside.
  3. In a medium-sized saucepan, bring 1 cup of water to a boil.
  4. Add the butter. 
  5. When the butter has melted, add the flour mixture all at once and stir vigorously. 
  6. Continue stirring until the mixture forms a ball that doesn’t separate.
  7. Remove from the heat and cool slightly (about 1 minute).  Add the eggs, one at a time, beating after each one until the dough is smooth.
  8. Place spoonfuls of dough, about 2 inches apart, onto a baking sheet lined with parchment paper. Alternatively, put the batter into a pastry bag fitted with a round tip and pipe circles approximately 2 inches wide and 1 inch apart onto the baking sheet.
  9. Bake the puffs for about until they are golden brown and puffy, about 25 to 30 minutes.
  10. If the puffs are mini-sized, bake for about 17 to 20 minutes. 
  11. Remove the cream puffs from the oven and cool on a cooling rack.

Mascarpone Cheese Filling

  • 2/3 cup mascarpone cheese
  • 2/3 cup heavy whipping cream
  • 5 tablespoons powdered sugar
  • 2 teaspoons pure vanilla

Process

  1. In a chilled bowl, beat the Mascarpone cheese and vanilla until creamy.
  2. Add the heavy whipping cream, and beat until thick.
  3. Gradually add the powdered sugar, mix until fully incorporated.
  4. Beat mixture on high speed until thick and fluffy.
  5. Cut cooled puffs in half, and set the top half of the puff aside.
  6. Fill the bottom halves of the puffs with the cream mixture, then replace the tops.
  7. Drizzle with melted bittersweet chocolate or dust with powdered sugar.
  8. Store in the refrigerator until ready to serve.