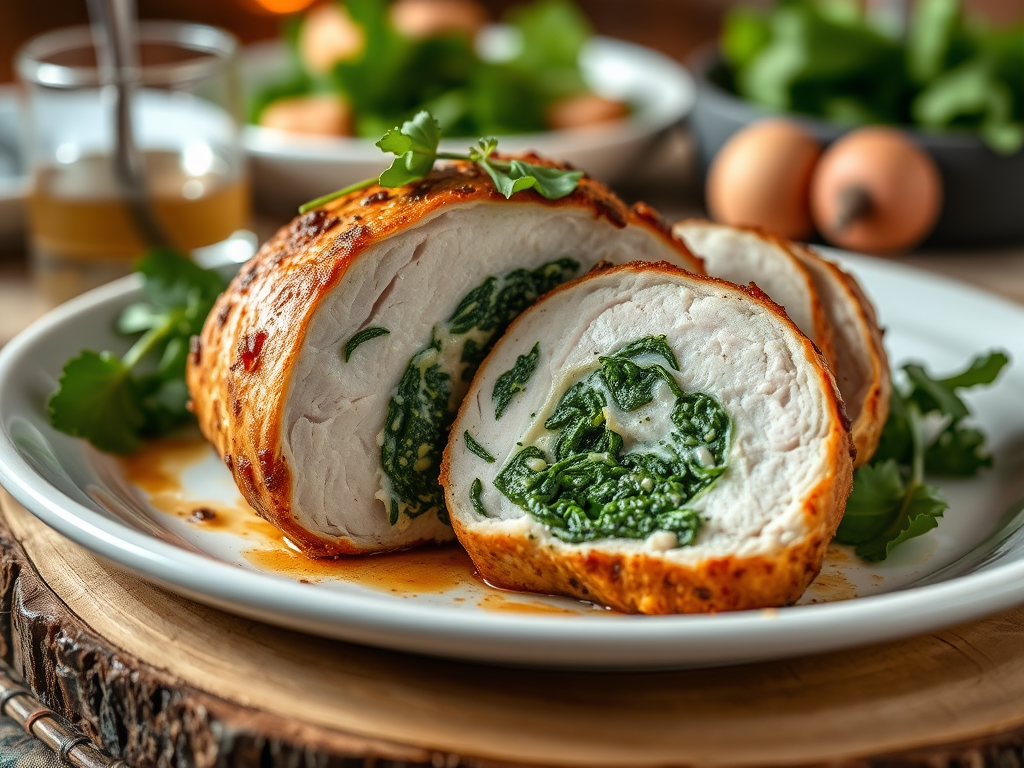
Category Archives: Dinner Ideas

Onion Jam

Onion jam is a versatile condiment crafted by slow-cooking onions with honey, vinegar, and spices until they reach a thick, sweet, and tangy consistency. This culinary creation offers a unique blend of flavors that can enhance a variety of dishes. Its rich, caramelized taste makes it an excellent accompaniment to meats, cheeses, and bread, adding depth and sweetness to savory dishes. Onion jam can be used as a topping for burgers, sandwiches, and grilled meats, providing a burst of flavor that elevates the overall dish. It also pairs well with cheese platters, serving as a sweet contrast to sharp cheese like cheddar or blue cheese. Whether spread on toast, dolloped on roasted vegetables, or used as a marinade component, onion jam is a flavorful addition that enhances a wide range of culinary creations.

Ingredients

  • 2 tablespoons of olive oil
  • About 2 pounds of sweet onion (about 3 large)
  • 2 sprigs of fresh thyme
  • ¼ teaspoon Kosher salt and ground pepper
  • 1 cup of red wine
  • ¼ cup of honey
  • ¼ cup of red wine vinegar

Directions:

  1. Slice onions thin, a mandoline is a great tool for this task.
  2. Preheat a heavy skillet over medium-low heat with 2 tablespoons of olive oil
  3. Add onions, thyme, salt and pepper, cover and cook until onions have wilted, about 10 to 15 minutes. Stir occasionally with a wooden spoon to prevent sticking. You do NOT want to brown the onions, just sweat them
  4. Remove lid. You will not need the lid for the next steps.
  5. Add red wine, cook over medium-high heat until the wine is absorbed into the onions.
  6. Remove pan from high heat. Turn heat down to medium-low. Return the pan to medium-low heat.
  7. Add the honey and red wine vinegar and simmer gently until onions have a jam like consistency, about 15 minutes.
  8. Remove from heat, cool and use immediately or cover and store in the refrigerator.

Compound Flavored Butters

Compound flavored butters serve multiple culinary purposes. They can be melted over grilled meats, seafood, or vegetables to add moisture and flavor. Perfect to add fun and flair to any breakfast spread. They are also used as finishing touches on baked potatoes, bread, or pasta, providing an extra layer of richness. Additionally, they can be incorporated into sauces, marinades, or used as a base for more complex flavor combinations. Their ease of use and ability to add depth to meals make them popular among chefs and home cooks alike. Following are six compound butters that are equally delicious for all meals.

Compound Herb and Garlic Butter

Compound herb and garlic butter is a versatile culinary ingredient that enhances a wide range of dishes with its rich, aromatic flavor. Made by blending softened butter with fresh herbs, this butter offers a fragrant and savory profile that elevates both simple and complex recipes. Its culinary appeal lies in its ability to add depth and richness to meats, seafood, vegetables, and bread.

Ingredients

  • ½ cup of unsalted butter, softened to room temperature
  • ¼ cup of fresh chopped fresh herbs
    •  Example: rosemary, oregano, thyme, parsley, sage, basil or chives. Fresh herbs will give a beautiful display of green flecks in your butter.
  • 2 grated or pressed garlic cloves
  • ½ teaspoon fresh lemon juice
  • ½ teaspoon Kosher salt

Process

  1. Place the softened butter in a small bowl. Add the chopped herbs, garlic, lemon juice and salt and mix well.
  2. Transfer the mixture onto a sheet of plastic wrap. Roll into a log shape and twist ends to seal tightly. Or leave it in a covered bowl.
  3. Refrigerate the butter for at least 2 hours, or until firm.
  4. Room Temperature – Let butter sit out for a few minutes before using to soften. Butters can sit at room temperature for a couple of days, just like plain butter. But if the weather is hot, store it in refrigerator so butter doesn’t melt.

Compound Lemon Dill Butter

Delicious spread over seafood dishes, such as grilled salmon, baked cod or shrimp where the citrus notes complement the natural flavors of seafood. It also works well as a finishing touch for roasted vegetables or spread on warm bread.

Ingredients

  • 1 stick of unsalted butter room temperature
  • 2 tablespoons finely chopped fresh dill weed 
  • 1 tablespoon fresh squeezed lemon juice
  • ½ teaspoon lemon zest
  • ¼ teaspoon kosher salt
  • ½ teaspoon freshly ground black pepper

Process

  1. Wash and finely mince the dill leaves.
  2. Zest and juice lemon.
  3. Cut the softened stick of butter in a mixing bowl.
  4. Using a stand mixer or hand beater, mix until light and fluffy.
  5. Add the chopped dill, lemon zest, lemon juice, salt and pepper. Mix until combined.
  6. Transfer the mixture onto a sheet of plastic wrap. Roll into a log shape and twist ends to seal tightly.  Or leave in a covered bowl.
  7. Refrigerate the butter for at least 2 hours, or until firm.
  8. Room Temperature – Let butter sit out for a few minutes before using to soften. Butters can sit at room temperature for a couple of days, just like plain butter. But if the weather is hot, store it in refrigerator so butter doesn’t melt.

Compound Maple Bourbon Butter

This is a smooth, sweet butter with a smoky flavor from bourbon. It is great to spread on bread, pancakes, waffles, roasted vegetables or melted over steak.

Ingredients

  • 1 cup (2 sticks) unsalted butter, softened
  • 2 tablespoons pure maple syrup
  • 1 tablespoon bourbon
  • 1 tablespoon brown sugar
  • 1/2 teaspoon cinnamon
  • 1/2 teaspoon vanilla extract
  • Pinch of salt

Process

  1. Bring butter to room temperature.
  2. In a mixing bowl, add softened butter and beat butter until light and fluffy.
  3. Gradually mix in pure maple syrup, bourbon, brown sugar, cinnamon, vanilla extract and salt.
  4. Taste and adjust sweetness or bourbon as needed.
  5. Transfer the mixture onto a sheet of plastic wrap. Roll into a log shape and twist ends to seal tightly.  Or leave in a covered bowl.
  6. Refrigerate the butter for at least 2 hours, or until firm.
  7. Room Temperature – Let butter sit out for a few minutes before using to soften. Butters can sit at room temperature for a couple of days, just like plain butter. But if the weather is hot, store it in refrigerator so butter doesn’t melt.

Compound Hot Honey Butter

One of my favorite ways to enjoy this whipped hot honey butter is on Jalapeno and Cheese Cornbread or Cheddar and Chive Biscuits, sweet potatoes or baked potatoes or corn on the cob.

Ingredients

  • 1 stick of unsalted butter, room temperature
  • 2 tablespoons honey
  • 2 teaspoons hot sauce
  • ½ teaspoon Koren red chili flakes

Process

  1. Bring butter to room temperature.
  2. In a mixing bowl, add softened butter and beat butter until light and fluffy.
  3. Gradually mix in honey, hot sauce and chili flakes.
  4. Transfer the mixture onto a sheet of plastic wrap. Roll into a log shape and twist ends to seal tightly.  
  5. Refrigerate the butter for at least 2 hours, or until firm.
  6. Room Temperature – Let butter sit out for a few minutes before using to soften. Butters can sit at room temperature for a couple of days, just like plain butter. But if the weather is hot, store it in refrigerator so butter doesn’t melt.

Compound Orange Butter

Orange butter is a tasty spread that can be used on French toast, pancakes, sweet breads, and more. It is smooth and rich, making it perfect for breakfast and brunch. It adds color and flavor to your dishes, making them more appealing.

Ingredients

  • 1 cup (2 sticks) butter, softened
  • 1 teaspoon of Grand Marnier, substitute with Cointreau, or orange juice.
  • 1 tablespoon orange zest. Be careful not to zest the white pith under the orange skin as it is bitter.

Process

  1. Bring butter to room temperature.
  2. In a mixing bowl, add softened butter and beat butter until light and fluffy.
  3. Gradually mix in Gand Marnier, and orange zest.
  4. Transfer the mixture onto a sheet of plastic wrap. Roll into a log shape and twist ends to seal tightly.  
  5. Refrigerate the butter for at least 2 hours, or until firm.
  6. Room Temperature – Let butter sit out for a few minutes before using to soften. Butters can sit at room temperature for a couple of days, just like plain butter. But if the weather is hot, store it in refrigerator so butter doesn’t melt.

Compound Chocolate Butter

Spread chocolate butter on various baked goods such as toast, pancakes, croissants, or bagels, and explore different flavor combinations to enhance your culinary experience.

Ingredients

  • 1 cup butter, softened
  • 2 tablespoons unsweetened cocoa
  • 3 tablespoons powder sugar
  • ½ teaspoon of vanilla extract

Process

  1. Bring butter to room temperature.
  2. In a mixing bowl, add softened butter and beat butter until light and fluffy.
  3. Gradually mix in unsweetened cocoa, powder sugar and vanilla extract.
  4. Transfer the mixture onto a sheet of plastic wrap. Roll into a log shape and twist ends to seal tightly.  Or leave in covered bowl.
  5. Refrigerate the butter for at least 2 hours, or until firm.
  6. Room Temperature – Let butter sit out for a few minutes before using to soften. Butters can sit at room temperature for a couple of days, just like plain butter. But if the weather is hot, store it in refrigerator so butter doesn’t melt.

Chicken Sausage & Bean Soup

During the chilly embrace of winter, few comforts compare to the warmth and aroma of a hot, steamy bowl of soup. As the cold air bites outside, a steaming soup offers not only nourishment but also a sense of coziness and relaxation. A bowl of steamy soup on a cold winter day is more than just food; it is a comforting experience that restores energy, lifts spirits, and provides a much-needed respite from the harshness of winter weather. Enjoy with a slice of crusty bread and salad.

Ingredients

  • 3 carrots
  • 1 medium onion
  • 8 ounces of kale
  • 1 can (15.5 oz) of cannellini beans, do not drain
  • 1-package Italian Chicken (or Turkey) Sausage
  • 1 32-ounce carton of either chicken broth or stock
  • 1 tablespoon of all-purpose flour
  • 1 tablespoon of softened butter

Process

  1. Trim, peel, and halve carrot lengthwise, thinly slice crosswise into half-moons. Set aside.
  2. Remove and discard any large stems from kale. Finely chop into small pieces. Set aside.
  3. Peel onion and dice into small pieces.
  4. Heat a tablespoon of olive oil in a large pot over medium heat. Add onion and slowly cook until caramelized for about 10 minutes. Remove from pot.
  5. Turn heat up to medium-high and add sausage. If sausage comes in links, squeeze the meat out of the casing and discard the casing. Flatten the sausage into an even layer. Cook undisturbed until meat is brown on bottom, about 5 minutes.
  6. Break up meat into pieces, then add cooked onion, carrot and kale. Add ½ teaspoon of salt and cook, stirring until carrot is slightly softened and the kale begins to wilt.
  7. Stir in the 32-ounce carton of chicken broth and add the cannellini beans. Bring mixture to a boil and turn heat down so soup can simmer for 10 minutes to continue cooking the sausage and vegetables.
  8. If you want to thicken the soup broth, make a Beurre Manié by mixing 1 tablespoon of softened butter and one tablespoon of flour. Incorporate the flour into the butter with your hands or in a bowl until the flour has completely disappeared.
  9. Whisk into your soup until the Beurre Manié has been completely melted in.

2 Ingredient Pizza Dough

I’ll bet you are thinking, “really?” Not your typical, pizza dough from your local Italian eatery by any means, not only delicious but healthy, and pretty darn easy to make. I made this dough, baked it on my pizza stone and must say, it was all I could do to not eat the whole thing. I am not one to “recreate” the wheel, so I used a 1/4 cup of Ragu’s Lite Parmesan Alfredo sauce with a piece of garlic grated into the sauce – and layered my ingredients, it smelled wonderful while cooking. The crust was full of flavor, crispy and a little sweet.

Ingredients:

  • 1 cup of self-rising flour (you can make your own, see below)
  • 1 cup of Greek Plain Yogurt

Directions:

Preheat oven to 450°F. if using a pizza stone, preheat stone in oven before using.

  1. Mix flour and yogurt together with a spatula.
  2. Put ball of dough onto a floured board and knead for 5 minutes.
  3. Roll out on board sprinkled with corn meal to prevent sticking and to make transferring to pizza stone easier.
  4. Spread with ¼ cup of sauce (white or red).
  5. Add your favorite toppings.
  6. Bake on pizza stone preheated in oven for 15 minutes or until bubbly and crust turns a golden color.

Self-Rising Flour

Mix together:

  • 1 cup of all-purpose flour
  • 1 ½ teaspoon of baking powder
  • ½ teaspoon salt

Zucchini Couscous

Zucchini Couscous is a delightful dish that combines the tender, mild flavor of zucchini with the fluffy, light texture of couscous. The entire process is quick, often taking less than 20 minutes, making it an easy and satisfying meal option. Its lightness and flavor make it a popular choice for those seeking a healthy yet flavorful dish. Whether served as a main course or a side dish, Zucchini Couscous offers a delicious and effortless way to enjoy fresh vegetables and grains in one bowl.

Ingredients

  • 2 small – medium zucchini diced into 1/4 -inch pieces
  • 5 ounces of Couscous
  • 1 tablespoon of Olive Oil
  • 4 cloves of garlic, minced
  • 2 scallions, sliced separate white from green (use whites for another recipe)
  • 1 lemon, zest lemon and set aside,
  • quarter remaining lemon and set aside
  • 1 tablespoon butter
  • ½ teaspoon salt
  • ¼ teaspoon black pepper

Process

  1. Heat oil in pan over medium-high heat.
  2. Add zucchini and season with half of the garlic, salt and pepper.
  3. Cook stirring frequently, until browned and tender, 4 – 7 minutes.
  4. Remove from heat and cover to keep warm.
  5. Melt 1 tablespoon of butter In a small pot over medium-high heat.
  6. Add couscous and remaining garlic, stir until fragrant, 30 seconds.
  7. Stir in 1-1/2 cups of water and a pinch of salt. Bring to a boil, cover and reduce to a low simmer. Cook until couscous is tender, follow package instructions. Drain excess water.
  8. Stir in zucchini, scallion greens, and lemon zest. squeeze juice from one lemon quarter and stir, add salt and pepper to taste.

Note: Asparagus can be used in place of Zucchini

Shrimp Lettuce Wraps

This recipe involves wrapping a tasty filling in lettuce leaves, creating a satisfying vegetable and shrimp wrap. A store-bought rotisserie chicken, shredded, can substitute for the shrimp. For variety, consider experimenting with other vegetables such as snow peas, mushrooms, or canned bamboo shoots. These additions can enhance the dish’s flavor and texture, making it more exotic and satisfying. The preparation is simple, and the result is a healthy, flavorful wrap that can be enjoyed as a snack or light meal. Feel free to customize the ingredients to suit your taste preferences and create new flavor combinations.

Ingredients:

  • 1 tablespoon of sesame oil to coat pan
  • 2 tablespoons low sodium soy sauce
  • 1 tablespoon dry sherry or apple cider vinegar
  • 1 tablespoon hoisin sauce
  • 1 teaspoon rice vinegar
  • ¼ teaspoon red pepper flakes
  • 1 tablespoon minced garlic
  • 1 tablespoon minced peeled ginger
  • 1 (14 oz) bag of coleslaw
  • 1/2 cup sliced scallions
  • 1 small, peeled zucchini, sliced very thin with a vegetable peeler
  • About 12 Bibb lettuce leaves rinsed, and dried, or Boston lettuce.
  • 1 lb. of deveined and peeled medium shrimp
  • 1/4 cup chopped cashews or peanuts

Process

  1. In a bowl, mix soy sauce, dry sherry, hoisin sauce, red pepper flakes, and rice vinegar. Set aside.
  2. In a small bowl combine minced garlic and minced ginger. Set aside.
  3. In another bowl, combine coleslaw, scallions and zucchini, set aside

Directions:

  1. Heat a large wok or frying pan on medium-high heat, add 1 tablespoon of sesame oil and swirl oil to coat pan or use a pastry brush.
  2. Add garlic and ginger, cook for about 30 seconds, stirring to prevent burning.
  3. Add soy sauce mixture, coleslaw, and vegetables. Cook for 1 minute stirring.
  4. Add shrimp and stir fry until shrimp is pink and cooked through. Coleslaw and veggies should be crisp tender at this point.
  5. Divide mixture among lettuce leaves, sprinkle with cashews and enjoy.

Spaghetti Squash

Tonight, I prepared spaghetti squash for dinner. Instead of steaming it in the oven, which is my usual method, I roasted the squash, and it turned out excellent. Spaghetti squash can be cooked in various ways, including baking, boiling, steaming, and microwaving. It is versatile and can be served with or without sauce, making it a good substitute for traditional pasta. The seeds of the squash can also be roasted, like pumpkin seeds, providing an additional snack. When raw, the flesh is firm and similar to other raw squash. After cooking, the flesh easily separates into ribbons or strands resembling spaghetti. Nutritionally, spaghetti squash is rich in nutrients such as folic acid, potassium, vitamin A, and beta carotene. It is low in calories, with approximately 42 calories per one-cup (155 grams) serving. Although it does not taste like traditional spaghetti, it absorbs the flavors of the ingredients it is cooked or served with. Besides being healthy, it is also gluten-free, making it suitable for various dietary needs.

Ingredients

  • 1 large spaghetti squash
  • 2 tablespoons of olive oil
  • 1 large Roma tomato finely chopped
  • 2 tablespoons of fresh basil
  • ¼ cup shredded mozzarella or parmesan cheese
  • 1 teaspoon each coarse salt and pepper
  • 1 teaspoon garlic powder

Directions

Preheat oven to 400°F. degrees

  1. Place the squash on a towel to reduce the rocking, if cutting lengthwise, cut the stem end off first. Split the squash in half lengthwise using a very sharp knife.
  2. Use a fork to remove the seeds and center strings.
  3. Drizzle the inside of the two halves with the olive oil, using hands or a brush to be sure all surfaces have been coated.
  4. Sprinkle the coarse salt, pepper and garlic powder all over the inside surface of the squash.
  5. Using an oven safe dish or pan place the cut ends of the squash down on surface.
  6. Bake in a 400° F. degree oven for 40 – 50 minutes or until the squash is soft and the strands pull up easily with a fork.
  7. Remove from the oven and fluff the squash with a fork, pulling the strands away from the sides – leave squash in shell
  8. Turn oven onto broil
  9. Add the tomatoes and fresh basil to the fluffed squash and sprinkle each half with the cheese.
  10. Place under broiler for 3 to 4 minutes or until the cheese is melted and lightly browned.

Allow to cool 5 minutes before serving.

Old Fashioned Ham and Bean Soup

Are you unsure about what to do with leftover holiday ham? Consider making a traditional ham and bean soup. The key to a delicious soup is the broth, which should be prepared first. To do this, start by making the ham stock, as it takes a few hours for the ham flavor to fully develop from the ham bone. If you have leftover ham from the holidays, you’ll need about 2 cups of cubed ham to add to the soup. Ham hocks can also be used as a substitute for a ham bone, providing rich flavor. For added texture and richness, you can include barley in the broth, although this is optional. Preparing the stock first ensures your soup will be flavorful and hearty, making the most of your holiday leftovers.

Ingredients

  • 2 ham hocks or a ham bone
  • Enough water to cover the ham bone or ham hocks
  • 2 bay leaves
  • 1 medium onion chopped
  • 1 bag of dry navy, great northern, or cannellini beans, rinse well
  • 1 cup of sliced celery
  • 1 – 2 cups of chopped carrots
  • 2 cups of cubed potatoes
  • 2 cups of chopped ham
  • 1/3 cup of barley (optional)
  • 2 chopped or grated garlic cloves
  • 1/2 cup chopped parsley
  • ¼ tsp pepper
  • ½ tsp nutmeg
  • 1 tsp salt

Process

  1. Place ham hocks or ham bone in a large soup pot and cover with cold water.
  2. Add chopped onion, celery, 1 teaspoon of salt, bay leaves, and beans *see note below.
  3. Bring to boil and reduce heat to simmer.
  4. Skim any foam or froth from the top of the soup as it simmers and discard.
  5. Simmer for about 1.5 – 2 hours until meat is tender and can be cut off the bone.
  6. Remove meat from bones, discard the bones and cut meat into small pieces add to broth, add remaining two cups of chopped ham to the broth, remove bay leaves from the broth.
  7. Add remaining ingredients, potatoes, barley, garlic, parsley, pepper, and nutmeg. Simmer for about 45 minutes or until carrots and potatoes are tender.
  8. Serve with crusty bread and salad.

*My mom never pre-soaked her beans, I don’t presoak my beans either, I just add them to the water while the ham is cooking, they become soft and flavor the broth.

Roasted Pork Shoulder

Tender Roasted Pork Shoulder
Roasted Pork Shoulder

The Pennsylvania Dutch started the tradition of eating pork and sauerkraut on New Year’s Day. This tradition is linked to hopes for good luck and prosperity in the coming year.

Eating sauerkraut on New Year’s Eve is a common practice in Germany. People believe that eating sauerkraut will bring blessings and wealth. Before the meal, people at the table wish each other good fortune and money, symbolized by the amount of shredded cabbage in the dish. The pig is also a symbol of good luck and well-being. Many believe that eating pork will bring luck for the new year. The pig is seen as a symbol of looking forward because it cannot turn its head from side to side or look behind. Instead, it faces forward, reminding us to focus on future opportunities rather than past events.

Ingredients

  • 9-10 lb bone-in Pork Shoulder
    • Bake 1.5 – 2.0 hours per pound in a low heat oven (250° – 275°F.)
    • Will take about 8 – 12 hours to cook
    • It is done when an internal meat thermometer reaches 195 – 205°F. for shredded pulled pork.
    • Or 160°F. for slicing.

Seasoning

  • 2 tablespoons coarse salt to season overnight
  • 4 – 6 garlic cloves
  • 1 tablespoon coarse salt
  • ½ tablespoon fresh cracked peppercorns
  • 1-1/2 tablespoon ground mustard
  • 1-1/2 tablespoon onion powder
  • 3 tablespoons of minced fresh rosemary

Process

  1. Rub the pork shoulder with 2 tablespoons of coarse salt all over, tie it, wrap it air-tight with cellophane, place in a sheet pan or roasting dish, and refrigerate overnight.
  2. Pull the pork out of the refrigerator about 30 minutes before cooking to bring to room temperature.
  3. Preheat the oven to 450°F. line the bottom of a roasting pan with aluminum foil for easy clean up and fit a roasting rack inside the pan.
  4. Cut each garlic clove into slivers. With a small knife poke holes in the pork that are about ½ inch deep (or the length of the garlic clove) to create slits and push the garlic sliver into each slit.
  5. Mix the seasoning together and rub into the pork shoulder, seasoning on all sides.
  6. Place the seasoned pork onto the roasting rack in the pan.
  7. Place the pan into the oven and let it roast for 15 minutes at 450°.
  8. Lower the heat to 275°F.  and let it slowly cook until it reaches the tender internal temperature of 200 – 203°F. internal temperature.
  9. Pull pork out of the oven, tent with aluminum foil and let rest for 1/2 hour up to 1 hour.

Citrus Salmon

Experience the exquisite flavor of a perfectly prepared orange glazed salmon fillet. This dish features a tender, flaky salmon fillet coated with a vibrant, sweet, and tangy orange glaze that enhances its natural richness.

The bright, citrusy notes of the orange glaze complement the oily flesh of the salmon, creating a harmonious and flavorful experience that appeals to a wide range of palates. Whether prepared for a casual dinner or a special occasion, this orange glazed salmon fillet is sure to impress with its vibrant presentation and delicious taste.

Ingredients

  • 1 tablespoon extra virgin olive oil
  • 4 salmon fillets, 4 to 6 ounces each and about 1 inch thick
  • 1 teaspoon kosher salt
  • ½ teaspoon fresh ground black pepper
  • 1 tablespoon minced garlic, about 3 cloves
  • 2 to 3 sprigs fresh rosemary
  • 1/2 cup fresh orange juice, (from about 2 oranges)
  • Orange zest from 2 oranges
  • 1/4 cup honey
  • 1 tablespoon cornstarch
  • 3 tablespoons water

Directions

  1. Place a large cast-iron skillet over medium-high heat. Add 1 tablespoon extra-virgin olive oil and heat until hot.
  2. Sprinkle the salmon fillets evenly with 1 teaspoon kosher salt and ½ teaspoon fresh ground black pepper.
  3. Add the salmon fillets to the hot skillet, skin-side down. Cook for 3 to 4 minutes per side, until golden on the outside and just cooked through. Transfer salmon to a plate.
  4. Reduce the heat to medium-low.
  5. Add 1 tablespoon minced garlic to the skillet and cook for about 30 seconds, stirring constantly, until fragrant.
  6. Add the rosemary sprigs, ½ cup fresh orange juice, ¼ cup honey, 1 tablespoon cornstarch, and 3 tablespoons water to the skillet. Stir constantly for 1 to 2 minutes, until the glaze thickens and turns glossy.
  7. Return the salmon to the skillet and spoon the orange glaze over the fillets until well coated.

Note: The orange glaze can be made up to 1 day ahead and reheated gently before adding the salmon. If the glaze thickens when it cools add 1 – 2 tablespoons of water or orange juice.