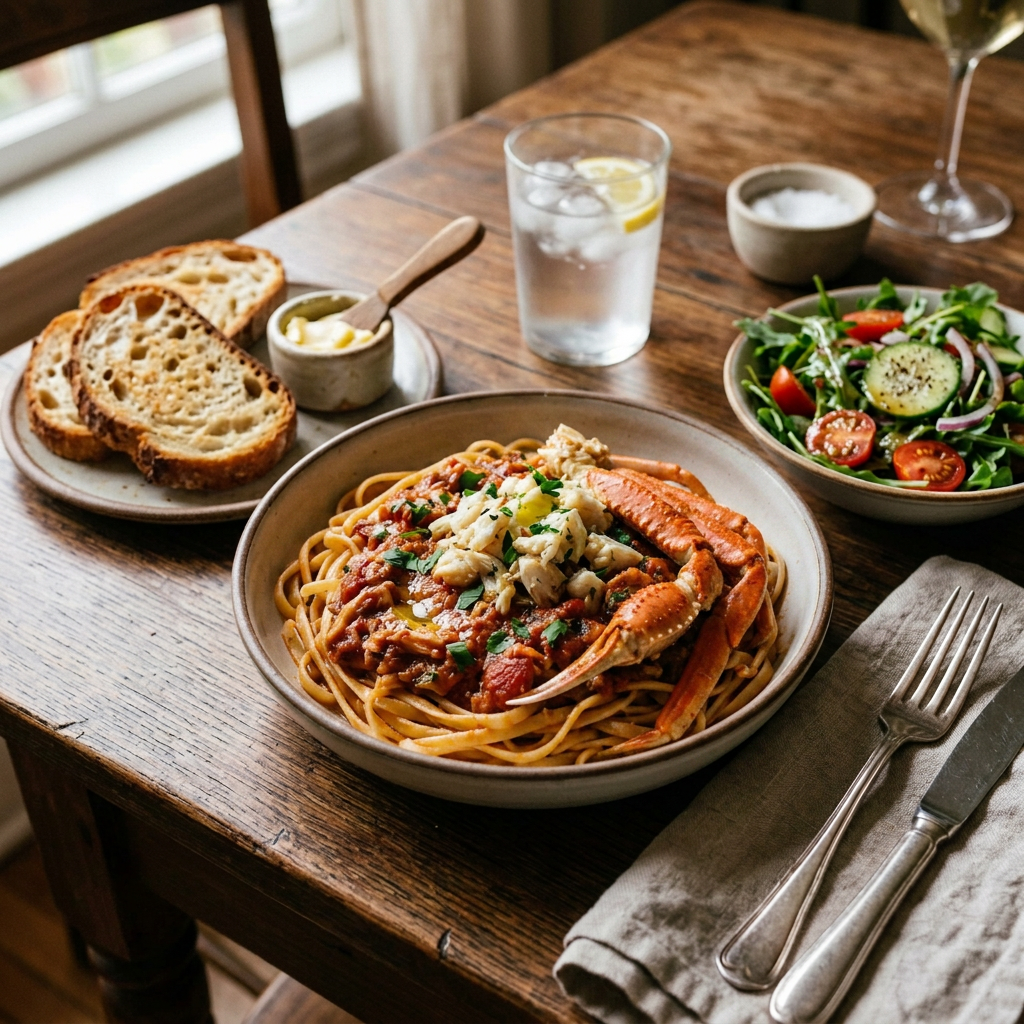
Summer memories come alive with this delicious crab gravy and pasta! Instead of live crabs, my mom simmered tender crab legs right in the gravy, filling the house with an irresistible aroma. Now that summer has arrived and crab legs are plentiful, it’s the perfect time to share this comforting family recipe. Dig in and enjoy!
Ingredients
¼ cup olive oil
1 cup of yellow onion, finely chopped
2 ounces anchovies, + their oil
6 garlic cloves, thinly sliced
¼ teaspoon red pepper flakes
2 cans of whole peeled tomatoes (two 28-ounce cans)
1 6-ounce can of tomato paste
Salt and black pepper to taste
1 small bunch fresh basil, roll leaves together and slice into ribbons
1 pound of spaghetti or linguine
3 pounds Dungeness crab or king crab legs, scrub clean under cold running water
Extra basil and olive oil for serving (optional)
Process
Heat olive oil in a large, heavy-bottomed pot over medium-high heat.
In a large, heavy-bottomed saucepan or Dutch oven, heat the olive oil, onions, garlic, anchovies, and crushed red pepper together over medium-low heat and cook until the onions and garlic are soft and starting to brown. At this point, the anchovies will have fully dissolved into the oil.
Add the tomatoes and crush them by hand as you place them in the pot. Alternatively, break them apart with a wooden spoon. Add a generous pinch of salt, then bring the mixture to a simmer.
Nestle the crab legs into the gravy. Cover the pot and reduce the heat to low.
Simmer for 1½ to 2 hours, stirring occasionally. Keep the crabs covered by the gravy during cooking; the gravy will develop a richer flavor and a pleasant, briny sweetness.
During the final 10 minutes, add the basil leaves. Taste the gravy and adjust the salt if necessary. For a thicker gravy, stir in tomato paste until it dissolves completely.
Meanwhile, boil the pasta in salted water according to package directions. Drain and set aside. Do NOT rinse.
Serve the pasta with crab gravy, arranging the crabs on a platter beside it or on top. Drizzle with a little extra olive oil. Add a few more basil leaves, if desired, before serving.
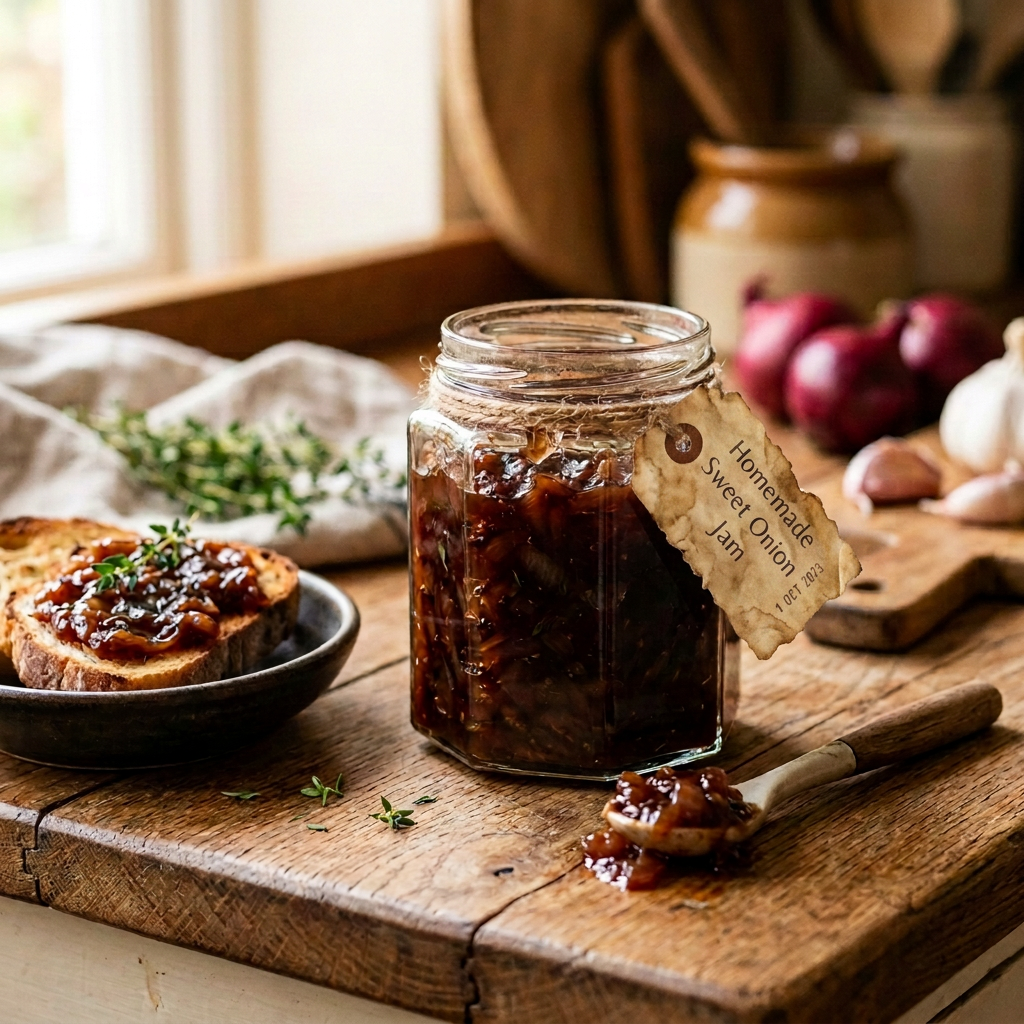
Onion Jam is a slow-cooked preserve that transforms humble onions into a rich, glossy condiment with remarkable depth. As the onions gently soften and caramelize, their natural sweetness intensifies, balanced by savory notes and a subtle touch of acidity. The result is tender, spreadable, and complex, with layers of buttery richness, mellow allium flavor, and a lingering finish on the palate. Spoon it onto a cheeseboard, tuck it into a grilled cheese sandwich, or serve it alongside roasted meats to add warmth and contrast. Sweet without being cloying and savory without becoming heavy, onion jam brings a polished, versatile character to both simple snacks and elaborate dishes.
Ingredients
2 tablespoons olive oil
3 large, sweet onions, cut into 1/4-inch dice
2 parsley sprigs
2 Fresh Thyme sprigs
1 fresh rosemary sprig
1 cup sugar
3/4 cup white balsamic vinegar
½ teaspoon of Kosher salt
Process
Heat the olive oil in a large pot over medium heat until it shimmers. Add the onions and cook over medium heat, stirring occasionally, until golden brown, about 15 minutes.
Tie the parsley, thyme, and rosemary with kitchen twine. Add the herb bundle to the diced onions. Cook over low heat, stirring a few times, until fragrant, about 3 minutes.
Sprinkle the sugar over the onions and cook, without stirring, until the sugar melts, for about 5 minutes.
Turn the heat to high and cook without stirring for about 6 minutes, until the caramel turns amber brown. Then reduce the heat to low.
Stir in the white balsamic vinegar. Simmer over low heat for about 5 minutes, stirring occasionally, until the jam thickens and the vinegar is absorbed. Remove the herb bundle. Season with salt and let the jam cool until warm.
Note: The caramelized onion jam can be refrigerated for up to five days. Serve warm or at room temperature.
A delicious grilled portabella burger with fresh toppings
Meaty, savory, and richly satisfying, portabella mushrooms make an elegant centerpiece for a wholesome entrée. Their broad caps provide a hearty texture and absorb marinades beautifully, developing deep layers of flavor when roasted, grilled, or seared. Seasoned with garlic, olive oil, herbs, and a touch of balsamic vinegar, portabellas become tender and succulent while retaining a pleasantly substantial bite.
Serve them over creamy polenta, alongside roasted vegetables, or nestled in a toasted artisan bun with crisp greens and a bright sauce. Whether enjoyed as a refined vegetarian main course or prepared as a simple weeknight meal, portabella mushrooms offer a delicious balance of earthiness, richness, and versatility.
Ingredients
2 large Portobello mushrooms, wipe clean with a dry paper towel, remove stem and gills with a spoon, careful not to break the mushroom
1 clove of garlic, grated
¼ cup olive oil
2 tablespoons balsamic vinegar
2 tablespoons minced flat leaf parsley, thyme, or substitute with your favorite fresh cut herb
Process
Combine the marinade ingredients in a plastic bag and mix well. Add the mushroom caps, seal the bag, and marinate for up to one hour.
Remove mushrooms from bag and discard marinade.
If cooking the mushroom caps on a stovetop, preheat skillet with 1 tsp of olive oil.
Grill or cook on the stovetop for 3-4 minutes on each side until soft but not mushy
Split the bun. Place the cut sides down on a skillet or grill, and toast.
Spread with onion jam and horseradish sauce; enjoy
4–5 fresh jalapeños, seeded and finely diced (leave seeds in 1–2 for extra heat)
2 cloves garlic, minced
1 teaspoon cumin
1 teaspoon smoked paprika
½ teaspoon kosher salt
¼ teaspoon cayenne pepper
For the Crispy Panko Topping:
1 cup panko breadcrumbs
3 tablespoons unsalted butter, melted
¼ cup freshly grated Parmesan
½ teaspoon garlic powder
¼ teaspoon smoked paprika
Pinch of kosher salt
Process
Preheat the oven to 375°F. Lightly grease a 9×13-inch baking dish or a 2-quart casserole dish with cooking spray.
In a large mixing bowl, beat the cream cheese with a hand mixer until smooth. Add the sour cream and mayonnaise and mix until fully combined. Fold in 1½ cups of the cheddar (reserving ½ cup for topping), the Monterey Jack, diced green chiles, fresh jalapeños, garlic, cumin, smoked paprika, salt, and cayenne. Stir until evenly mixed.
Spread the mixture into the prepared baking dish in an even layer. Scatter the reserved ½ cup of cheddar evenly over the top.
In a small bowl, combine the panko, melted butter, Parmesan, garlic powder, smoked paprika, and salt. Toss with a fork until the panko is evenly coated and clumping slightly. Sprinkle the panko mixture evenly over the top of the dip.
Bake for 25–30 minutes, until the dip is hot and bubbling at the edges and the panko topping is deep golden brown and crispy. If the topping browns before the dip is bubbling, tent loosely with foil for the last few minutes.
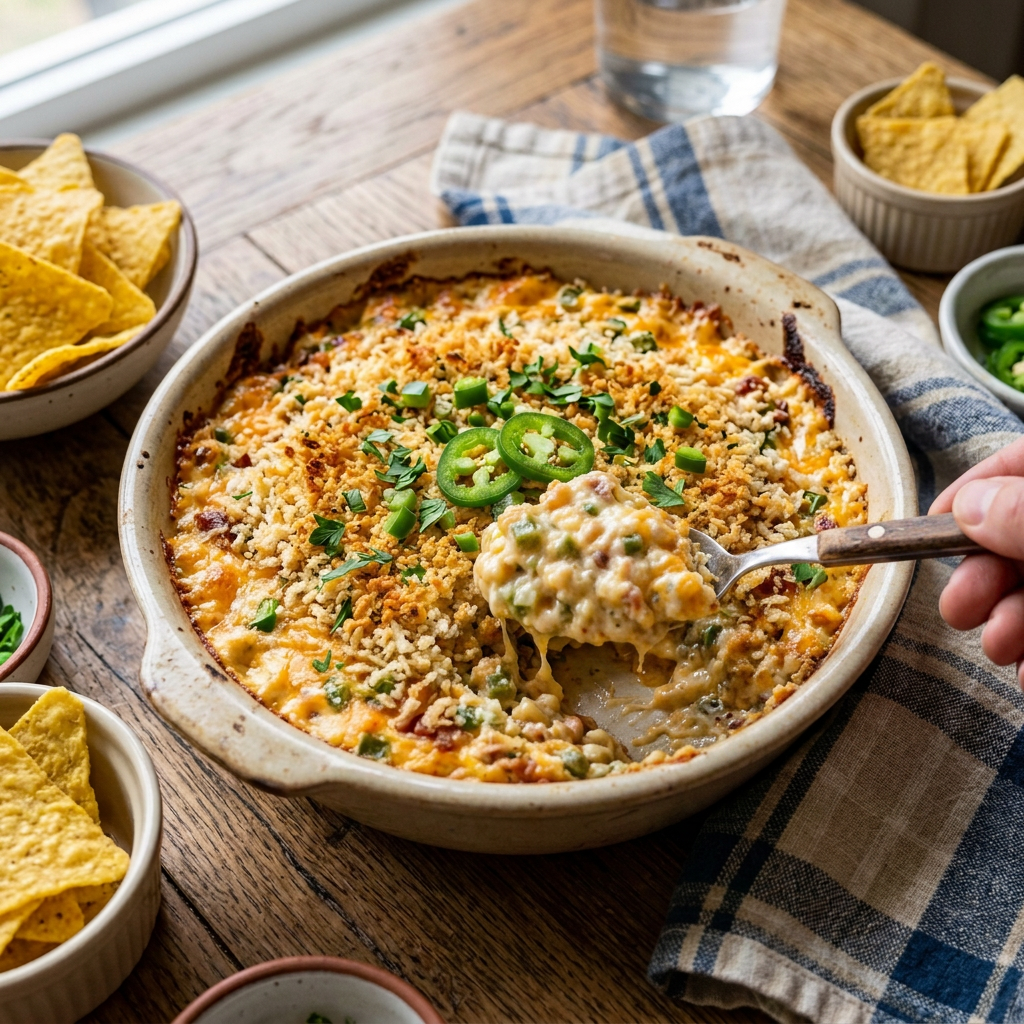
Remove from the oven and let cool for 5 minutes before serving — it will be extremely hot. Garnish with sliced fresh jalapeño and fresh cilantro or scallions. Set out alongside tortilla chips, crackers, and any other dippers.
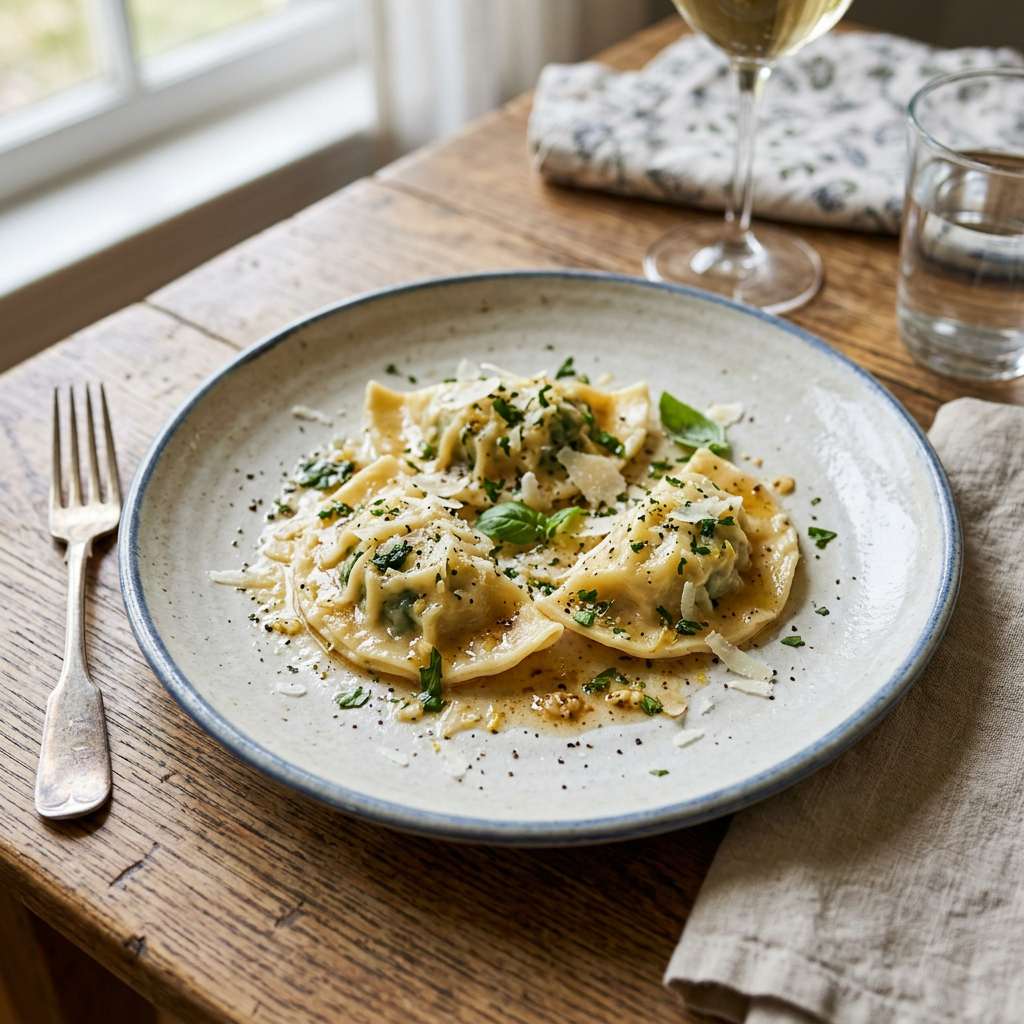
A plate of homemade spinach ravioli garnished with herbs and cheese
Serve these raviolis gently tossed in browned butter with fresh sage for a simple, aromatic finish, or dress them in a light tomato-basil sauce for a brighter, heartier option. They also pair well with a delicate cream sauce infused with white wine and lemon zest for an elegant touch. Finished with a dusting of grated Parmesan and a drizzle of high-quality olive oil, Three Cheese Spinach Wonton Raviolis make an inviting appetizer, a comforting main course, or an impressive dish for entertaining.
Ingredients
½ cup squeezed, chopped, cooked fresh or frozen spinach
½ cup coarsely grated mozzarella
½ cup ricotta (whole milk or low fat)
½ cup freshly grated Parmigiano-Reggiano plus extra for sprinkling
¼ teaspoon freshly grated nutmeg
Kosher salt and freshly ground black pepper to taste
32 square wonton wrappers
Shredded basil for garnish
Browned Butter and Sage Sauce
Directions
In a large bowl, combine the spinach, mozzarella, ricotta, ½ cup Parmesan, nutmeg, and salt and pepper to taste.
Moisten the edges of one wonton at a time with water (or egg wash), keeping the remaining wontons covered.
Put a level teaspoon of the filling in the center of each wrapper, then place another wonton on top.
After folding, use your fingers or a fork to crimp the edges tightly. This not only seals the wonton but also gives it a professional look. See Note below for crimping methods.
As they are filled, transfer the ravioli to a flour-dusted sheet pan. Repeat with the remaining wonton wrappers and filling.
Cook the ravioli in boiling water over medium-low heat for 3–5 minutes, until just tender. While it cooks, warm the sauce. To serve, place ravioli in four shallow bowls, spoon sauce over each portion, and sprinkle with cheese. Top with shredded basil.
BROWNED BUTTER AND FRESH SAGE SAUCE
Ingredients
½ cup of butter
10 to 15 Fresh Sage Leaves, chopped
2 cloves of Garlic, minced
Salt and Pepper to taste
Process
In a medium saucepan, melt the butter over medium-low heat. Stir occasionally to ensure even melting.
Add the minced garlic once the butter is melted. Cook for about 1 minute until fragrant, being careful not to let it burn.
Add the fresh sage leaves to the melted butter. Continue to cook, stirring occasionally, for about 2-4 minutes until the butter turns a light brown color and has a nutty aroma. The sage leaves should become crispy.
Add salt and pepper to taste.
Note: Choose a folding method Triangle-fold: Place filling in the center, fold diagonally to form a triangle, press out air pockets, then bring the two bottom corners together and overlap slightly.
Nurse’s cap fold: Fold in half to form a rectangle, then bring two corners together and overlap them.
Half-gold ingot fold: Fold one corner to the middle, then bring two corners together and overlap.
These folds naturally crimp the edges together with a fork, reducing the chance of leakage.
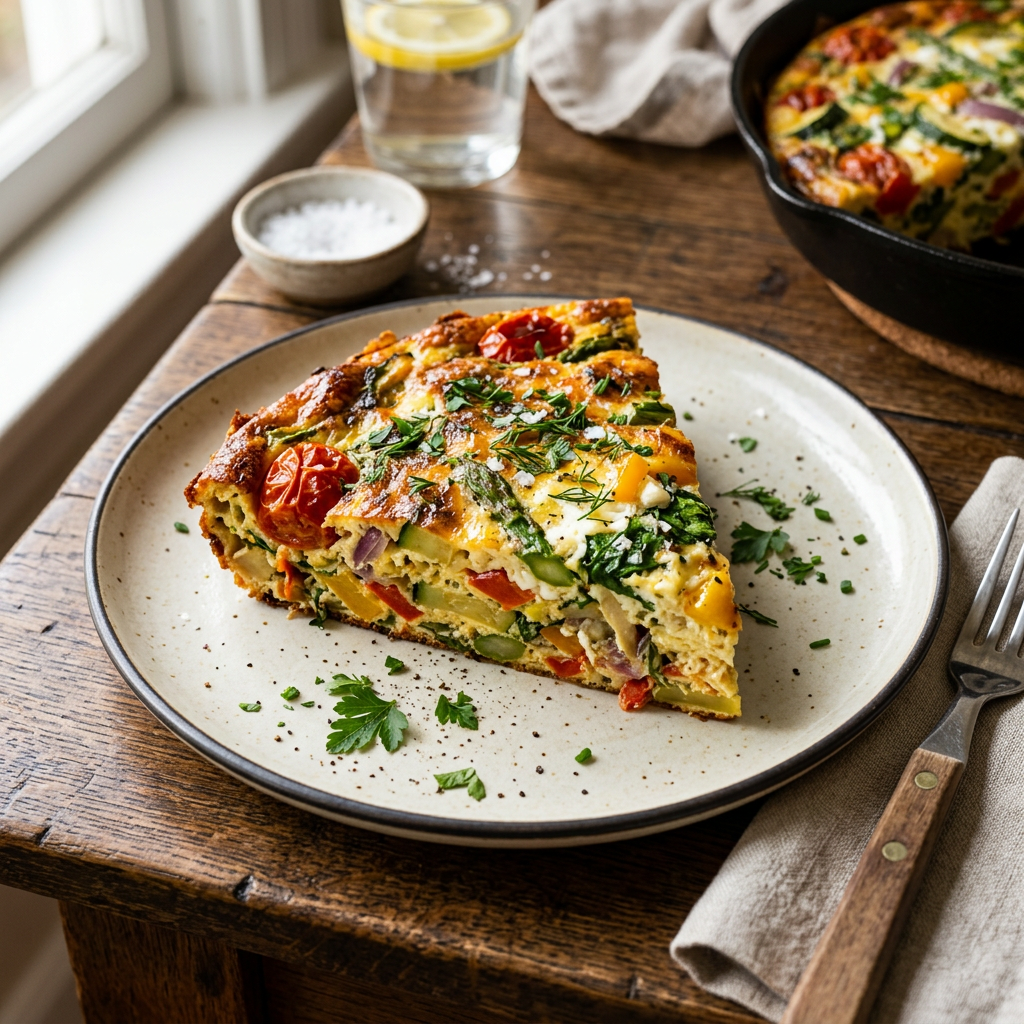
Eggs are a delightful culinary canvas any time of day—breakfast, lunch or dinner—and every part is edible, even the shell when ground for calcium. While shell color doesn’t change flavor, I’m lucky to know farmers whose hens lay blue, green, pink, brown and white eggs—Easter surprises all year. Those backyard eggs are incredibly fresh and, to me, taste like sunshine on a plate. Versatile and nutritious, eggs adapt to countless meals. Try a playful baked frittata: toss in your favorite vegetables, bits of cheese and a pinch of herbs to make a signature version. Serve a colorful tossed salad alongside a warm slice of frittata for a satisfying, balanced dinner.
Ingredients
7 Large Eggs
¼ cup of Whole Milk
1/3 cup of cheese (see NOTE below for choices)
Dash of salt
Dash of pepper
¼ cup of parsley, finely chopped
1 teaspoon of fresh thyme
Up to 1-½ cup of vegetables, (see NOTE below)
Process
Preheat oven to 350F.
Spray a deep pie plate, or a 11”x5” 7” oven proof dish
Beat all ingredients together
Mix egg mixture with your choice of vegetables and cheese
Bake in a preheated oven for 30 minutes or until a knife inserted in the middle comes out clean.
NOTE:Add-in Ingredients in ½ cup increments, up to 1-1/2 cups
Recommended Vegetables for Frittatas
Asparagus: Tender asparagus tips provide delicate, almost sweet notes while the slightly firmer stalks contribute a gentle snap. Roasting or sautéing the asparagus briefly before adding it to the pan concentrates its natural sugars and softens any fibrousness, producing a tender result without losing its color.
Spinach: A classic choice, spinach wilts down significantly and adds a rich green element. It is well paired with various cheeses and herbs.
Mushrooms: They add a savory depth of flavor and a nice texture. Sauté them before adding them to the egg mixture to enhance their taste.
Bell Peppers: Available in various colors, bell peppers add sweetness and crunch. They should be sautéed until tender before mixing with the eggs.
Zucchini: This vegetable adds moisture and a mild flavor. Sauté it to reduce excess water before adding it to the frittata.
Onions: They provide a strong flavor base. Caramelizing onions before adding them can enhance their sweetness and depth.
Broccoli: This hearty vegetable holds its shape well and adds a nice crunch. It should be steamed or sautéed until tender before use.
Tomatoes: Fresh or sun-dried tomatoes can add a burst of flavor. If using fresh tomatoes, pat them dry to avoid excess moisture in the frittata.
Popular Cheese Choices
Cheddar: A good choice is cheddar because it adds creamy, tangy flavor and melts well, making the frittata richer. Choose mild, medium, or sharp to suit your taste. Use block cheese instead of pre-shredded for better melting and texture. Mozzarella: Mozzarella has a mild taste and melts well, giving a creamy, stretchy texture. Fresh mozzarella contains more moisture and makes a frittata softer. Low-moisture mozzarella is drier and gives a firmer result. Feta: This crumbly, tangy cheese adds a Mediterranean flavor. It pairs well with spinach, tomatoes, and olives. Feta does not melt fully but adds a salty, textured contrast. Parmesan: A firm, nutty cheese that adds savory flavor. It does not melt smoothly like soft cheeses, but you can grate it into the eggs or sprinkle it on top for a tasty finish. Gruyère and Pecorino Romano: Gruyère has a mild, nutty, slightly sweet taste and melts smoothly, so it works well in vegetable or meat frittatas. Pecorino Romano is saltier and sharper, so use only a small amount in strong, meat-based frittatas.
Tips for Using Cheese in Frittatas
Grate or crumble your own cheese to ensure smooth melting and avoid additives found in pre-shredded cheese.
Combine cheeses for complex flavors, such as mozzarella with Parmesan or cheddar with Gruyère.
Moderate the amount to prevent a greasy or overly heavy frittata.
Pair with ingredients:
Vegetable frittata: mozzarella, Gruyère, Parmesan, or goat cheese
Meat frittata: cheddar, Pecorino Romano, or Gruyère
Mediterranean frittata: use feta, goat cheese, or mozzarella. Choose cheese based on the flavor and texture you want. Try different combinations to find a balanced taste.
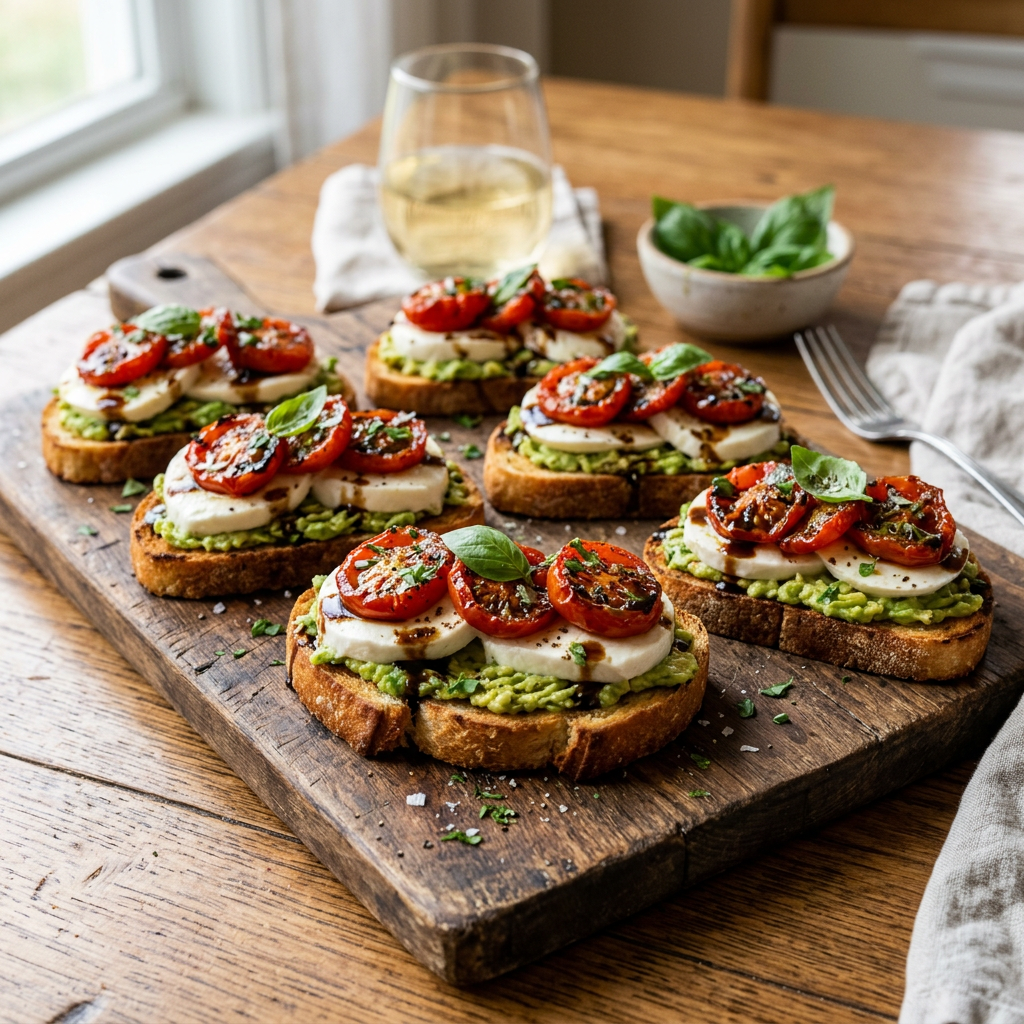
Delicious avocado toast topped with fresh mozzarella, roasted cherry tomatoes, and basil leaves
Imagine tiny flavor explosions on toast: ripe avocado, mashed with a spritz of lemon or lime, a slick of olive oil, and a pinch of salt becomes a silky, zesty base that plays off bright roasted tomatoes. Thin slices of fresh mozzarella tuck in atop the warm crostini, softening and stretching slightly from the toast’s heat to add a gentle milky hug. To assemble, smear the avocado over each piece of toast, plop on a spoonful of juicy roasted tomatoes, and nestle a few mozzarella slices on top. Scatter chopped basil like confetti and finish with a playful drizzle of balsamic reduction or extra-virgin olive oil. The bite delivers delightful contrasts: crackly bread, creamy avocado, tangy-sweet tomato, and pillowy mozzarella. These crostini are perfect for kicking off a relaxed gathering, stealing the show at a dinner party, or bringing cheerful flair to any antipasti spread. All recipes for Kitchen Moxy can be found at www.kitchenmoxy.com
1 clove of garlic, sliced in half; press or grate one half
8 ounces fresh mozzarella cheese, cut into 8 thin slices
1 large avocado, halved, pitted, and mashed
1 teaspoon of fresh lemon juice
1 teaspoon dried oregano
¼ cup roughly chopped fresh basil
1 pinch flaked sea salt
Process
Heat the butter in a large skillet over medium heat. Add bread slices to the skillet, in batches if necessary; cook until crisp and golden in places, 2 to 3 minutes per side.
Transfer crostini to a work surface; rub garlic half on each slice. Sprinkle with a pinch of dried oregano.
Mash avocado with grated garlic, a teaspoon of lemon juice, and 1 tablespoon of olive oil. Spread one scoop on top of each crostini.
Top each crostini with mozzarella, a roasted tomato slice, and a basil leaf. Drizzle with 1 tablespoon olive oil and sprinkle with flaky salt.
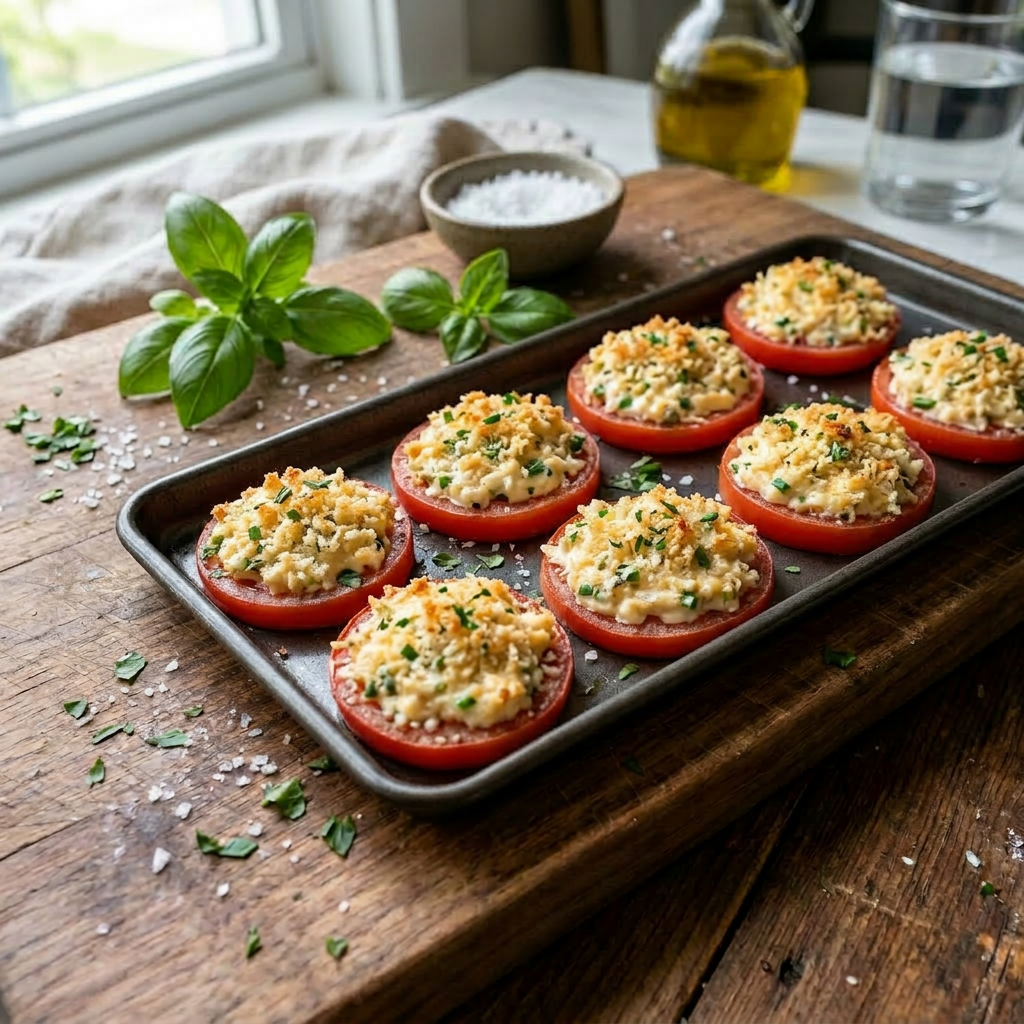
Delicious baked tomatoes topped with a crunchy herb and breadcrumb mixture
Bright, bubbly Parmesan tomatoes turn ordinary tomatoes into a crunchy, cheesy celebration. Thick tomato slices get a shower of grated Parmesan, a sprinkle of herbs, and a breadcrumb blanket, then roast until golden and irresistible. Each bite balances juicy sweetness with a savory, crunchy top that begs for seconds. Serve these playful rounds alongside grilled meats, toss them with pasta, or stack them for a veggie-forward snack. They’re speedy to make—about 10–20 minutes—perfect for a last-minute upgrade that feels special without fuss. All Kitchen Moxy recipes can be found at www.kitchenmoxy.com
Ingredients
4 ripe tomatoes, sliced into 1/2-inch slices
4 tablespoons mayonnaise, or sour cream
½ cup of grated Parmesan cheese
½ cup Panko breadcrumbs
1 tablespoon Dijon mustard
1 teaspoon dried oregano
salt and pepper to taste
1 teaspoon chopped fresh parsley
1 teaspoon chopped fresh basil
½ cup of fresh, shredded mozzarella cheese
Process
Gather all ingredients. Preheat oven to 350°F (175°C).
Arrange tomato slices in a single layer on a baking sheet lined with parchment paper.
In a small bowl, mix mayonnaise, Parmesan, panko breadcrumbs, and Dijon mustard, then add oregano, salt, and pepper to taste.
Layer each tomato slice with a small amount of mayonnaise mixture. Sprinkle with mozzarella and then top with parsley and basil.
Bake in a preheated oven for approximately 15 minutes, or until cheese is golden brown. Serve immediately.
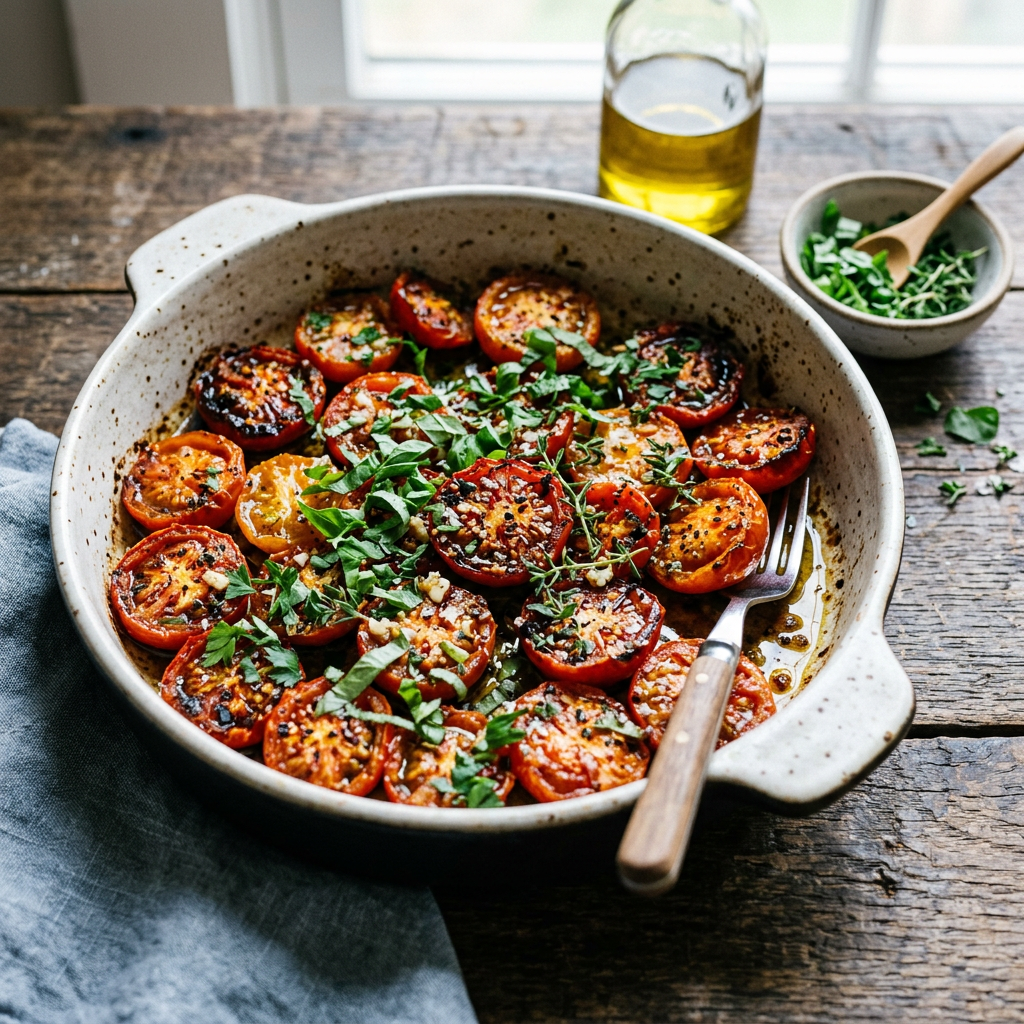
A dish of roasted tomatoes garnished with fresh herbs and olive oil.
Tomato season is here, and the East Coast couldn’t be happier! Try a simple roast: toss halved tomatoes with olive oil, garlic, salt, and pepper, then bake until caramelized. Use these vibrant roasted tomatoes in sauces, soups, gravies, appetizers, or freeze for later. For a burst of flavor, roast cherry tomatoes and pile them on bruschetta. Roasting transforms tomatoes, concentrating their sweetness and giving them a cozy, rustic bite.
Boost this recipe with ease! Choose a roomy baking dish so tomatoes don’t crowd each other and steam; give them space to roast and concentrate their flavor. If you want extra caramelized goodness, drizzle olive oil and sprinkle herbs before baking. Avoid aluminum or reactive metal pans—use stainless steel, enamel, or ceramic to keep the tang intact. Enjoy bright, roasted tomatoes with a punch of flavor and minimal fuss.
Ingredients
2 tablespoons of olive oil
½ tsp of sea salt or kosher salt
¼ tsp of ground pepper
2 cloves garlic, peeled and thinly sliced (throw some unpeeled whole garlic cloves in the pan to roast, you can squeeze the soft garlic out of the clove after roasting and add to your favorite dish)
Fresh herbs: basil, oregano, thyme, rosemary – mix or add your favorite herb
1 pound (450g) tomatoes (8 small or 4 medium-sized)
Process
Preheat the oven to 325ºF
Pour the olive oil into a shallow baking dish or pan and add the herbs and salt and pepper.
Cut the tomatoes in half horizontally, remove the core with a paring knife, then cut into ½-inch thick slices, or leave halved.
Stems will come out easily after roasting.
Toss the tomatoes with the oil and seasonings, lay them cut side down in the dish.
Bake for two hours, or until the tomatoes are completely softened and wilted, and start to wrinkle. Depending on the tomatoes, they may take longer to cook.
Remove from oven and carefully transfer tomatoes to a bowl or plate. Cover with plastic wrap and let cool for about 10 minutes.
Remove plastic wrap and carefully pull off the skin with a pair of tongs, then use as desired.
Storage: Store in a tight-lid mason jar with their juices in the fridge for 3 to 5 days. They can also be frozen for up to six months.
Roasted Tomato, Avocado, and Fresh Mozzarella Crostini
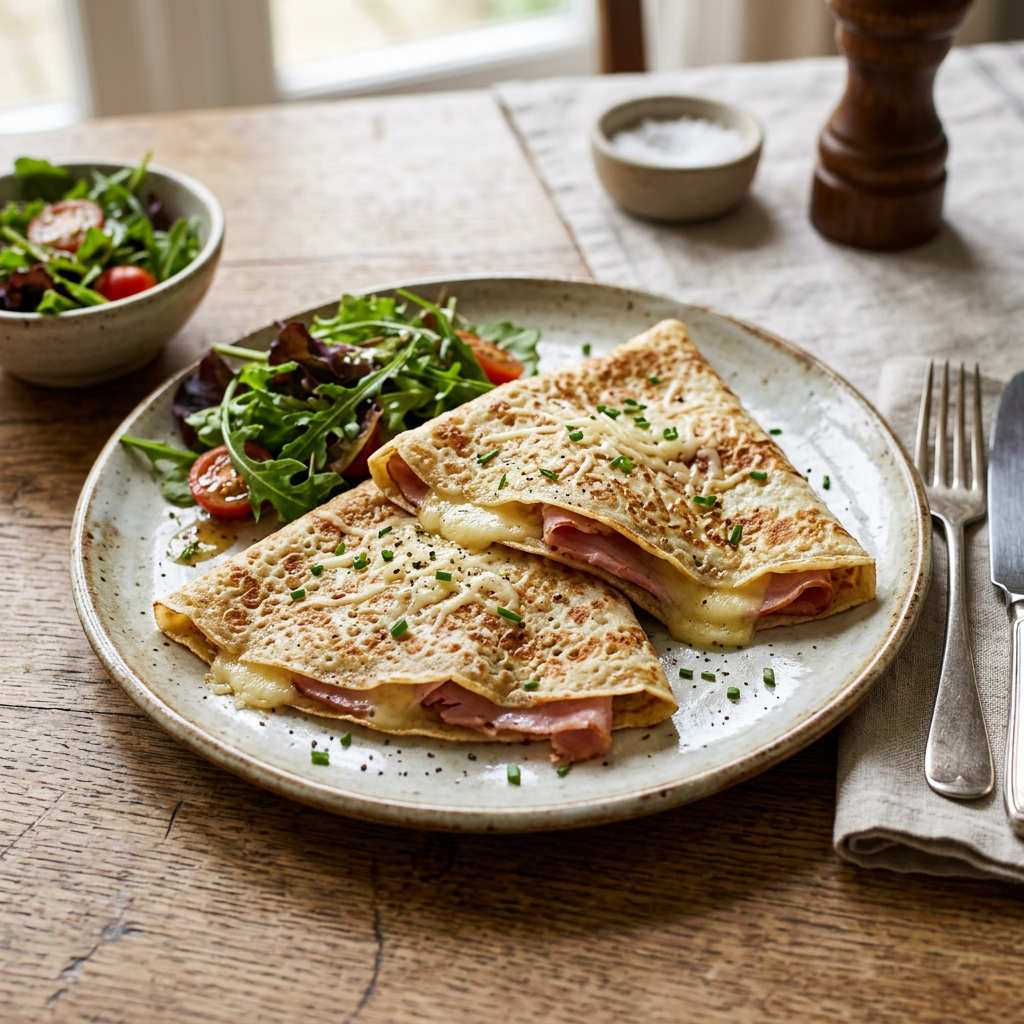
Delicious ham and cheese crepes served with a fresh mixed salad
Ham and Cheese Crêpes deliver a timeless blend of savory comfort and elegant simplicity. Thin, delicate crêpes cradle slices of savory ham and melted cheese, creating a warm, satisfying bite that balances tenderness and a slight crisp at the edges. These crepes are versatile: served for a leisurely brunch with a crisp green salad, paired with Dijon mustard or a drizzle of creamy béchamel for extra richness, or enjoyed as a quick weekday meal with a side of pickles or lightly dressed arugula. Garnish options like chopped chives, a grind of black pepper, or a scattering of fresh herbs bring freshness and visual appeal. For a gourmet touch, use aged Gruyère or Comté for nuttier notes, or choose a mild Swiss or cheddar for a family-friendly version. All recipes from Kitchen Moxy can be found at www.kitchenmoxy.com
Ingredients
1 teaspoon butter
1 medium onion, thinly sliced
2 teaspoons butter, divided, or more as needed
2 tablespoons Dijon mustard
10 slices thinly sliced ham
8 ounces shredded Gruyère cheese
Process
Prepare basic crêpe recipe at least an hour before making crêpes in a non-stick skillet.
Heat 1 teaspoon butter in a skillet over medium heat. Cook onions, stirring occasionally, until they start to turn golden brown, about 5 minutes. Set aside.
Assemble crêpes one at a time, spread mustard over one half, then top with 1 slice of ham, some sautéed onion, and Gruyère cheese.
Fold the crêpe over the filling, press gently, and heat briefly just until the cheese begins to melt. Fold in half again so each finished crêpe is about one-quarter the size of the original.