Tag Archives: Food

Old Fashioned Ham and Bean Soup

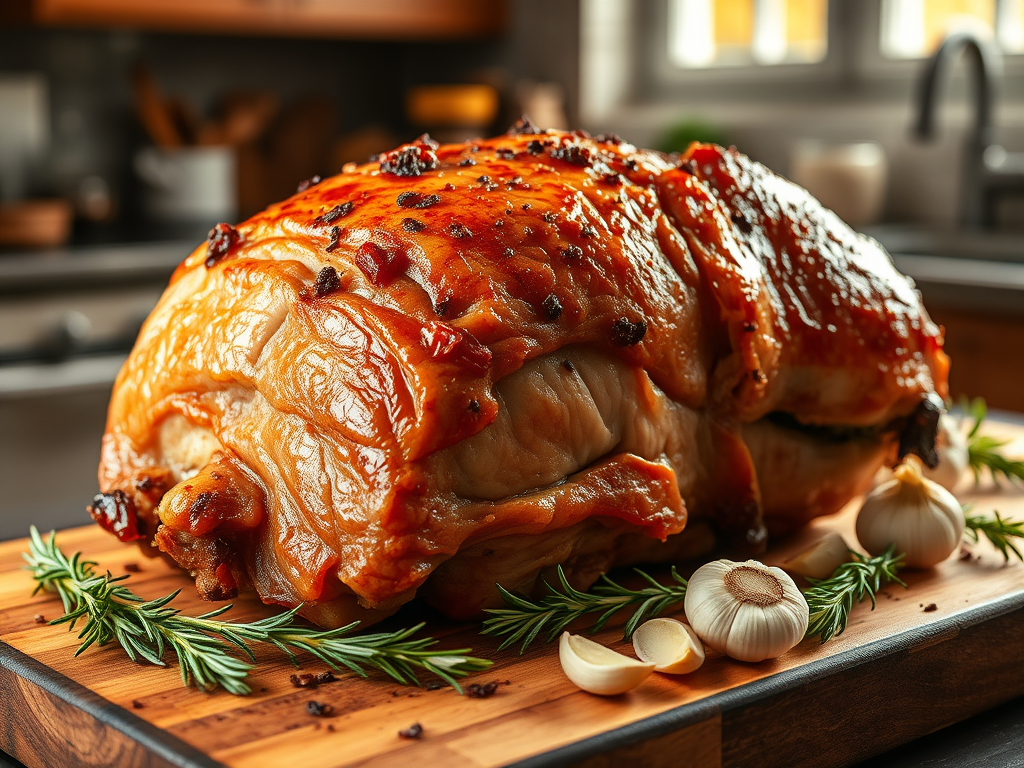
Are you unsure about what to do with leftover holiday ham? Consider making a traditional ham and bean soup. The key to a delicious soup is the broth, which should be prepared first. To do this, start by making the ham stock, as it takes a few hours for the ham flavor to fully develop from the ham bone. If you have leftover ham from the holidays, you’ll need about 2 cups of cubed ham to add to the soup. Ham hocks can also be used as a substitute for a ham bone, providing rich flavor. For added texture and richness, you can include barley in the broth, although this is optional. Preparing the stock first ensures your soup will be flavorful and hearty, making the most of your holiday leftovers.

Ingredients

  • 2 ham hocks or a ham bone
  • Enough water to cover the ham bone or ham hocks
  • 2 bay leaves
  • 1 medium onion chopped
  • 1 bag of dry navy, great northern, or cannellini beans, rinse well
  • 1 cup of sliced celery
  • 1 – 2 cups of chopped carrots
  • 2 cups of cubed potatoes
  • 2 cups of chopped ham
  • 1/3 cup of barley (optional)
  • 2 chopped or grated garlic cloves
  • 1/2 cup chopped parsley
  • ¼ tsp pepper
  • ½ tsp nutmeg
  • 1 tsp salt

Process

  1. Place ham hocks or ham bone in a large soup pot and cover with cold water.
  2. Add chopped onion, celery, 1 teaspoon of salt, bay leaves, and beans *see note below.
  3. Bring to boil and reduce heat to simmer.
  4. Skim any foam or froth from the top of the soup as it simmers and discard.
  5. Simmer for about 1.5 – 2 hours until meat is tender and can be cut off the bone.
  6. Remove meat from bones, discard the bones and cut meat into small pieces add to broth, add remaining two cups of chopped ham to the broth, remove bay leaves from the broth.
  7. Add remaining ingredients, potatoes, barley, garlic, parsley, pepper, and nutmeg. Simmer for about 45 minutes or until carrots and potatoes are tender.
  8. Serve with crusty bread and salad.

*My mom never pre-soaked her beans, I don’t presoak my beans either, I just add them to the water while the ham is cooking, they become soft and flavor the broth.

Roasted Pork Shoulder

Tender Roasted Pork Shoulder
Roasted Pork Shoulder

The Pennsylvania Dutch started the tradition of eating pork and sauerkraut on New Year’s Day. This tradition is linked to hopes for good luck and prosperity in the coming year.

Eating sauerkraut on New Year’s Eve is a common practice in Germany. People believe that eating sauerkraut will bring blessings and wealth. Before the meal, people at the table wish each other good fortune and money, symbolized by the amount of shredded cabbage in the dish. The pig is also a symbol of good luck and well-being. Many believe that eating pork will bring luck for the new year. The pig is seen as a symbol of looking forward because it cannot turn its head from side to side or look behind. Instead, it faces forward, reminding us to focus on future opportunities rather than past events.

Ingredients

  • 9-10 lb bone-in Pork Shoulder
    • Bake 1.5 – 2.0 hours per pound in a low heat oven (250° – 275°F.)
    • Will take about 8 – 12 hours to cook
    • It is done when an internal meat thermometer reaches 195 – 205°F. for shredded pulled pork.
    • Or 160°F. for slicing.

Seasoning

  • 2 tablespoons coarse salt to season overnight
  • 4 – 6 garlic cloves
  • 1 tablespoon coarse salt
  • ½ tablespoon fresh cracked peppercorns
  • 1-1/2 tablespoon ground mustard
  • 1-1/2 tablespoon onion powder
  • 3 tablespoons of minced fresh rosemary

Process

  1. Rub the pork shoulder with 2 tablespoons of coarse salt all over, tie it, wrap it air-tight with cellophane, place in a sheet pan or roasting dish, and refrigerate overnight.
  2. Pull the pork out of the refrigerator about 30 minutes before cooking to bring to room temperature.
  3. Preheat the oven to 450°F. line the bottom of a roasting pan with aluminum foil for easy clean up and fit a roasting rack inside the pan.
  4. Cut each garlic clove into slivers. With a small knife poke holes in the pork that are about ½ inch deep (or the length of the garlic clove) to create slits and push the garlic sliver into each slit.
  5. Mix the seasoning together and rub into the pork shoulder, seasoning on all sides.
  6. Place the seasoned pork onto the roasting rack in the pan.
  7. Place the pan into the oven and let it roast for 15 minutes at 450°.
  8. Lower the heat to 275°F.  and let it slowly cook until it reaches the tender internal temperature of 200 – 203°F. internal temperature.
  9. Pull pork out of the oven, tent with aluminum foil and let rest for 1/2 hour up to 1 hour.

Cooking a City Ham for the Holidays

The main difference between city ham and country ham is how they are cured. Country hams are dried and cured with salt and seasonings over several months. This slow process makes them saltier and gives them a strong, unique flavor. They tend to be dry and are best sliced very thin, like prosciutto. City hams are soaked in a salty water solution for a shorter time, which keeps them moist and tender. They are milder in flavor and can be sliced thicker. The curing method affects the taste, texture, and how each ham is served. Country ham has a salty, intense flavor and is good for appetizers or charcuterie boards. It is often used in small slices. City ham is more versatile, suitable for sandwiches, main dishes, or breakfast. It has a milder taste and is easier to slice in thicker pieces. When choosing between the two, consider the flavor you want and how you plan to serve the ham. Both types are popular and can be the main part of a meal. Proper preparation can make either type of ham more enjoyable for different occasions.

Applying a glaze to your ham during the final stages of cooking enhances its appearance and flavor, resulting in a caramelized, lightly crisp exterior. It is important to time the glazing appropriately; applying it too early, especially during prolonged cooking, can lead to burning and an undesirable burnt glaze.

Ingredients

  • 1 city style (brined) ham, hock end
  • ¼ cup brown mustard
  • 2 cups dark brown sugar
  • 1-ounce bourbon (poured into a spritz bottle)
  • 2 cups of crushed ginger snap cookies

Directions

  1. Heat oven to 250°F.
  2. Remove ham from bag, rinse and drain thoroughly. Place ham, cut side down, in a roasting pan. Using a small parting knife score the ham from bottom to top, spiraling clockwise as you cut. Be careful to only cut through the skin and first few layers of fat. The aim is to create a diamond pattern all over the ham.
  3. Tent the ham with heavy duty foil, cook for 3 to 4 hours or until the internal temperature at the deepest part of the meat registers 130°F.
  4. Remove ham from oven and remove the aluminum foil. Using tongs, pull away the diamonds of skin and any sheets of fat that come off with them.
  5. Heat oven to 350° F.
  6. Dab the ham dry with paper towels and then brush on a liberal coat of mustard, using a basting brush. Sprinkle on the brown sugar, packing loosely as you go until the ham is coated. Spritz this layer lightly with bourbon, then loosely pack on as much of the cookie crumbs as you can.

Insert the thermometer and cook until the interior temperature reaches 140°F. approximately one hour.

Let the ham rest outside of the oven for ½ hour before slicing.

Oyster Stuffing

The history of oyster stuffing dates back to at least 1685, when it was first mentioned in the cookbook The Accomplisht Cook in London. Traditionally, the stuffing was placed under the skin of the bird, a common practice at the time. By 1796, culinary advice suggested stuffing the cavity of the bird instead. Different regions have their own preferred types of stuffing: Southerners often favor pecan, rice, or cornbread; Italians typically include sausage; and Germans enjoy dried fruit, potatoes, and apples. I personally discovered an oyster stuffing recipe many years ago and decided to try it. I am pleased to say that this stuffing is delicious, it does not have a fishy smell or taste. One of its advantages is that it can be served as a standalone dish. For the best flavor, I recommend using fresh herbs whenever possible. Enjoy your cooking experience and the unique taste of oyster stuffing.

SERVES 8—10

INGREDIENTS

  • 11 cups ½” cubed white French bread (about 14 oz.)
  • 6 slices bacon
  • 6 tbsp. butter, melted, plus more for greasing the pan
  • 6 shallots, thinly sliced
  • 4 celery ribs, thinly sliced
  • 40 medium oysters, such as Bluepoint’s shucked (about 1 lb.), with 1 cup of the liquor reserved (I have used canned oysters)
  • 1 cup chicken stock
  • ¼ cup madeira or port (a sweet wine)
  • ⅓ cup chopped flat-leaf parsley leaves
  • 2 tbsp. fresh chopped thyme leaves
  • 2 tbsp. fresh chopped sage leaves
  • ½ tsp. Tabasco (or any hot sauce)
  • ¼ tsp. fresh grated nutmeg
  • ⅛ tsp. ground cloves
  • Kosher salt and freshly ground black pepper, to taste

DIRECTIONS

  1. Preheat oven to 250˚F.
  2. Arrange bread cubes on a baking sheet in a single layer and bake, stirring occasionally, until dried but not browned, about 15 minutes. Remove bread cubes from the oven and let cool.
  3. Put bacon into a 12″ skillet; cook over medium-high heat, stirring frequently, until crisp for about 10 minutes. Remove bacon from pan. Reserve 1 tablespoon of grease.
  4.  Add 4 tablesopoons of butter to bacon grease and heat. Add shallots and celery, reduce heat to medium, and cook, stirring occasionally, until vegetables are soft, about 10 minutes.
  5.  Add oyster liquor, stock, Madeira or port, parsley, thyme, sage, Tabasco, nutmeg, cloves, and salt and pepper. Bring to a boil over high heat and cook, stirring occasionally, for 5 minutes.  Scrape the mixture into a large bowl and stir in the bread cubes and oysters. Set aside to allow the flavors to come together for 10 minutes.
  6. Raise the oven temperature to 400˚. Transfer mixture to a buttered 2-qt. oval baking dish and cover with foil. Bake for 30 minutes, remove foil, drizzle with remaining butter, and continue baking until golden brown and crusty, about 15 minutes more. Serve immediately.

Crab and Flounder Dish

flounder crabTraditionally we served fish for our Christmas Eve dinner. My mom loved her herrings in sour cream. Today, I will share my favorite dish and that is Crab Meat stuffed Flounder. This incredible dish can be served as a main entrée using the method below; or a side dish using smaller fillets; wrap a smaller flounder around a small scoop of crab meat mixture, secure with a toothpick. I have also served this crab mixture scooped on top of salmon or trout. You will enjoy this dish however you decide to serve it. Happy Holidays.

FLOUNDER FILLETS

4 to 5 Large fillets

Preheat the oven to 350 degrees F.

flounder slicedSprinkle flounder with salt and pepper. Using a fillet knife, carefully open the flounder by cutting along the left and right sides of the seam down the middle of the fish to make pockets. Lay the cut sides back.

CRAB MIX

Ingredients

  • 2 green onions, thinly sliced (about 1/4 cup)
  • 1 clove garlic minced
  • 1 minced red pepper
  • 2 tablespoons chopped fresh parsley
  • 1 egg
  • 1/8 teaspoon cayenne pepper
  • 1/8 teaspoon garlic powder
  • 3 tablespoons heavy cream
  • 1 1/2 tablespoons spicy mustard
  • 1/2 lemon, juiced
  • 2 tablespoons mayonnaise
  • 10 saltine crackers, crumbled medium to fine
  • 1/2-pound lump crabmeat, picked clean of shells
  • 1/2-pound claw crabmeat, picked clean of shells
  • Salt and freshly ground black pepper

Directions:

  1. In a medium skillet, melt the butter and sauté the onions, garlic, parsley and peppers until soft. Let cool.
  2. In a mixing bowl, combine the egg, cayenne pepper, garlic powder, heavy cream, mustard, lemon juice and mayonnaise together. Gently mix in the Saltine crackers and crabmeat. Add salt and pepper, if needed. Set aside to stuff in flounder.
  3. Stuff the flounder with the Crab Mix and press the sides down to cover the filling. Sprinkle with paprika.
  4. Coat a glass baking dish with cooking spray. Place the fish in the dish and bake for 20 minutes.
  5. Without removing the dish from the oven, turn the oven to broil and broil for 5 additional minutes.
  6. When the fish is done, remove it from the oven.

*Optional: Melt ½ cup of butter and drizzle over fillets when finished baking.

Roasted Garlic Chicken Thighs

Here is a terrific recipe for chicken thighs, great for a party or a special dinner.  Or use legs/thighs. Yes, you do have to love garlic, so be sure only to invite those who have an acquired taste for this tasty allium.

This recipe should be prepared the day before and as a note, the longer you marinate it – the taster it becomes.  It is best to marinade for at the very least, 6 hours up to 24 hours in advance.  Please use only fresh herbs and fresh garlic cloves with this recipe, or you will rob yourself of the intoxicating aroma and flavor of this dish.

INGREDIENTS

  • 3 – 4 pounds of skin on and bone in chicken thighs
  • 1 cup of olive oil
  • 16 fresh garlic cloves
  • 2-tablespoons fresh rosemary, chopped
  • 2-tablespoons fresh thyme, chopped
  • 1/2 cup (or more) fresh parsley, chopped

MARINADE

  • About 1 cup of olive oil – more or less to cover the chicken pieces
  • 6 peeled and smashed garlic cloves – cut in half after you smash them
  • ½ cup of fresh minced flat leaf Italian parsley

PROCESS

  •  Wash, and trim extra skin and fat from chicken thighs, pat them dry.
  • Spread them flat in a baking dish large enough to hold all thighs
  • Combine olive oil, garlic cloves and parsley and pour over thighs
  • Cover baking dish with plastic wrap or lid and refrigerate for up to 24 hours, turning only once during that time.

After 6 – 24 hours

  • Remove chicken from marinade and scrape off excess olive oil and place chicken in a shallow, foil lined, rimmed  cookie  sheet. 
  • With a slotted spoon, scoop up garlic and parsley from marinade and spread on top of chicken.
  • Reserve 1/3 cup of olive oil from marinade.
  • Preheat oven to 400F. 

In a bowl combine

  • 8 more garlic cloves, minced or grated
  •  1/3 cup reserved olive oil
  •   2 tablespoons fresh rosemary chopped
  •   2 tablespoons fresh thyme leaves
  1. Pour this mixture on top of chicken in pan.
  2. Bake at 400F.  for 45 minutes – do not turn chicken during baking.
  3. *Note: do not crowd chicken pieces in roasting pan – this will steam the chicken rather than roasting it.

Enjoy

Cinnamon Bread Pudding with Vanilla Bourbon Sauce

This is the absolute best recipe for bread pudding. it will fill your home with warm, welcoming aromas of brown sugar, cinnamon, and vanilla. It also makes a wonderful addition to your holiday brunch. With the holidays around the corner, I feel the need to share some of my favorite recipes for you and your family. This rich, comfort food and so addicting.

Ingredients for Pudding

  • 1 cup firmly packed brown sugar
  • 10 cups chopped day old bread or pastry
  • 3 cups Half-and-Half
  • 2 cups heavy whipping cream
  • ½ cup sugar
  • 5 eggs
  • 1 tablespoon cinnamon

Directions Bread Pudding

  1. Mx bread, brown sugar, Half & Half, whipping cream, sugar, eggs and cinnamon ingredients in a large bowl and let sit for 20 minutes, stirring occasionally.
  2. Preheat oven to 350F. degrees.
  3. Spray a 9 x 13″ baking dish with cooking spray. Spray a piece of aluminum foil with cooking spray to cover the bread pudding while it is baking.
  4. Pour bread pudding batter into pan. Cover with foil and bake for 1 hour or until center of pudding is firm.
    1. NOTE: This can be made about 1 or 2 days in advance, reheat at 250F. degrees for 30 minutes before serving

Ingredients for Vanilla Bourbon Sauce

  • 4 cups heavy whipping cream
  • 2 cups firmly packed brown sugar
  • 1 tablespoon pure vanilla extract
  • ¼ teaspoon cinnamon
  • ¼ to ½ cup bourbon
  • 1 tablespoon cornstarch (optional)

Directions Vanilla Bourbon Sauce

  1. Pour heavy cream into a heavy saucepan and bring to a gentle boil over medium heat. Stirring constantly to keep from scalding, continue to boil until cream is reduced by almost half, about 30 minutes.
  2. Add brown sugar, vanilla, cinnamon, and bourbon and allow to boil until sauce thickens slightly (another 15 minutes). For extra thick sauce, add a tablespoon of cornstarch to the boiling liquid, stirring constantly.

Serve warm, drizzling sauce over the top of each pudding square after placing on a plate.

Smoked Salmon wrapped Cheese balls

Ingredients

  • 1 8-ounce cream cheese block
  • 8-ounce cheddar cheese, shredded
  • ½ teaspoon garlic salt
  • 1 teaspoon onion powder
  • 2 teaspoons chives, chopped
  • 2 teaspoons parsley, chopped
  • 1 tablespoon grated Parmesan cheese
  • 1 4-ounce package of Smoked Salmon
  • 1 English cucumber sliced into 1/2-inch rounds for garnish

Process

  1. Bring cheeses to room temperature.
  2. In a mixer, mix cream cheese, cheddar, Garlic salt, and onion powder.
  3. Cover with plastic wrap and refrigerate for at least 1 hour.
  4. Remove plastic wrap and using a ¾ inch cookie scooper, scoop cheese into small balls.
  5. In a small bowl, mix parsley and Parmesan cheese together.
  6. Roll each ball in the parsley and cheese mixture.
  7. Separate the salmon layers and cut 1-inch circles of smoked salmon and wrap around each ball. Place the balls in the refrigerator until ready to use.
  8. Before serving, dip the top of each ball into chopped chives.
  9. Place cheese ball on top of cucumber slice and secure with a toothpick.

Oven Roasted Bok Choy

bok choy1I received three baby Bok Choy, also known as Chinese cabbage in my Bountiful Basket (a local food co-op) today. I was stumped as to how I was going to prepare them since I have only eaten this cabbage in stir fry or marinated. I decided to experiment tonight with an oven cooked bok choy.

A little about boc choy that you may not know; this vegetable contains glucosinolates. These compounds have been reported to prevent cancer in small doses, but, like many substances, can be toxic to humans in large doses, particularly to people who are already seriously ill. Cultivated in China since ancient times, bok choy is found in soups and stir-fries, appetizers and main dishes. Bok choy’s popularity comes from its light, sweet flavor, crisp texture and nutritional value. Not only is bok choy high in Vitamin A, Vitamin C and calcium, but it is low in calories.

Preheat oven to 350 degrees

Ingredients

  • 1 baby Bok Choy
  • Olive Oil
  • 4 cloves of fresh garlic, grated or chopped very fine
  • Kosher salt
  • Pepper
  • Parmesan cheese

Directions

Bok Choy

Bok Choy

  • Remove outer leaves if they look torn or bruised, or just cut short with scissors.
  • If leaves are overly long you can trim them with scissors, otherwise leave long, they will crisp up when cooked.
  • Wash with cool water and drain and dry on paper towels.
  • Slice the Bok Choy lengthwise into 4 quarters leaving the stem on each piece to hold leaves together.
  • Drizzle with olive oil, rub the olive oil into the leaves
  • Grate the garlic cloves and spread all over the Bok Choy and into the leaves
  • Sprinkle with kosher salt, pepper and Parmesan cheese
  • Place on a flat baking sheet covered with aluminum foil – do not use a pan with a lip, you want them to roast not steam.
  • Bake in 350 F. oven for 20 minutes, turn over and let bake for another 5 minutes
  • Be careful not to overcook, the Bok Choy should be crisp tender, at this point you can cut into chunks and serve or drizzle with a good quality balsamic vinegar and serve.

Top food blogs

Purgatory Meatballs

Sweet & Hot Meatballs

Sweet & Hot Meatballs

Purgatory Meatballs, yes the heat factor is there, but the pineapple and apricot preserves dial it down to a spicy sweetness. You can add additional hot jalapenos to dial up the heat factor. Start with this recipe and then add if it is not spicy enough.

I needed a fast, quick entrée to bring to work for an impromptu party. Off to the market I went to try and figure it out. Here is what I walked out with, I put it all together and decided it is yummy and great enough to post. Great as an appetizer, party food, over rice or great for a last minute potluck. I put it in a crock pot and was all set for the event.

Ingredients:

  • 1 medium sweet onion, diced
  • ½ cup of Italian parsley or cilantro, chopped fine
  • 1 jar of chili sauce
  • 1 large can of pineapple tidbits
  • 1 jar of apricot preserves
  • 1 jar of HOT Mango Chutney (I used half)
  • 1 can of HOT jalapeno peppers (diced)
  • 1 can of medium hot chilies peppers (diced)
  • 4 bags of frozen, fully cooked meatballs (about 15 in each bag),
  • 4 large green peppers, cut into chunks

Directions:

  1. In a large saucepan, sauté the diced onion in 1 tablespoon of oil or 1 teaspoon of coconut oil until soft
  2. On medium heat, add the next 6 ingredients, I only used ½ jar of the HOT Mango Chutney, but you can use the whole jar
  3. Bring to a simmer, stirring constantly for 10 minutes, remove from heat. NOTE; because there is sugar in this mixture it will come to a boil quickly so keep the heat on medium and stir so the bottom does not burn.
  4. After removing the pan from the heat, bring to room temperature if not using right away and refrigerate until you are ready to use.
  5. When you are ready to serve; about 4 hours before the event, put the sauce in a crock pot and cook on high until hot, turn down to low and add the peppers, and meatballs, stir to coat and put the lid on and heat until meatballs are heated through.