Tag Archives: lunch

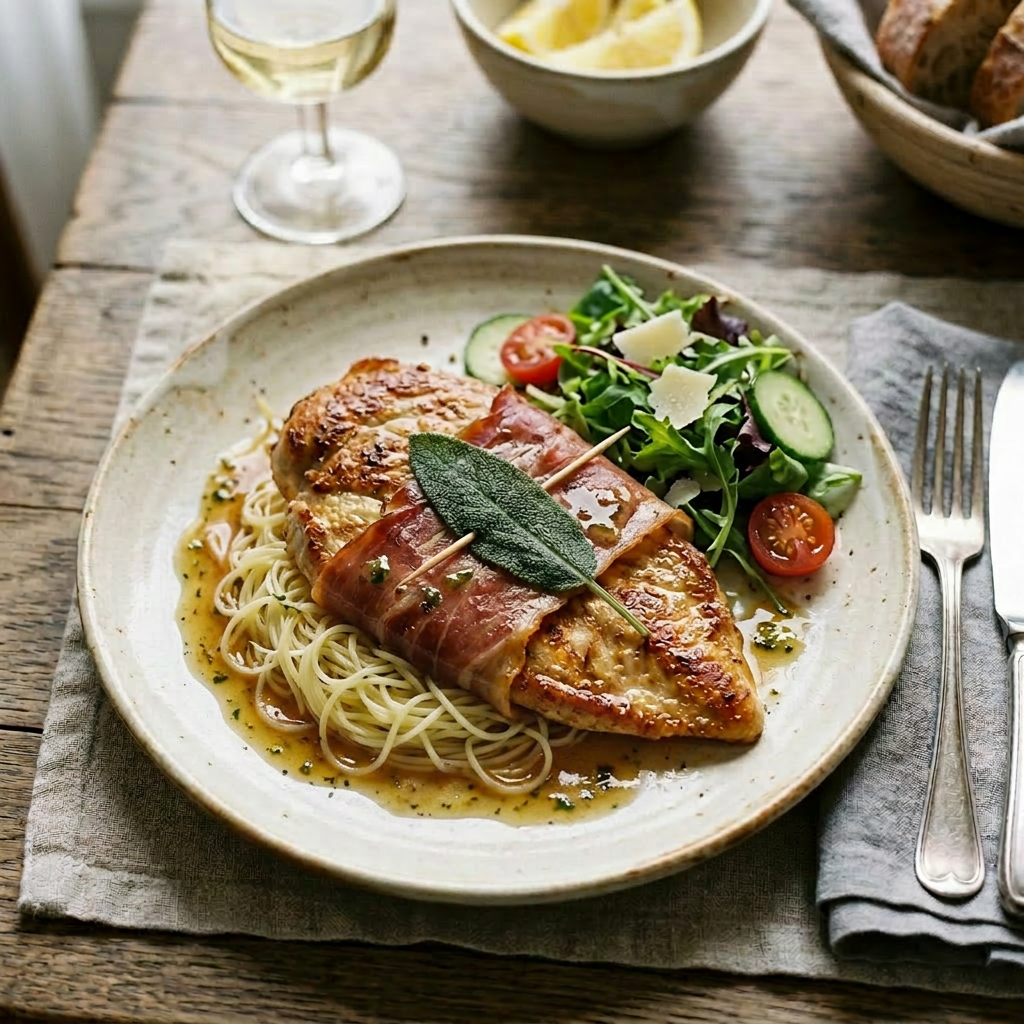
Chicken Saltimbocca

Replace polenta with pasta; drizzle pan sauce
Chicken Saltimbocca

Chicken saltimbocca dances between rustic charm and joyful indulgence. Imagine feather-thin chicken cutlets cloaked in salty prosciutto and studded with bright sage, sizzling in butter or olive oil until edges crisp and aromas pop. A cheeky splash of dry white wine or a spritz of lemon lifts pan juices into a glossy, lively sauce that winks at your taste buds without stealing the show. Each bite delivers contrast: the prosciutto’s savory-sweet snap, the sage’s herbal pep, and chicken so tender it practically sighs. Textures play together—crisp, juicy, and silky—making every forkful a little celebration of simple, spirited cooking.

Ingredients

Serves 4

  • 2 boneless, skinless large chicken breasts, butterflied and pounded to ¼-inch thickness
  • Salt and freshly ground black pepper
  • 4 fresh sage leaves
  • 4 thin slices of prosciutto
  • ¼ cup all-purpose flour for dredging
  • 2 tablespoons extra-virgin olive oil
  • 2 tablespoons unsalted butter
  • ¼ cup dry white wine (e.g., Sauvignon Blanc or Pinot Grigio)
  • ½ cup chicken stock (low sodium)
  • Optional: parsley, fresh lemon juice, or cream for finishing the sauce

Process

  1. To prepare the chicken, slice chicken breasts horizontally into thin cutlets. Pound between wax paper to a uniform thickness and pat dry. Season both sides with salt and pepper.
  2. Place a slice of prosciutto on the cutlet, then a sage leaf, and secure with a wooden toothpick. Dredge the plain side in flour, shaking off excess.
  3. 3. Heat 1 tablespoon olive oil and 1 tablespoon butter in a skillet over medium heat. Place the chicken, prosciutto, and sage, side down, and sear for 2–3 minutes, until golden. Turn the chicken and cook 2–3 more minutes, until the internal temperature reaches 165°F (74°C). Remove from the skillet and keep warm.
  4. Deglaze the pan with white wine, scraping up browned bits. Add chicken stock and simmer until reduced, about 5 minutes. Remove from heat and swirl in remaining butter (and optional lemon juice or cream) to create a silky sauce.
  5. Return chicken to the pan briefly to coat with sauce. Serve immediately with the prosciutto and sage side up, and remove the toothpick. Spoon sauce over the top. Garnish with parsley.

Notes

  • Use thin chicken cutlets for quick, even cooking.
  • Fresh sage is essential for authentic flavor.
  • Prosciutto can be substituted with pancetta if desired.
  • For a richer sauce, add a splash of cream or a small amount of butter at the end.
  • Serve with roasted vegetables, creamy polenta, pasta, or a light salad to balance the richness.
  • Chicken saltimbocca can be prepped ahead by layering chicken, prosciutto, and sage, then refrigerating until ready to cook.
  • This dish is elegant yet quick, typically ready in 20–30 minutes, and delivers a restaurant-quality Italian flavor at home 

How to Butterfly a Chicken Breast:

  1. If the chicken breast has skin attached, loosen it with your fingers and remove.
  2. Place the chicken breast on the cutting board. Place one hand on the chicken breast, curving your fingers up slightly for safety. Insert the knife into the middle of the thickest part and cut horizontally; cut almost to the other side. Open it like a book.
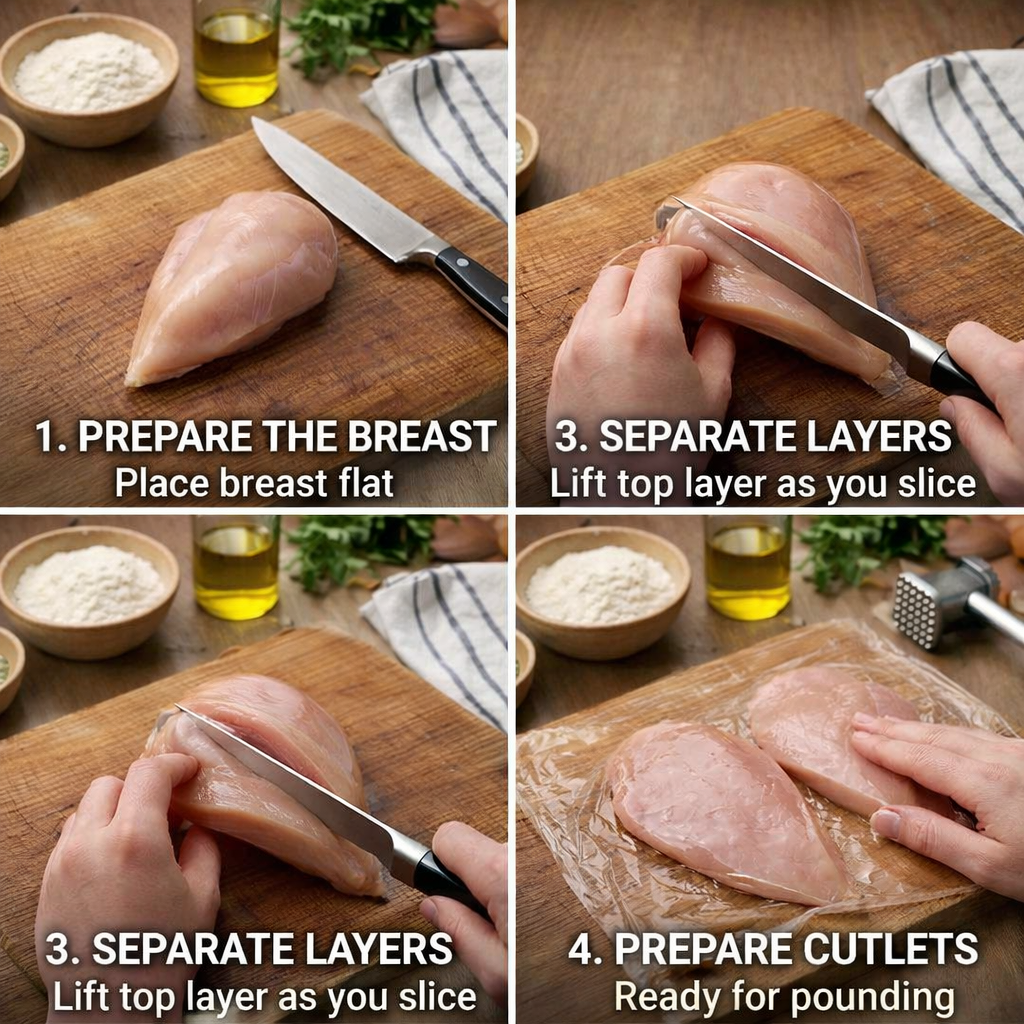
Four-step sequence showing how to butterfly a chicken breast on a wooden board with a knife
Step-by-step guide to butterfly and flatten a chicken breast for cooking.

Butterflying raw chicken breast
Chicken Roulade with Tomato Sauce

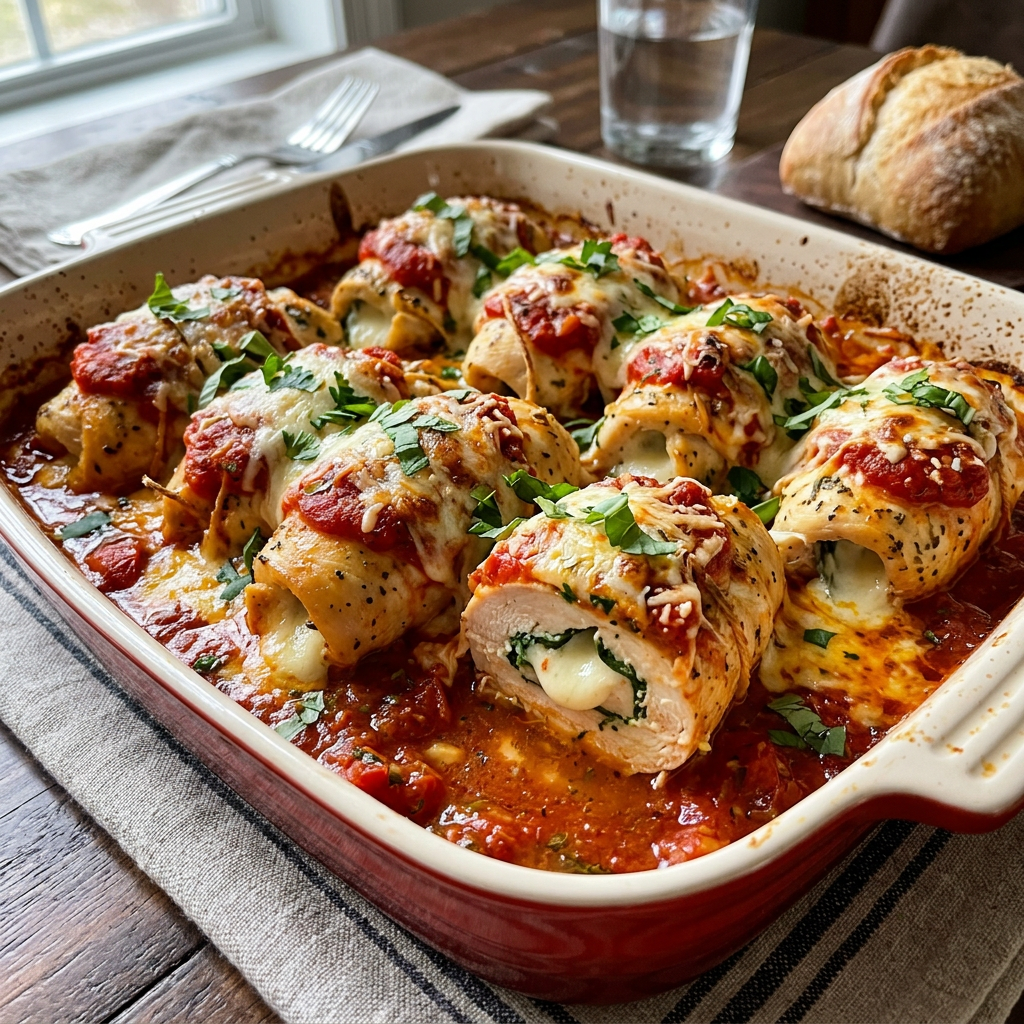
Baked chicken breasts stuffed with spinach and cheese topped with melted cheese and tomato sauce in a casserole dish
Delicious baked chicken roulades

These cheese-stuffed chicken rolls are a harmonious blend of tender poultry, melted cheese, and bright tomato sauce. Boneless chicken breasts are carefully pounded thin, layered with fresh spinach leaves and a flavorful cheese filling for savory depth—then rolled tightly, secured, and lightly seared to develop color. The rolls finish in a simple tomato sauce made from ripe tomatoes, garlic, olive oil, and fresh herbs, which infuses the chicken with acidity and aromatic complexity as it simmers.

The contrast between the golden exterior and the molten, gooey interior is what makes this dish especially appealing. Each slice reveals a ribbon of cheese that complements the juicy chicken, while the tomato sauce cuts through the richness, adding brightness and moisture. Texturally, the dish balances tender meat, silky cheese, and a velvety sauce, making it satisfying and approachable. Serve with any pasta or polenta.

Ingredients:

  • 1 can of Italian plum tomatoes, drain the sauce into a cup, and chop the tomatoes
  • 1 small can of tomato sauce
  • 2 garlic cloves, grated or pressed
  • 1 green bell pepper, finely chopped
  • 1 medium onion, finely chopped
  • ¼ teaspoon dried oregano
  • ¼ teaspoon freshly ground pepper
  • 4 skinless, large boneless chicken breasts
  • 2 cups of fresh spinach leaves
  • 1 egg, beaten
  • ½ cup ricotta cheese
  • 1 cup grated mozzarella cheese
  • 2 tablespoons grated Parmesan cheese
  • 2 tablespoons chopped fresh parsley

Process

  1. Preheat oven to 350° F.
  1. Combine the tomato sauce and the liquid from the canned tomatoes until you have ½ cup.
  2. In a medium saucepan, combine tomatoes, tomato sauce, garlic, bell pepper, onion, oregano, and pepper. Bring to a boil, reduce the heat, and simmer for 15 minutes – stirring occasionally.
  3. Butterfly each chicken breast and pound between two pieces of wax paper to ¼ inch thickness (see Note)
  4. In a small bowl, beat the egg, then blend in Ricotta, Parmesan cheese, ½ cup of mozzarella cheese, and parsley.
  5. Place fresh spinach leaves onto each flattened chicken breast. Spread 2 tablespoons of the filling over each piece, roll the chicken tightly, and secure with a toothpick or kitchen twine.
  6. Sear each chicken breast in 1 tablespoon of olive oil over medium-high heat until browned on both sides.
  7. Spoon half the tomato sauce into an 8-inch square baking dish. Arrange chicken rolls in the baking dish. Pour remaining sauce over chicken. Sprinkle the remaining mozzarella cheese on top. Bake for 40 minutes or until an instant-read thermometer reads 165°F.

Notes:

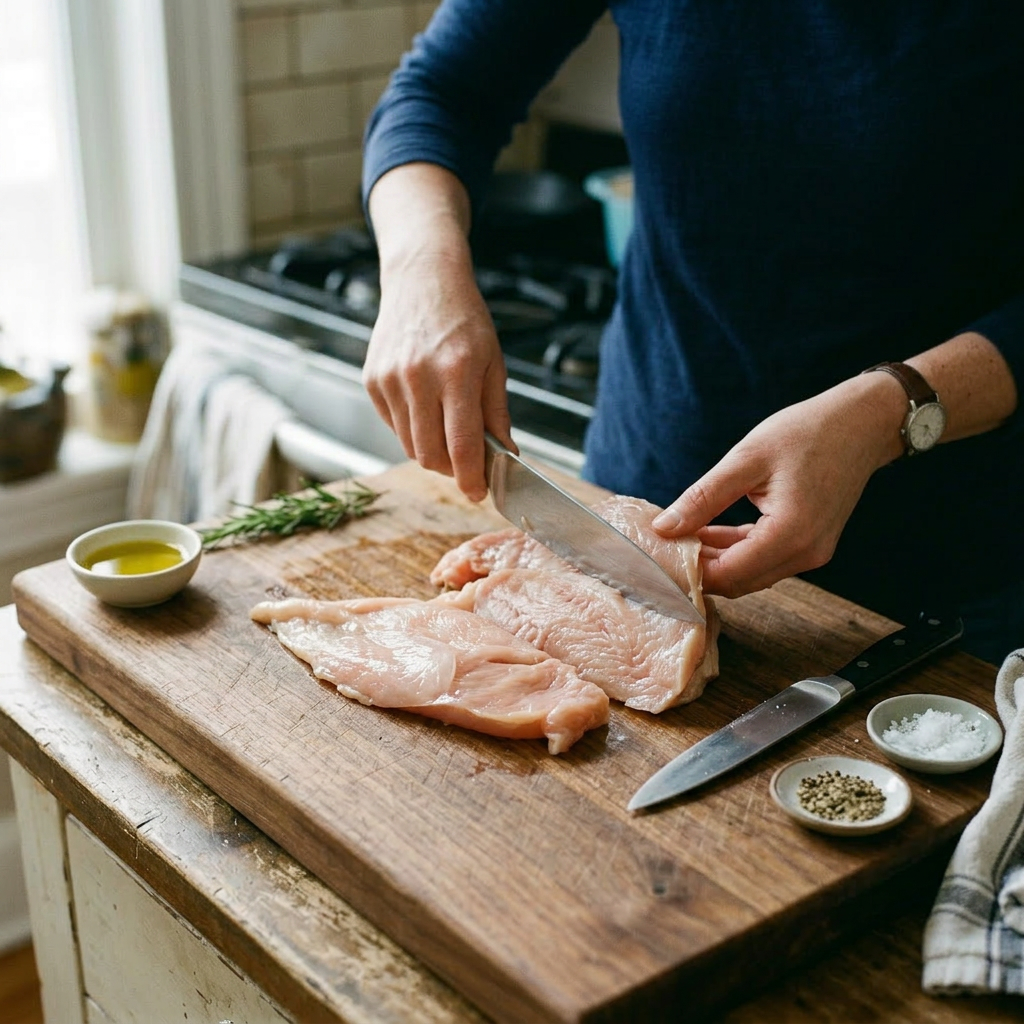
The culinary term “to butterfly” means splitting a food, almost—but not completely—through. It’s a technique used for everything from shrimp to turkey breast. The two halves are then opened so they resemble a butterfly. With a chicken breast, it’s more like cutting the chicken breast horizontally so it opens up like a book.

How to Butterfly a Chicken Breast:

  1. If the chicken breast has skin attached, loosen it with your fingers and remove.
  2. Place the chicken breast on the cutting board. Place one hand on the chicken breast, curving your fingers up slightly for safety. Insert the knife into the middle of the thickest part and cut horizontally; cut almost to the other side. Open it like a book.
Hands cutting raw chicken breast fillets on wooden cutting board with knife
Butterflying raw chicken breast
Garlicky Marsala Mushrooms with Tortellini

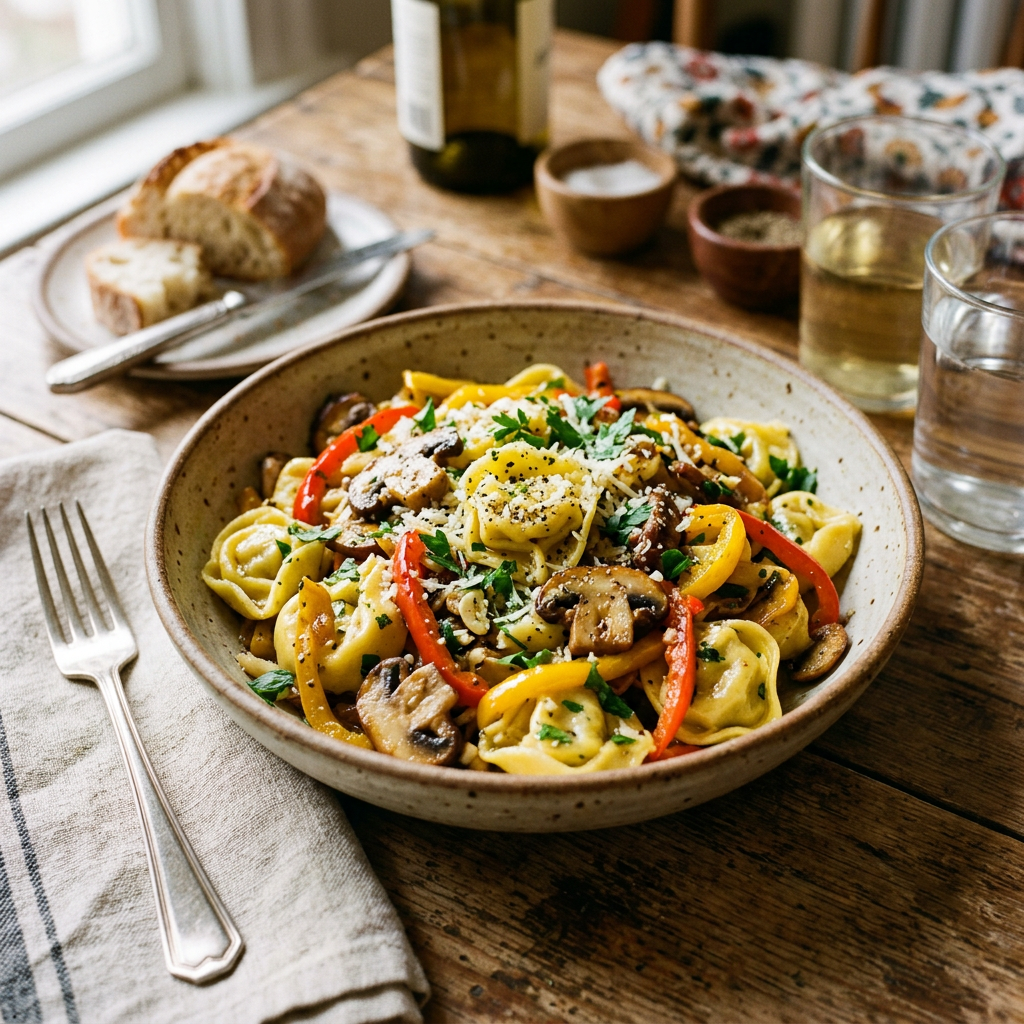
Bowl of tortellini pasta with mushrooms, red and yellow bell peppers, and herbs
Marsala Tortellini

Warm, comforting, and richly flavored, this savory mushroom and tortellini dish celebrates the earthy depth of wild mushrooms paired with pillowy cheese-stuffed tortellini. Quartered mushrooms are gently sautéed with garlic and shallot until golden, then deglazed with a splash of Marsala wine to lift the caramelized fond. A touch of fresh rosemary infuses the pan with herbal warmth while a knob of butter and a drizzle of olive oil round out the mouthfeel, creating a silky coating that clings to each pasta parcel.

The tortellini are cooked al dente and folded into the mushroom mixture, allowing the pasta to absorb the savory pan juices. Finishing the dish with a swirl of cream or a generous handful of grated Parmesan adds luminosity and salt-balanced richness, while a squeeze of lemon and a scattering of chopped parsley brighten the overall profile and cut through the creaminess.

Ingredients

  • 5 tablespoons olive oil
  • 1 pound of white mushrooms – cleaned & quartered or mushrooms of your choice
  • 1 pound of portabella mushrooms – cleaned & quartered
  • 4 large garlic cloves
    • 2 cloves sliced thin
    • 2 cloves minced (set aside)
  • 1 medium shallot, thinly diced
  • 1-1/2 teaspoons of fresh minced rosemary
  • ½ cup dry Marsala wine
  • 3 tablespoons of balsamic vinegar
  • 1 cup of minced green, yellow, and red peppers
  • 1 package of frozen or fresh Tortellini or pasta of your choice
  • 2 tablespoons of butter, melted
  • 1/3 cup freshly grated Parmesan cheese
  • 2 large garlic cloves, grated or minced

Process

  1. Bring a large pot of salted water to a boil for the pasta.
  2. In a very large skillet, heat 2 tablespoons of olive oil. Add the mushrooms, season with salt and pepper,
  3. Cook over high heat, stirring until the mushrooms are browned all over, about 2 – 3 minutes.
  4. Add the sliced garlic, shallot, peppers, and rosemary; cook, stirring, until fragrant, about 2 minutes. Add the Marsala wine and cook until nearly evaporated,
  5. Add the balsamic vinegar and cook, stirring for 30 seconds.
  6. Stir in the minced garlic and the remaining 3 tablespoons of olive oil, then season with salt and pepper. Cover and keep warm.
  7. Prepare pasta according to directions
  8. After draining the pasta, return it to a large bowl and stir in the melted butter and mushroom mixture. Stir in 1/3 cup of fresh Parmesan cheese until melted. Garnish with chopped parsley and a swirl of fresh cream if desired.

Salmon Burgers

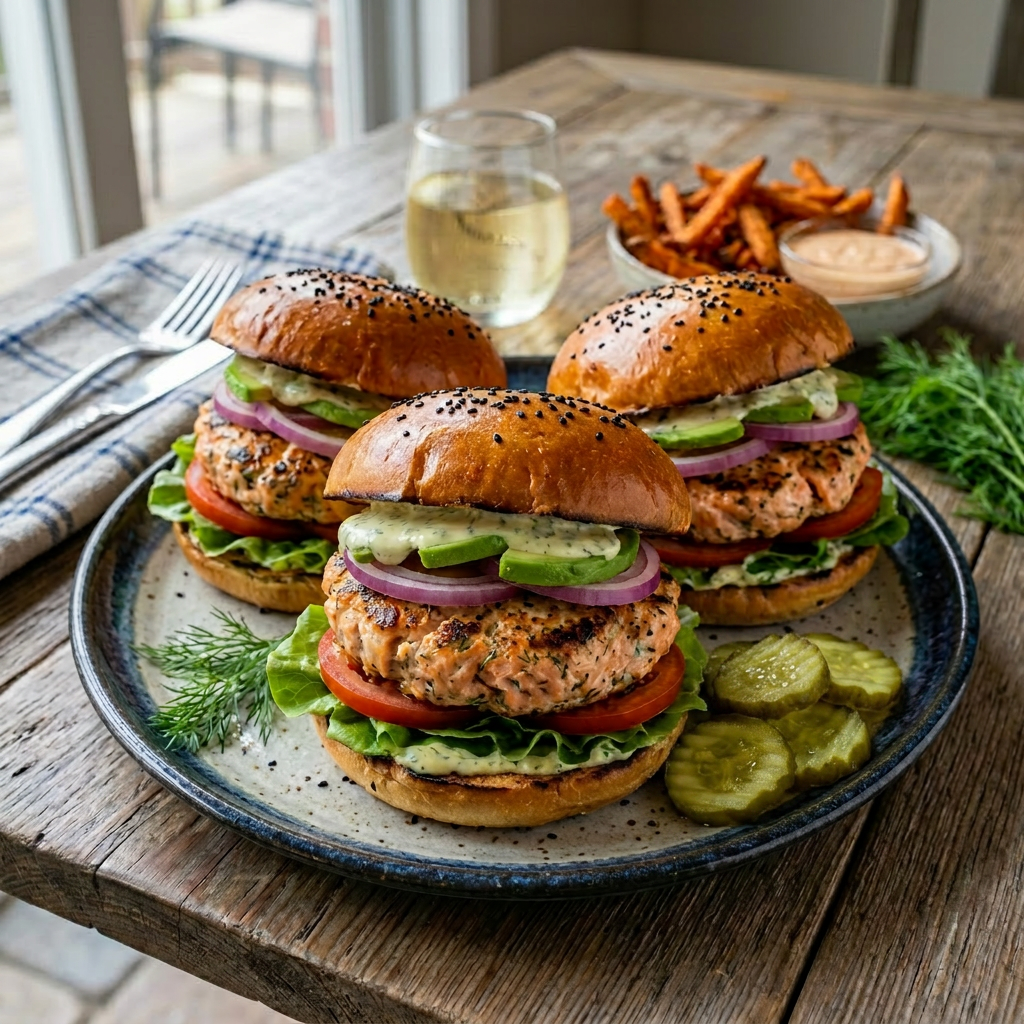
Three salmon burgers with lettuce, tomato, red onion, cheese, and sauce on sesame buns with sweet potato fries and dipping sauce
Salmon burgers with fresh toppings, served with sweet potato fries

Salmon burgers turn dinnertime into a tasty adventure, blending flaky salmon with bright lemon zest, fresh herbs, garlic, and a hint of Dijon for a lively flavor kick. These patties come together in no time and sizzle on the stovetop, grill, or in the oven, delivering juicy, savory bites that beat ho-hum meals. Skip heavy toppings and celebrate simplicity: crisp lettuce, a juicy tomato slice, and a scoop of yogurt-dill sauce create the perfect balance. Packed with omega-3s and lean protein, they’re a clever, feel-good choice for busy evenings or casual gatherings. Make them ahead and reheat briefly under the broiler or in a skillet to revive that fresh-off-the-grill charm whenever you need a quick, delightful meal.

Makes 4 burgers

Ingredients

Salmon Burgers

  • 1 5oz pouch of Chicken of the Sea Skinless & Boneless Pink Salmon or 1 14.75 ounce can of wild salmon *See notes below regarding canned salmon
  • 1/4 cup minced red onion
  • 1/4 cup finely chopped bell pepper
  • 1 tablespoon of Dijon mustard
  • 1 tablespoon of lemon zest
  • 1 tablespoon of fresh lemon juice
  • 1/4 tsp cayenne pepper
  • 2 garlic cloves, pressed or minced
  • 2 tablespoons of fresh dill, chopped
  • 1 medium egg (beaten)
  • 1 cup panko breadcrumbs
  • Salt and pepper to taste
  • 1 tablespoon of Olive oil or Avocado Oil if pan frying

Process

  1. Preheat oven to 400°F (200°C).
  2. Combine onion, lemon juice, lemon zest, and seasonings in a bowl.
  3. Combine salmon, beaten egg, and 1/4 cup breadcrumbs. If the mixture is too loose to shape, add 1 tablespoon more of breadcrumbs. The mixture should be soft and hold together, but not stiff or sticky.
  4. Gather about 1/2 cup of the salmon mixture and shape it into a loose ball. Roll the ball in the remaining 3/4 cup of breadcrumbs to coat it. Place the coated patty on a plate and repeat with the remaining mixture.
  5. Line a baking sheet with parchment paper. This prevents the burgers from sticking and makes cleanup a breeze. Lightly grease the parchment paper with cooking spray or olive oil.
  6. Place the patties on the prepared baking sheet, leaving some space between each burger.
  7. Bake for 12-15 minutes, or until the burgers are cooked through and flake easily with a fork. The internal temperature should reach 145°F (63°C).
  8. Allow the burgers to rest for a few minutes before serving. This allows the juices to redistribute, resulting in a more flavorful and moister burger.

Dill Sauce

  • 1/2 cup plain non-fat Greek yogurt
  • 1 clove garlic, crushed
  • 2 tbsp chopped dill
  • 2 tbsp lemon juice
  • salt and pepper to taste

 Process

  1. Mix all ingredients in a small bowl and set aside.

Note: Drain cans of salmon thoroughly so patties bind and brown perfectly. You don’t have to worry about the fish bones: The canning process makes them soft and edible.  The dense, meaty flesh is ideal for forming into patties, so it’s a natural for burgers.  

Chicken Salad Caesar Style!

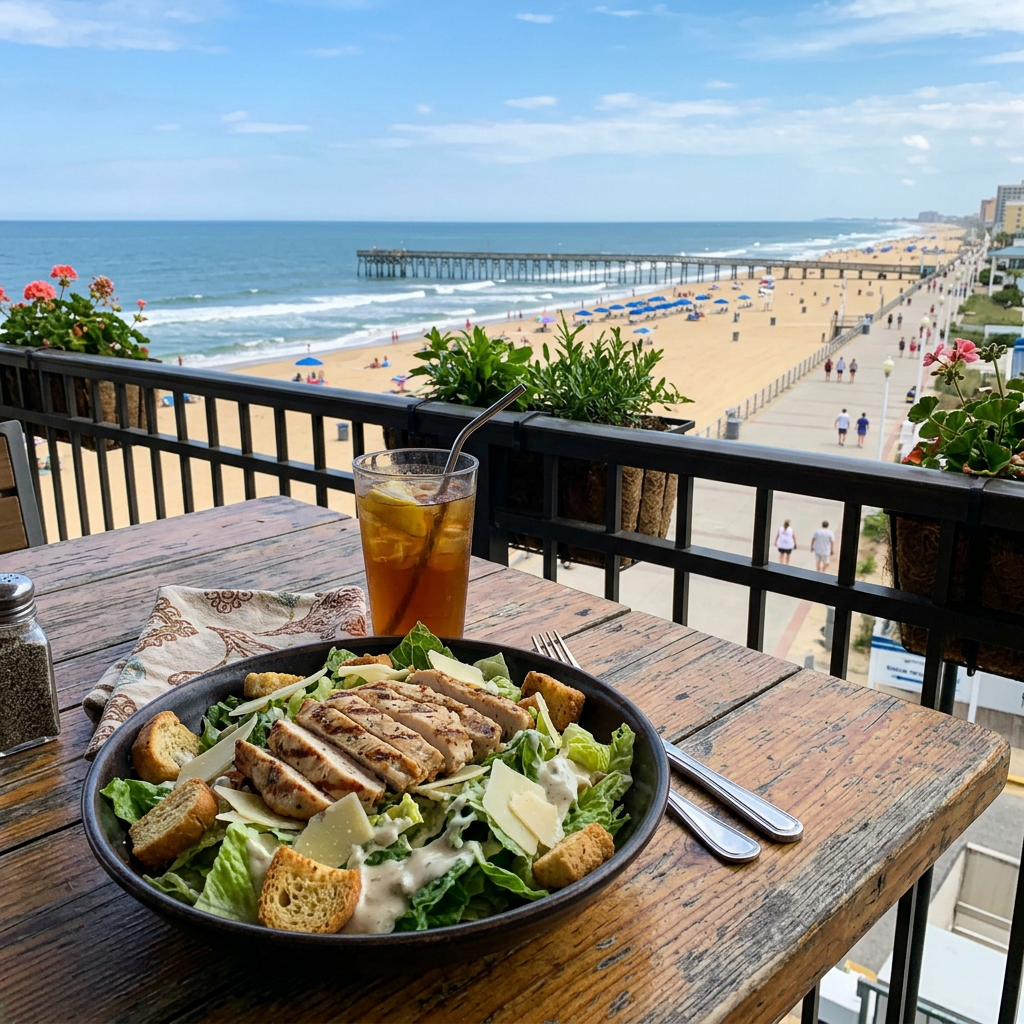
Grilled chicken Caesar salad with iced tea on wooden table overlooking beach and pier
Enjoying a grilled chicken salad!

Love this Chicken Salad! Ditch boring mayo and try a lively olive oil, garlic, and lemon dressing that hugs every leaf. Extra-crisp romaine, grilled chicken, and crunchy croutons deliver savory satisfaction with bright, zesty punch. Serve it as a starring entrée or a playful side—perfect for warm summer evenings when you want a light, yet wildly delicious meal.

Ingredients

Dressing

  • 2 cloves of garlic, minced or pressed
  • 1/3 cup extra virgin olive oil
  • 2 tablespoons of fresh-squeezed lemon juice
  • 1 tablespoon Dijon mustard
  • 1-1/2 teaspoons Worcestershire Sauce

Put dressing ingredients in a small food processor or blender and blend. Set aside.

 Marinade

  • ¼ cup olive oil
  • 2 tablespoons lemon juice
  • 1 tablespoon Worcestershire sauce
  1. Mix the marinade ingredients together in a bowl or a sealed bag.
  2. Marinade chicken breasts for 20 – 30 minutes.
  3. Discard the marinade and grill the chicken until the thickest part reaches 165°F (fully cooked).

Salad Ingredients

Use the listed options or add your own; all choices are optional.

  • Romaine Lettuce torn into bite-size pieces
  • 2 hard-boiled eggs
  • Crumbled Feta or Goat Cheese
  • Black olives, sliced
  • Thinly sliced scallions
  • 1 can baby corn on the cob, drained
  • Roasted red pepper, sliced
  • Garlic croutons
  • 1/3 cup Freshly grated Parmesan cheese

Process

  1. Put lettuce and other salad ingredients in a large salad bowl.
  2. Add sliced grilled chicken.
  3. Mix with the olive oil and garlic dressing
  4. Top the salad with garlic croutons and 1/3 cup grated Parmesan cheese.
  5. Serve immediately.

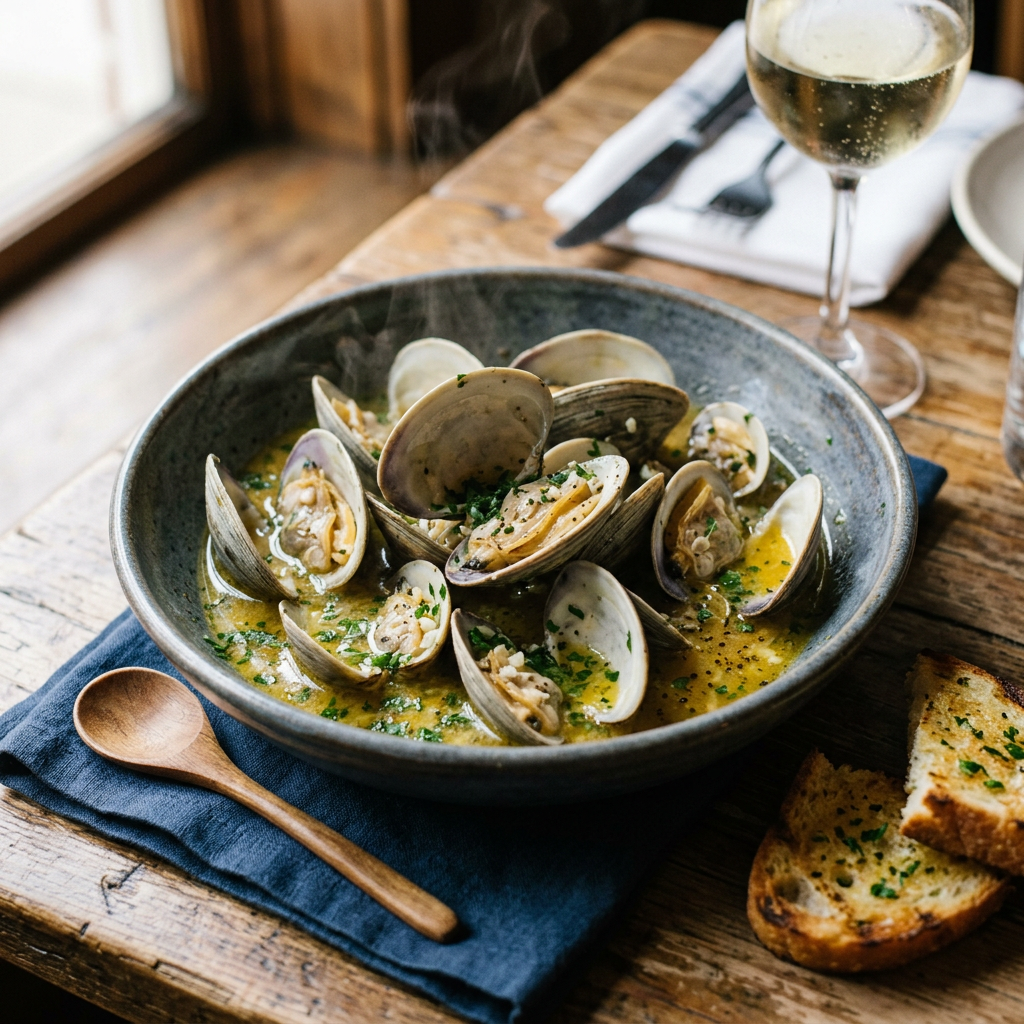
Garlic and Herb Steamed Clams

Steaming clams in garlic butter sauce garnished with herbs, served with toasted bread and a glass of white wine
A bowl of steaming clams served in a garlic herb butter sauce with toasted bread on the side

Steam clams and mussels for friends and watch the party come alive! These briny treasures cook fast in a fizzy splash of dry white wine, butter, garlic, and fresh herbs, filling the kitchen with irresistible aromas. When the shells pop open, ladle that fragrant broth over pasta or dunk crusty bread to sop up every savory drop. The dry wine brightens flavors as the alcohol cooks away, leaving concentrated, mouthwatering depth. It’s an easy, crowd-pleasing dish that looks impressive without effort and turns any summer gathering into a warm, festive feast.

Ingredients

  • 1/2 cup of butter
  • 5 cloves garlic, minced or grated
  • 2 cups of dry white wine (such as a Chardonnay)
  • 1 tablespoon dried oregano or 2 tablespoons of fresh chopped oregano
  • ¼ cup fresh chopped parsley
  • 1 teaspoon crushed red pepper flakes
  • 36 clams in shell, scrubbed

Process

  1. Melt butter in a large skillet over medium heat. Cook garlic in butter briefly. Stir in wine, and season with oregano, parsley, and red pepper flakes.
  2. Place clams in the wine mixture. Cover, and steam until all the clams have opened; discard any that do not open. Serve in soup bowls and ladle broth generously over them.

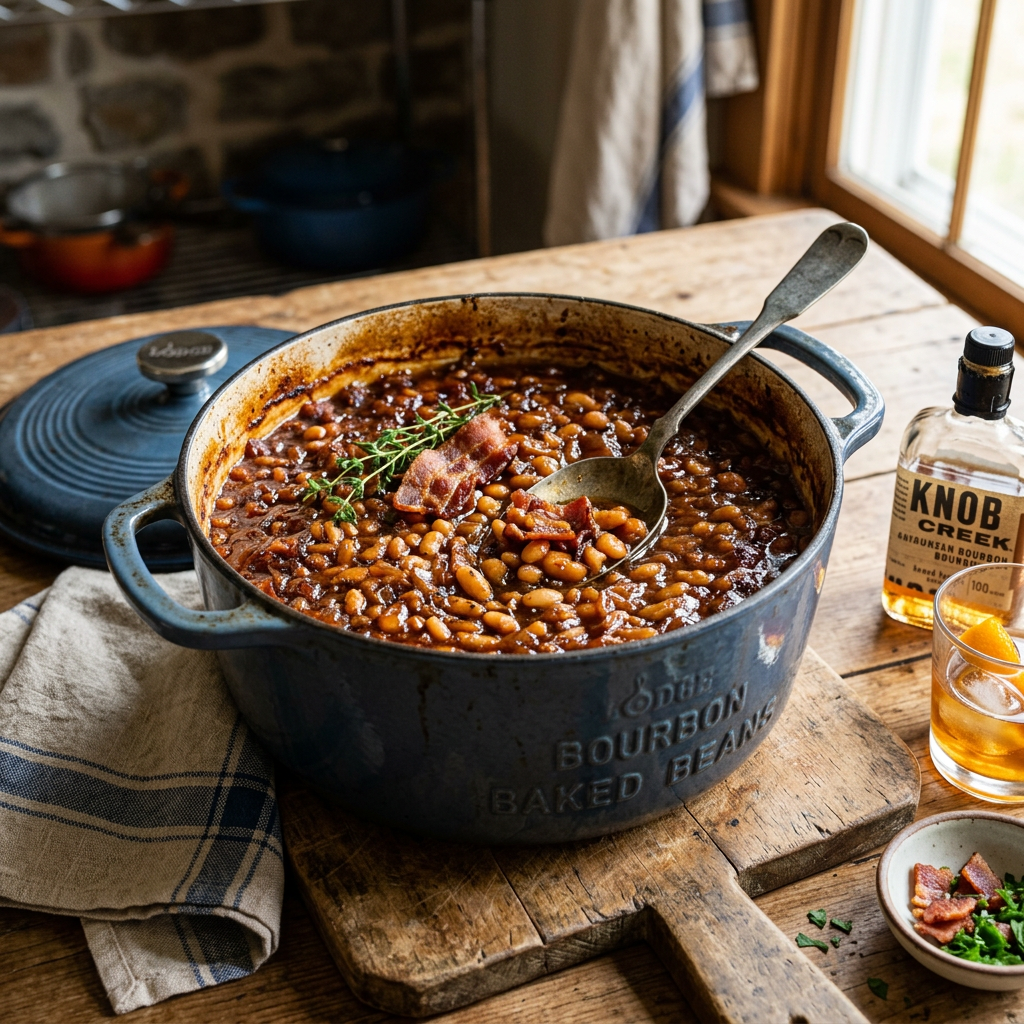
Bourbon Baked Beans

Large blue Dutch oven filled with bourbon baked beans garnished with bacon and thyme
Dutch oven filled with rich bourbon baked beans garnished with bacon

Let’s keep the bourbon love going! Here’s a fun twist on baked beans—skip the soaking and grab canned beans for quick prep. Mix in your favorite barbecue sauce, and for an extra kick, try my homemade Bourbon Barbecue Sauce. Perfect for parties or a cozy night in, this recipe adds a delicious, spirited touch to your meal. Cheers to good food and great times!

Ingredients:

  • 8 slices bacon, halved
  • 1 medium onion, cut into small dice
  • 1 medium green pepper, cut into small dice (Optional: add 1 diced jalapeno pepper for heat)
  • 2 (15-ounce) cans of pinto beans, drained and rinsed
  • 1 (15-ounce) can of navy beans, drained and rinsed
  •  3/4 cup barbecue sauce (Try my Bourbon Barbecue Sauce)
  •  1/2 cup dark brown sugar
  •  1/4 cup cider vinegar
  •  ½ cup of strong coffee
  • 1/4 cup Bourbon
  • 3 teaspoons dry mustard or 2 tablespoons Dijon

Process

Adjust the oven rack to the lower-middle position and heat the oven to 400° F.

  1. Fry bacon in a large, deep sauté pan or skillet until partially cooked, releasing about 1/4 cup of drippings.
  2. Remove bacon from the pan and drain on paper towels. Set aside.
  3. Add diced onions and peppers to the drippings in the pan and sauté until tender, about 5 minutes.
  4. Add barbecue sauce, brown sugar, cider vinegar, coffee, mustard, and bourbon. Bring to a boil, remove from heat.
  5. Add the beans and stir.
  6. Pour the beans into a greased 13 x 9-inch pan or a large Dutch oven. Top with reserved bacon pieces. Bake uncovered for about 30 minutes until the edges bubble and the mixture thickens. If the beans seem too watery, bake for an additional 5 minutes. For a darker, caramelized top, briefly broil the dish for a minute or two.
  7. Since canned beans are used, they tend to be slightly firmer. Lightly mash the beans with a spoon to break them up a bit. This helps create a texture similar to that of beans cooked for a longer time, making the dish more uniform and appealing.
  8. The beans thicken as they cool.

Bourbon Barbecue Sauce

Roasted Peppers & Onions

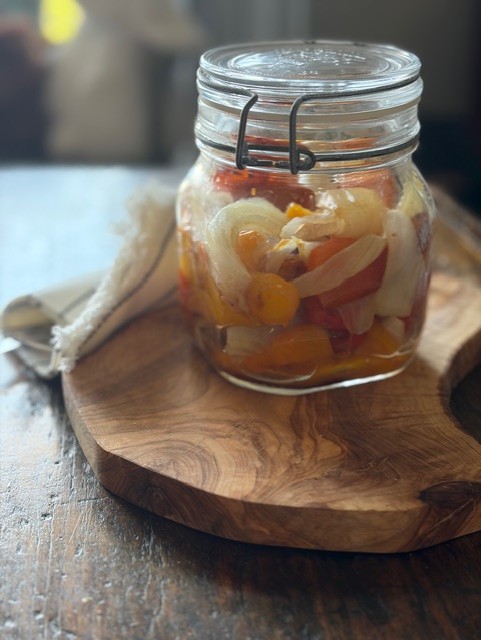
Having a jar of homemade roasted peppers and onions is very useful in cooking. These vegetables are flavorful and tender, making them great for many dishes. They can quickly improve salads by adding a smoky flavor and bright color. In sandwiches, they add a sweet, caramelized taste that makes the sandwich more delicious without extra sauces. As a side dish, roasted peppers and onions go well with grilled meats, pasta, or rice, providing a quick and healthy option. Storing them in a jar keeps them fresh and flavorful for a long time, making them a handy ingredient in the kitchen. Overall, having a jar of roasted peppers and onions makes cooking easier, cuts down on processed foods, and adds flavor and health benefits to many meals.

Ingredients

  • 3 tri-color peppers
  • 1 large sweet or yellow onion
  • Olive oil

Process

  1. Preheat oven to 450° F.
  2. Wash and completely dry peppers. Slice in half and remove the stem and seeds.
  3. Lightly brush the inside and outside of the pepper halves with olive oil.
  4. Arrange the pepper halves on a baking sheet lined with aluminum foil or parchment paper with the skin side up, ready for roasting.  
  5. Peel and halve an onion; slice the onion halves into wedges and place them on the same baking sheet as the peppers. Drizzle with olive oil.  
  6. Place the baking sheet on the top shelf of the oven and bake for 20 minutes or until the skins on the peppers are charred and blistered.
  7. Remove from the oven and cool to room temperature. Remove and discard the skins from the peppers; they should slip off.
  8. Cut peppers into chunks and layer with the roasted onion slices in a clean glass jar with a tight-fitting lid.

Traditional Cucumber Salad

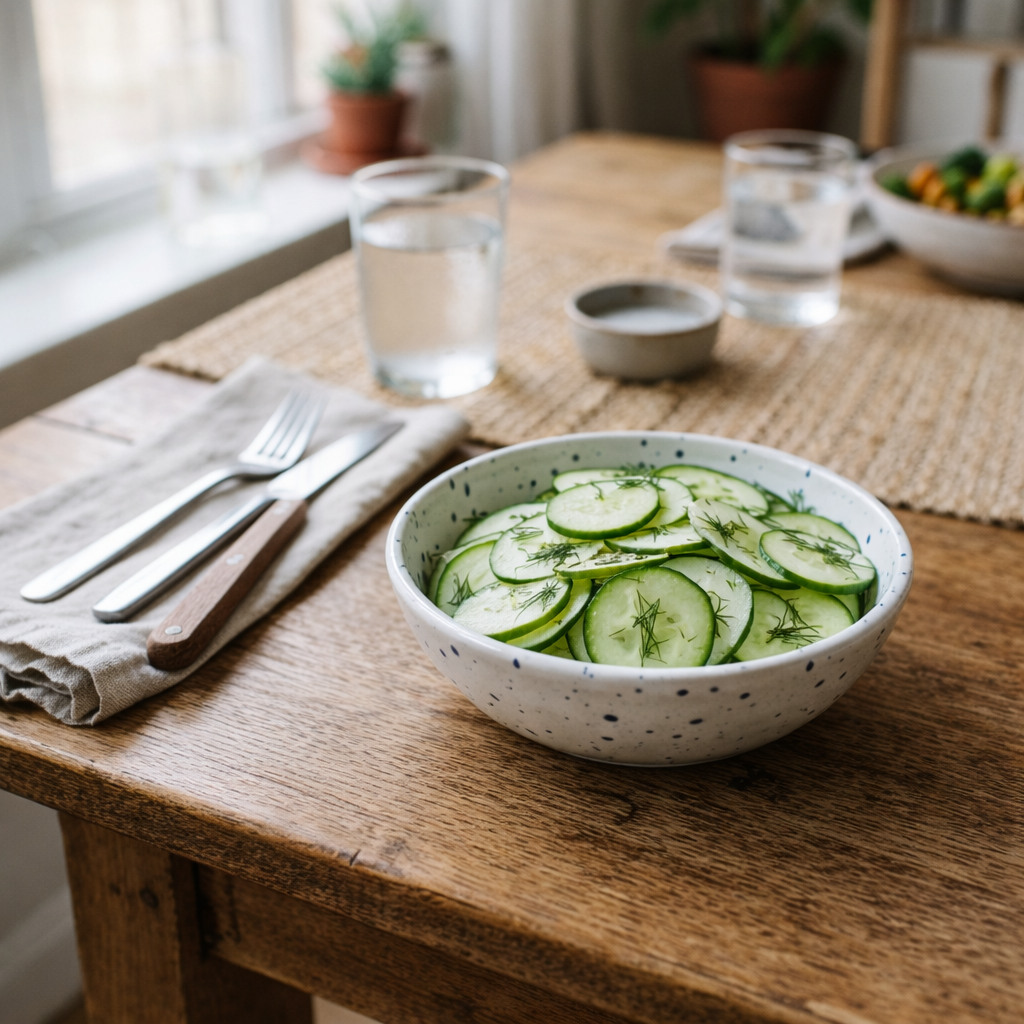
bowl of cucumber salad with dill and thin onion slices alongside a bowl of quinoa with chicken, broccoli, chickpeas, and sweet potato
A wholesome meal with a cucumber salad

Experience the crisp, refreshing flavor of a cucumber salad, a perfect choice for a light, healthy meal or side dish. This salad highlights the natural, cool taste of freshly sliced cucumbers, complemented by subtle hints of herbs and a tangy dressing.

Its versatility allows customization with ingredients such as red onions, cherry tomatoes, and feta cheese, enhancing its flavor profile. Whether served chilled as a standalone dish or as a complement to grilled meats and seafood, this salad delivers a burst of freshness with every bite, making it a popular choice among those seeking a revitalizing culinary experience.

Ingredients

  • 2 large cucumbers
  • 2 thinly sliced scallions
  • 1 tsp Kosher salt
  • ¼ tsp pepper
  • 2 tablespoons of fresh, minced parsley
  • 3 tablespoons of white vinegar
  • 1 tablespoon sugar

Process

  1. In a medium bowl, whisk together the vinegar, sugar, salt, and pepper until the sugar is dissolved.
  2. Wash and peel your cucumbers. Slice them into very thin slices or use a mandoline to slice the cucumbers paper-thin.
  3. Slice scallions on the diagonal.
  4. Add the cucumber slices and scallions to the bowl and toss to coat them in the dressing.
  5. Cover and refrigerate for at least 30 minutes.

Notes: Customize your salad by adding fresh herbs such as dill or basil.

Apple Cider Vinegar can be used in place of white vinegar.

Use red onion instead of scallions, sliced thinly.

Pierogi Wontons

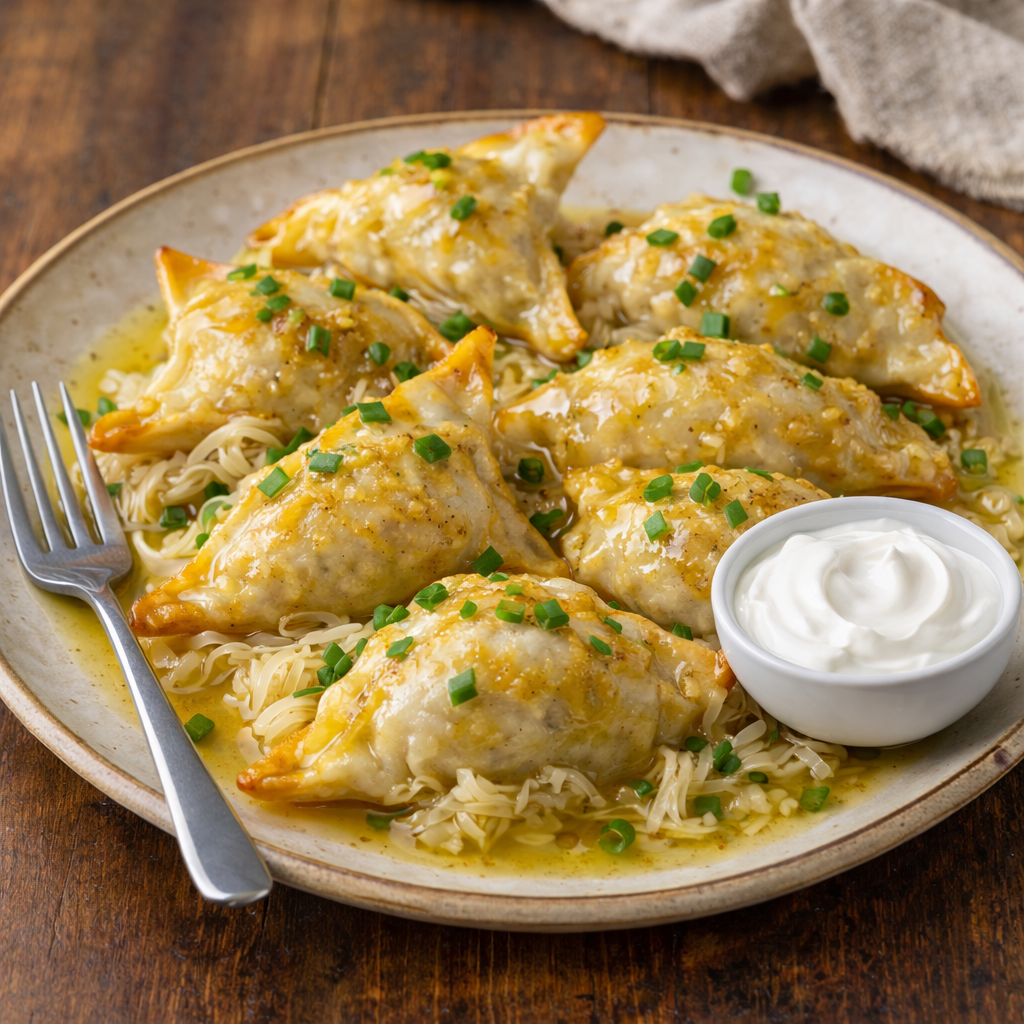
Golden-brown pierogies topped with bacon bits and green onions on a plate with sour cream
Golden-brown pierogies garnished with bacon bits and green onions, served over saurekraut with sour cream

Using Wonton wrappers is a fantastic shortcut for making pierogies, allowing you to create these delicious dumplings quickly and easily. Pierogies can be served boiled and then pan-fried or baked, and are best complemented with toppings like sautéed onions, sour cream, bacon, or fresh herbs like basil. Serve alongside kielbasa, sauerkraut, roasted vegetables, salads, or soups for a crowd-pleasing meal that is easy to make and enjoy.

Ingredients

  • 2 russet potatoes, washed, peeled, and cut into 1-inch pieces
  • 2 garlic clove(s) peeled and sliced lengthwise
  • ½ cup diced onion
  • ½ cup sharp cheddar shredded
  • 2 – 3 Tbsp sour cream
  • Salt and pepper to taste
  • 1 36-count package of wonton dumpling wrappers
  • 2 tablespoons of butter for sautéing pierogies
  • Salt for boiling water

Directions

  1. Combine cut potatoes and garlic in a medium saucepan. Cover with water, add 1 teaspoon of salt, and set the pan over high heat. Bring to a boil, lower the heat, and boil for 15-20 minutes until fork-tender.
  2. In a small pan over medium heat, melt the butter and add the diced onions. Cook onions until soft and translucent. Remove from heat.
  3. Drain and transfer the potato and garlic to a large bowl; add the cheese, onion, and sour cream, and salt and pepper to taste. Mash the mixture together. The mixture should not be dry; it should hold together so it can be scooped with a spoon, and it should not be loose or runny.
  4. Place wonton wrappers on a flat surface. Add a large spoonful of filling in the center of each wrapper. Wet the edges with your fingers, fold the wrapper in half to form a semicircle, and press the edges to seal. To prevent the dumplings from drying out, cover with plastic wrap or place the dumplings on a flat cookie sheet and freeze until ready to use.
  5. When you are ready to cook, bring a large pot of water seasoned with 1 teaspoon of salt to a boil. Drop the pierogies in the boiling water and stir. After 2 – 3 minutes, pierogies should float to the top and be finished cooking. Remove from the water with a slotted spoon and drain.
  6. Heat a skillet with 2 tablespoons of butter on medium heat. When the butter is melted, drop the boiled pierogies into the melted butter and sauté until golden brown on either side.